Description: War Thunder is a next generation military MMO game dedicated to...

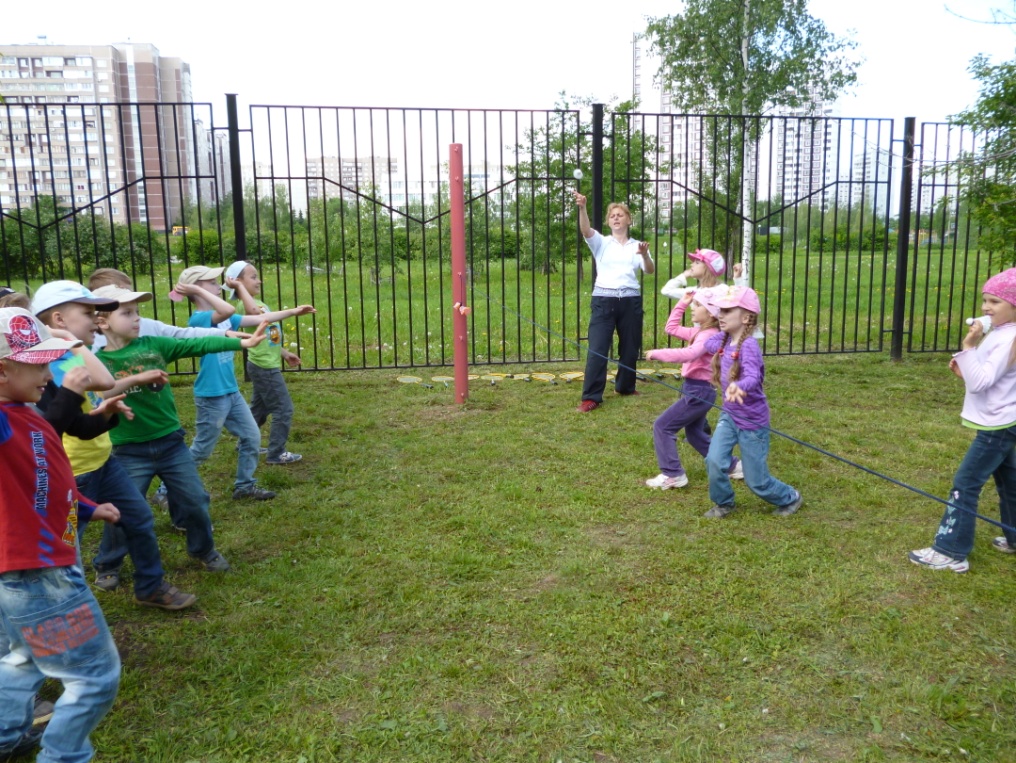
Fans of collective sports games and even those who are not fond of them know that some of them require such special equipment as a net. It is used in football, hockey, volleyball, tennis (both table and tennis), basketball.
For each of the listed games there is a grid with certain indicators. These include its size and the sizes of individual cells. The latter depends on the features of the game. If you need to purchase a tennis net, it will not be replaced by a similar football one. Firstly, it will not fit in size, and secondly, a tennis ball will easily fly through its cell, which is contrary to the rules of the game.
The same can be said about the table tennis net, the width of the cells of which must be such that a small tennis ball cannot pass through it. Therefore, it is very difficult to replace this device with something else.
During the many years of development of sports games, optimal standards for nets have been set, corresponding to the characteristics of each game. That's why:
You can not mention basketball, because there the net is needed not to keep the ball in the basket, but to better visualize it hitting it.
Assuming you can't play sports without a net, don't forget other accessories. For example, you can take a hockey goal. Without them, the game of hockey will become impossible. No, well, you can adapt something else instead of a gate and play like children do in the yards. And they use all the materials at hand: bricks, boxes, boards, etc. But offer the children to change their bricks and boxes for normal gates - they will be completely delighted.
First, the game atmosphere on normal field and with normal equipment it cannot be compared with a yard skating rink and “gates” made of trash. Secondly, in the absence of a netted goal, it is difficult to see whether the puck went through or past the goal. The net holds the puck and makes it easier to control the score in the game. The same can be said about football.
Therefore, for one-time games with friends, you can get by with improvised means, but with serious sports, you should not waste time on trifles and save on sports equipment. It will make the game much more enjoyable and eliminate doubts about the correctness of its results.
In this section of the site, we will talk about the main points and features when choosing hockey protective equipment.
We will try to answer the following questions:
1. How to choose a hockey helmet?
A hockey helmet is an integral and one of the most important parts of a professional hockey equipment. The helmet protects the athlete's head from injury.
Protection and comfort
To fully perform the function of protection, the helmet must be light, and its fasteners must be reliable. Modern helmets are made of high-strength plastic, with a softening lining on the inside.
Helmet shape and fit
When choosing a hockey helmet, it is important to correctly determine its shape. There are narrow and wide hockey helmets. When trying on, you should not feel discomfort, pressure on any area of the head, especially on the temporal parts. On the other hand, in order to provide maximum protection, the helmet must fit snugly, stably, “not hanging out”. A carelessly seated helmet is poor protection, and therefore a high possibility of injury.
Measure your head circumference and find the appropriate size in the table.
When choosing a hockey helmet, you should first of all focus on personal feelings and only after that pay attention to appearance helmet and manufacturer.
HELMET SIZE CHART
ATTENTION: The helmet sizes shown in the table should be taken as recommendations only. Each manufacturer has its own size grid, moreover, different models of the same manufacturer may have their own size range.
|
|
Head circumference, cm | ||||
| Size US |
X-Small (XS) | Small (S) | Medium (M) | Large (L) | Extra Large (XL) |
| EASTON | 51-54 | 53-57 | 56-60 | 59-63 | 62-65 |
| BAUER | 51-54 | 52-57 | 55-60 | 57-62 | 59-63 |
| RBK, CCM | - | 51-56 | 55-59 | 58-63 | - |
Masks, visors
Additional face protection is a metal hockey grill - a mask, or an impact-resistant plastic hockey visor.
Children under 18 are allowed to train and play hockey only in a helmet with a mask.
After the age of 18, the player can independently choose to continue playing with a helmet with a mask or replace it with a visor.
Hockey helmet care
2. How to choose hockey gloves?
Hockey gloves (gaiters) - an element of hockey equipment that protects the hands, wrist joints and lower part of the player's forearms when hitting the hands with a stick, hitting the puck, and in other similar cases.
Depending on the materials and structural elements, hockey gloves can be divided into professional and amateur. Most professional grade models are lighter, a high degree protection and increased comfort during operation, as well as strength, which determines their resistance to prolonged loads of various nature.
When choosing hockey gloves, measure the distance between the fingertips and the bottom edge of the elbow pad and find the appropriate size in the table. Check the hit in other parameters given in the table, such as height, weight and age of the player.
To ensure safety during the game, when choosing gloves, pay attention to the absence of a gap between the elbow pad and the glove. Players who prefer shorter glove styles should opt for longer elbow pads.
GLOVE SIZE CHART
ATTENTION: The glove sizes given in the table should be taken as recommendations only. Dimensions may vary depending on the manufacturer.
| CHILDREN (YOUTH) | JUNIOR (JUNIOR) |
ADULTS (SENIOR) | ||||||
|
Glove size US |
8"" | 9"" | 10"" | 11"" | 12"" | 13"" | 14"" | 15"" |
|
Length from fingertips to elbow, cm |
18-20 | 20-23 | 23-38 | 24-27 | 25-30 | 30-33 | 33-36 | 38+ |
| Approximate player height, cm |
90-100 | 100-110 | 110-120 | 120-130 | 140-150 | 150-170 | 160-180 | 180+ |
| 4-7 | 6-9 | 8-11 | 9-12 | 11-14 | 14+ | 14+ | 15+ | |
| Approximate player weight, kg | 18-27 | 23-32 | 27-41 | 32-45 | 36-50 | 54-73 | 64-82 | 73-91 |
3. How to choose a hockey bib?
Hockey bib (shell) - an element of hockey equipment that provides protection chest and the player's back.
The hockey bib consists of front and rear protectors and special shoulder pads. A number of models are equipped with reinforced side inserts and adjustable or removable belly and lumbar protectors. The main requirement for a hockey bib is a high degree of protection with maximum mobility.
Hockey bibs can be divided into 2 categories - for attackers and for defenders. Attackers favor models with minimal weight, sometimes at the expense of protection, to maintain maneuverability and maximum speed when attacking. Defenders choose models with the maximum level of protection, agreeing to not the lightest weight, but confidence in the disruption of an opponent's attack and in defense on the patch among a large number of players.
When choosing a hockey bib, measure your bust and find the appropriate size in the table. Check the hit in other parameters given in the table, such as height, weight and age of the player.
To ensure safety, when choosing a bib, pay attention to the absence of a gap between the lower border of the protector of the biceps of the bib and the elbow pad. But, at the same time, the biceps protector should not intersect with the elbow pad - this will hinder movement during the game.
BIB SIZE CORRESPONDENCE CHART
ATTENTION: The sizes of bibs given in the table should be taken as recommendations only. Dimensions may vary depending on the manufacturer.
| CHILDREN (YOUTH) | JUNIOR (JUNIOR) | ADULTS (SENIOR) | |||||||
| Bib size, US |
Small / Medium (S/M) | Medium / Large (M/L) | Small (S) | Medium (M) |
Large (L) |
Small (S) |
Medium (M) |
Large (L) |
Extra Large (XL) |
| Breast volume, cm | 51-58 | 58-65 | 65-70 | 70-75 | 75-80 | 80-90 | 90-100 | 100-110 | 107+ |
| Approximate player height, cm |
100-125 | 115-140 | 130-140 | 135-150 | 145-160 | 155-175 | 170-180 | 175-185 | 180-190 |
| Approximate age of the player, years | 4-7 | 7-9 | 8-11 | 9-12 | 11-14 | 14+ | 14+ | 15+ | 15+ |
| Approximate player weight, kg | 18-25 | 25-32 | 27-41 | 32-45 | 36-50 | 54-73 | 64-82 | 73-91 | 82-100 |
4. How to choose hockey elbow pads
?
Hockey elbow pads are an element of hockey equipment that protects the player's elbow joint. The hockey player's elbow pads consist of three parts: a plastic cup and two protectors - for the biceps and forearm.
Hockey elbow pads, like hockey bibs, can be divided into 2 categories - for attackers and for defenders. Forwards prioritize minimal weight, defenders choose models with the highest degree of protection.
When choosing hockey elbow pads, bend your arm and measure the length of the shoulder from the bottom of the bib bicep protector to the top of the glove cuff and find the appropriate size in the table. Check the hit in other parameters given in the table, such as height, weight and age of the player.
The choice of hockey elbow pads complete with a hockey bib will be the most optimal. These two elements of protection must necessarily be combined with each other so that the hockey player does not feel difficulties when moving, and also in order to avoid the formation of unprotected places on the player's body. It is also important to check the combination of hockey elbow pads and hockey gloves.
To ensure safety during the game, when choosing protection, pay attention to the absence of unprotected places between the lower border of the protector of the biceps of the bib and the elbow pad, as well as between the elbow pad and the glove. Players who prefer shorter glove styles should opt for longer elbow pads.
ELBOW SIZE CHART
ATTENTION: The dimensions of the elbow pads given in the table should be taken as recommendations only. Dimensions may vary depending on the manufacturer.
| CHILDREN (YOUTH) | JUNIOR (JUNIOR)
|
ADULTS (SENIOR) | |||||||
| Elbow size, US | Small / Medium (S/M) | Medium / Large (M/L) | Small (S) | Medium (M) | Large (L) | Small (S) | Medium (M) | Large (L) | Extra Large (XL) |
|
Length from the lower border of the protector of the biceps of the bib to the top of the cuff of the glove, cm |
18-20 | 20-23 | 23-27 | 25-28 | 26-30 | 30-33 | 33-36 | 36-38 | 38+ |
| Approximate player height, cm | 98-124 | 114-140 | 130-142 | 150-163 | 150-163 | 165-175 | 170-180 | 175-185 | 183+ |
| Approximate age of the player, years | 4-7 | 5-9 | 8-10 | 10-12 | 11-14 | 14+ | 14+ | 15+ | 15+ |
| Approximate player weight, kg | 18-27 | 27-32 | 27-36 | 36-41 | 41-50 | 54-73 | 64-82 | 73-91 | 90+ |
5. How to choose hockey pads ?
Hockey pads (knee pads) - an element of hockey equipment that protects knee-joint, caviar and shin of the player.
Hockey pads consist of two main parts: a cup and a shin guard. Additional elements hockey pads are made of "breathable" fabric shock-absorbing lining and adjustment straps. Often there is also a lateral enveloping shin protector that protects the calf muscle.
There are wide and narrow hockey pads:
Wide - shields, the lower part of which has a large inner radius. Designed for players who prefer the placement of the tongue of the skate under the guard. These shields are more massive and cover most of the ankle joint, providing reliable protection.
Narrow - unlike shields wide shape, have a smaller inner radius, do not hinder movement, allow you to make sharp and unpredictable maneuvers. They are located under the tongue of the skate, cover the smaller surface of the ankle joint compared to the wide ones.
Shield fixation
Regardless of the manufacturer, hockey pads are fixed with fastening straps made of elastic material and Velcro. Often players use adhesive tape or special elastic bands for additional fixation, which allows them to take into account individual characteristics the player's pieces and more securely fix the shield in place.
When choosing hockey pads, measure the length of the shin from the middle of the kneecap to the top of the skate and find the appropriate size in the table. Check the hit in other parameters given in the table, such as height, weight and age of the player.
SHIELD DIMENSIONS CORRESPONDENCE TABLE
ATTENTION: The dimensions of the shields given in the table should be taken as recommendations only. Dimensions may vary depending on the manufacturer.
| CHILDREN (YOUTH) | JUNIOR (JUNIOR) | ADULTS (SENIOR) | ||||||||||
| Shield size, US | Small (S) 7"" | Medium (M) 8"" | Large (L) 9"" | Small (L) 10"" | Medium (M) 11"" | Large (L) 12"" | Small (S) 13"" | Medium (M) 14"" | Large (L) 15"" | Extra Large (XL) 16"" | XXL 17"" | XXXL 18"" |
|
Leg length from the middle of the kneecap to the top of the ridge, cm |
15-18 | 18-20 | 20-23 | 23-28 | 25-28 | 25-30 | 30-33 | 33-36 | 36-38 | 38-41 | 41-43 | 43-46 |
| Approximate player height, cm | 98-115 | 109-120 | 120-130 | 120-135 | 133-150 | 143-151 | 150-167 | 168-180 | 175-185 | 180-190 | 185-198 | 192+ |
| Approximate age of the player, years | 4-7 | 5-8 | 6-9 | 8-11 | 9-12 | 11-14 | 14+ | 14+ | 15+ | 15+ | 15+ | 15+ |
| Approximate player weight, kg | 18-27 | 20-29 | 23-32 | 27-41 | 32-45 | 36-50 | 54-73 | 64-82 | 73-91 | 82-100 | 91+ | 100+ |
6. How to choose hockey shorts ?
Hockey pants (shorts) - an element of hockey equipment that provides protection for the player's hips, coccyx and kidneys. Hockey shorts prevent injury to a hockey player during falls, collisions, puck hits and in other cases.
Depending on the design and materials used, hockey shorts can be divided into professional and amateur. The former, as a rule, have a high degree of protection and strength, combined with a relatively low weight. The latter are a simplified version with a lesser degree of security and are intended for amateur hockey players.
Also, hockey shorts can be divided into models for attackers and models for defenders.
Forwards, speed, mobility and ease of play are important. Defenders, on the other hand, prefer reliable protection against impacts and collisions, even at the expense of maneuverability and lightness. The degree of protection and lightness of hockey shorts are in the back proportional dependence from each other. The more protective elements and inserts a particular model has, the heavier it will be. It is worth focusing, first of all, on your position in the game, your style of play, as well as on personal preferences.
The three main items to look out for when choosing hockey shorts are:
When choosing hockey shorts, measure your waist and find the appropriate size in the table. Check the hit in other parameters given in the table, such as height, weight and age of the player.
Please note that the cup of the pad should be partially under the protector of the thigh of the shorts, and there should not be wide unprotected areas between the hockey bib and the belt guard.
PANTS SIZE CHART
ATTENTION: The pant sizes given in the table should be taken as recommendations only. Dimensions may vary depending on the manufacturer.
| CHILDREN (YOUTH) | JUNIOR (JUNIOR) | |||||||||
| Panty size, US | Extra Small (XS) | Small (S) | Medium (M) | Large (L) | Extra Large (XL) | Extra Small (XS) | Small (S) | Medium (M) | Large (L) | Extra Large (XL) |
| Waist, cm | 50-53 | 51-56 | 53-60 | 55-62 | 63-73 | 56-58 | 58-62 | 62-68 | 68-73 | 72-79 |
| Approximate player height, cm | 92-115 | 100-120 | 109-120 | 115-130 | 120-140 | 105-125 | 120-135 | 135-148 | 148-160 | 158-165 |
| Approximate age of the player, years | 3-6 | 4-7 | 5-8 | 6-8 | 7-9 | 7-10 | 8-11 | 9-12 | 11-14 | 12-15 |
| Approximate player weight, kg | 16-20 | 18-27 | 20-28 | 23-30 | 25-32 | 25-36 | 27-41 | 32-45 | 36-50 |
41-54 |
| ADULTS (SENIOR) | ||||||
| Panty size, US | Extra Small (XS) | Small (S) | Medium (M) | Large (L) | Extra Large (XL) | XXL |
| Waist, cm | 71-79 | 76-83 | 81-90 | 86-93 | 91-100 | 100+ |
| Approximate player height, cm | 160-170 | 165-175 | 173-180 | 175-183 | 182-190 | 185+ |
| Approximate age of the player, years | 14+ | 14+ | 15+ | 15+ | 15+ | 15+ |
| Approximate player weight, kg | 52-60 | 54-73 | 64-82 | 73-91 | 82-100 | 91+ |
7. How to choose a hockey bag ?
Hockey bags (trunks) differ from each other depending on the area of application. There are the following types of hockey bags:
By size, hockey bags (hockey bags) can be conditionally divided into:
There is no clear division into age categories, but it must be taken into account that an adult form simply will not fit into a bag with dimensions of 26”x14”x14”. The choice of size is a matter of taste and personal preferences of each player.
3. Using badminton game elements in physical development children of senior preschool age ……………………………………………… 10
4. Organization and methods of conducting classes …………………………...15
5. Formation of actions with a shuttlecock and a racket in children of senior preschool age when teaching the elements of playing badminton ………21
6. Implementation of an individually differentiated approach to teaching older preschoolers the elements of playing badminton ……………………..38
7. Activation of the motor activity of children through the use of elements of the game of badminton ……………………………………………………….41
8. Development of motor abilities of preschool children in the game of badminton ……………………………………………………………………………43
Conclusion …………………………………………………………………….46
References ……………………………………………………………48
1. Introduction.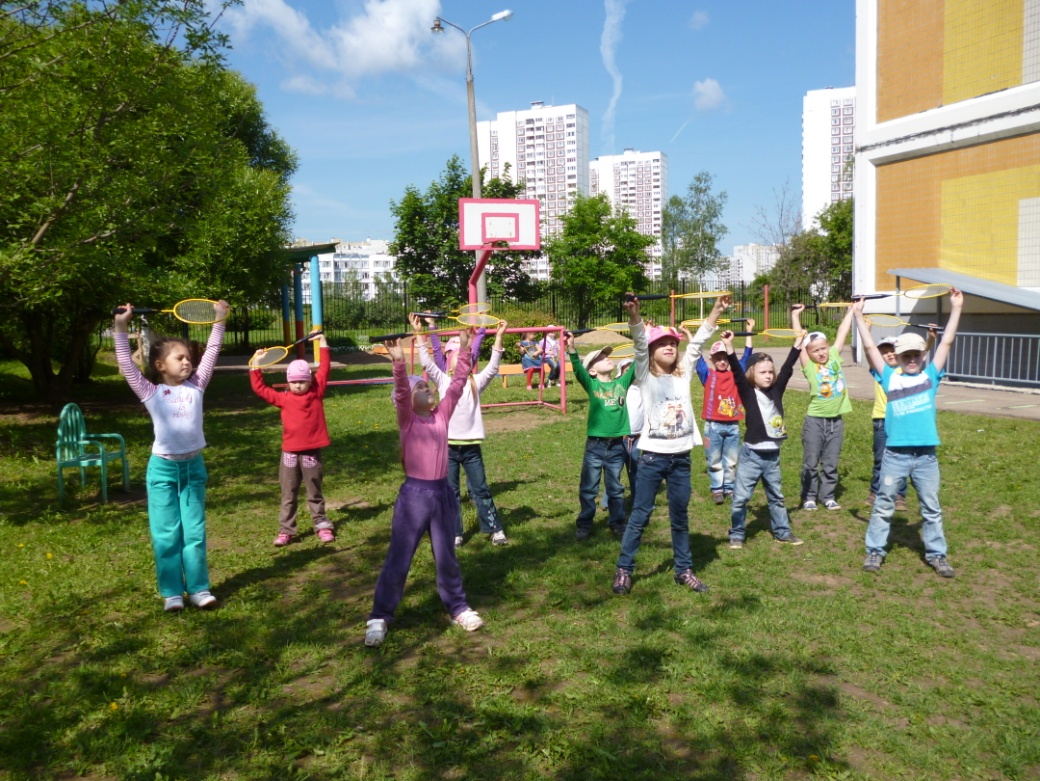
Modern scientists and practitioners consider the system of physical education of preschoolers as one of the potentials for a holistic humanistic impact on a person, ensuring the realization of the right of every child to a permanent and fullest possible physical development.
Today, exciting collective games have been replaced by computer games. The priority is the intellectual, aesthetic development of the child. Without denying their significance, it must be admitted that the child has less and less time for outdoor games, walks, and communication with peers. The imbalance between the game and other types of children's activities, between different types of games (mobile and calm, individual and joint) negatively affects both the state of health and the level of development of motor abilities of preschoolers. An analysis of studies on the development of motor abilities and qualities of children shows that almost 40% of older preschoolers have a level of development of motor abilities below the average. According to M. Runova, the motor regime in preschool institutions makes it possible to fill only 55-60% of the natural need of children for movement. Insufficient physical activity of children, especially during the period of active growth, when the accelerated development of the skeleton and muscle mass is not supported by the appropriate training of the circulatory and respiratory systems, is one of the reasons for the deterioration of their health, a decrease in vitality.
In Concept preschool education it is noted that the incidence of colds in children "acquires the character of a natural disaster"; with which neither pediatricians, nor parents, nor preschool teachers. According to the Research Institute of Hygiene and Prevention of Children's Diseases, for last decade the health status of preschool children has deteriorated: the number of absolutely healthy children has decreased (from 23.2% to 15.1%); the number of children with deviations in health status increased (from 66.9% to 67.6%) and with chronic diseases (from 15.9% to 17.3%). 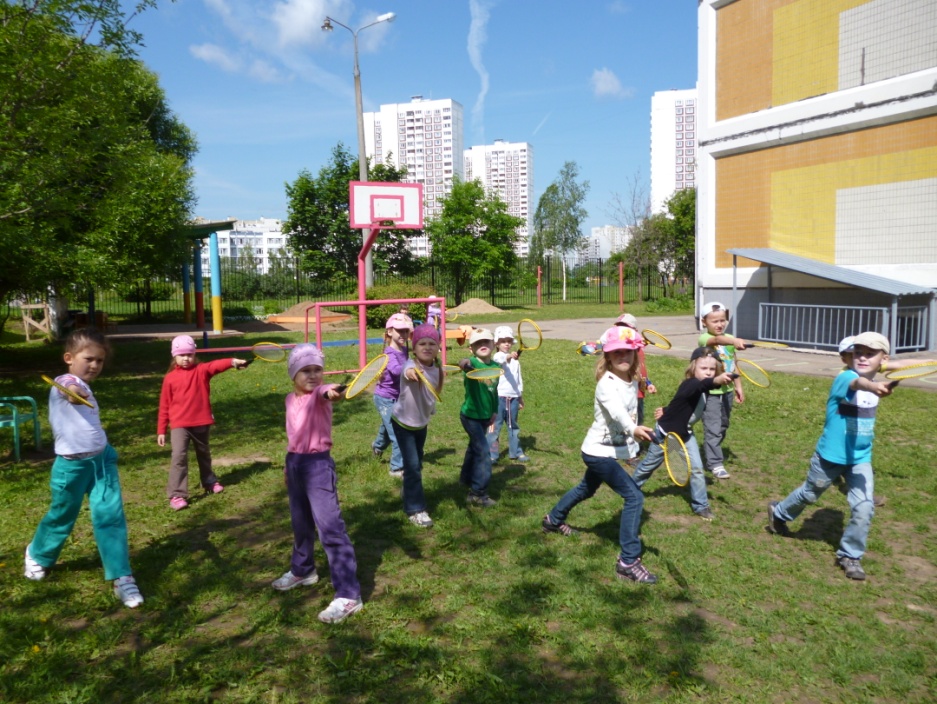
It is also known that at school the trend of deterioration in the health of children increases with age, children acquire a number of physical disabilities and bad habits. Therefore, it is necessary within the walls of the preschool educational institution to create a "crossing bridge" of mental and physical readiness for school; so that the first-grader can withstand the significant stress due to the mode of the school day.
Thus matured urgent problem search for ways of physical improvement of preschoolers, effective means the development of the motor sphere of the child, the development of interest in movement as a vital need to be dexterous, strong, and courageous. We see the solution to this problem in the totality of socio-pedagogical conditions that provide a holistic educational process, harmonious, physical. and personal development of the child. This is facilitated by game forms of organizing the motor activity of children indoors and outdoors.
According to the definition of domestic psychologists (L.S. Vygotsky, A.V. Zaporozhets, A.N. Leontiev, D.B. Elkonin, etc.), the game is the leading activity in preschool age, due to which significant changes occur in the child's psyche. An outdoor game is a form of activity accessible to preschoolers, which involves the conscious reproduction of the skill of movements. Many researchers state that an outdoor game is a means of a child's harmonious development, a school for managing one's own behavior, and forming positive relationships.
Games with elements of sports as a type of activity, as a rule, involve changing conditions of certain actions, therefore, most of these games are associated with the manifestation of motor abilities: speed-strength, coordination, requiring endurance, strength, flexibility. In games with elements of sports, the “sense of muscular effort”, “sense of space”, “sense of time”, the functions of various analyzers are improved. In addition, games with elements of sports allow the child to master various, rather complex types of actions, to show independence, initiative, and creativity. 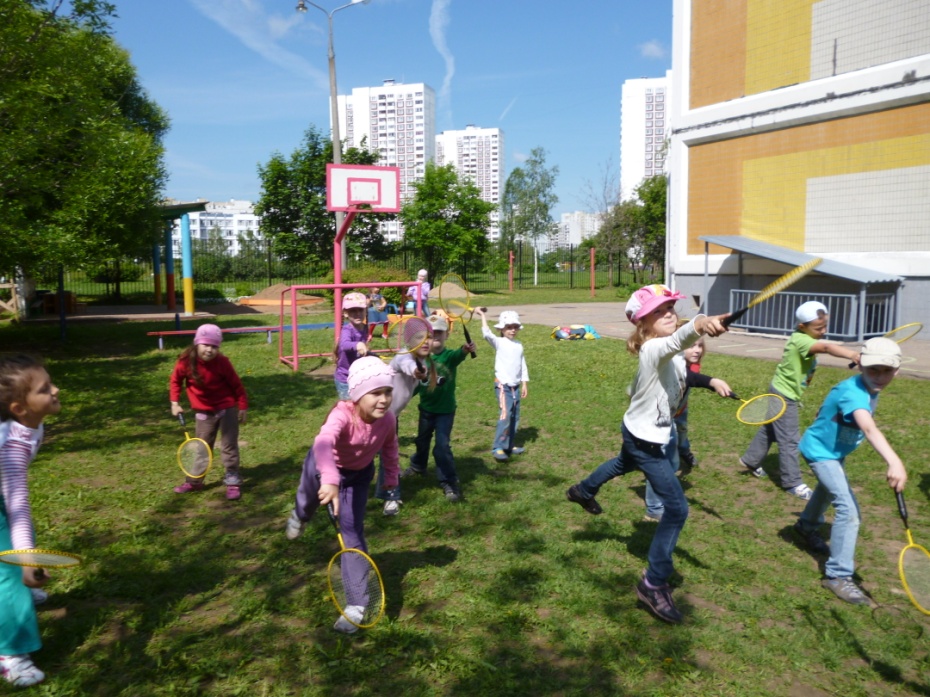
The methodological manuals deeply reveal the content and pedagogical conditions for teaching preschoolers the elements of sports games and exercises. However, the problem of the impact of games with elements of sports on the development of children's motor abilities, aspects of teaching the elements of these games, built taking into account different levels of development and initial data on the physical condition of each child, as well as specific natural conditions, needs further improvement.
The need for changes in the organization and content of teaching preschoolers 5-7 years old to play games with elements of sports is also confirmed by studying the practice of preschool institutions. Training in the elements of sports games is provided and carried out in the preschool educational institution in almost all modern programs. However, studies have shown that the real level of mastery of games with elements of sports does not meet the program requirements and age capabilities of older preschool children: more than half of older preschoolers are not familiar with the elements of such interesting and exciting games as towns, table tennis, badminton, basketball, etc., and do not own them. 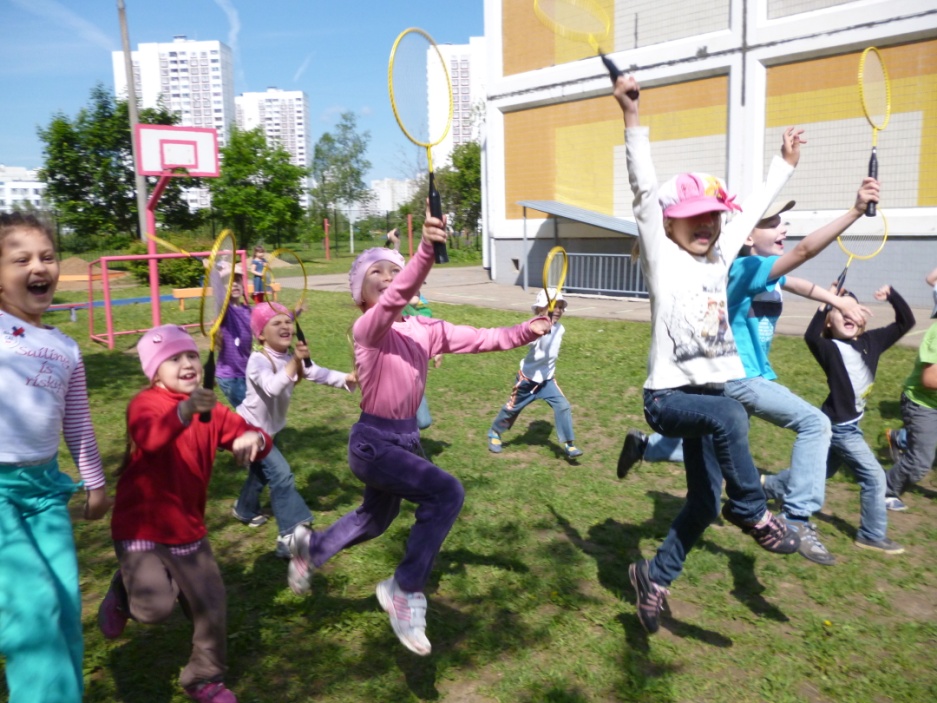
The reasons for this are the lack of a purposeful approach to the organization of training, reasonable forms, methods and techniques of differentiated management of the process of development of motor abilities. The effectiveness of the use of games with elements of sports in the development of children's motor abilities is also reduced due to the insufficient level of theoretical and practical training of educators and the poor organization of the subject developmental environment.
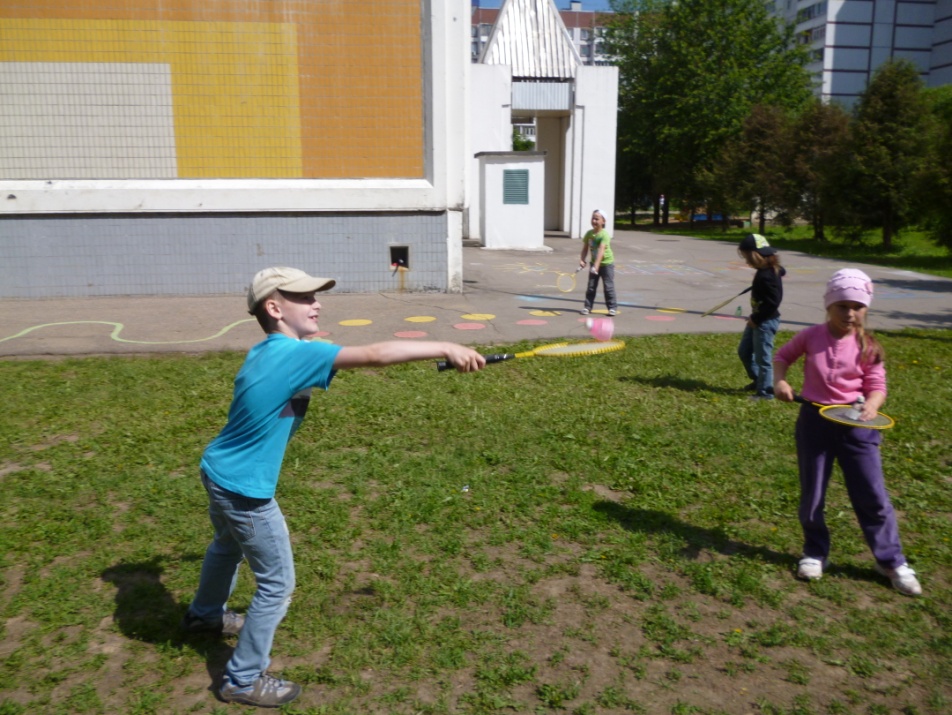
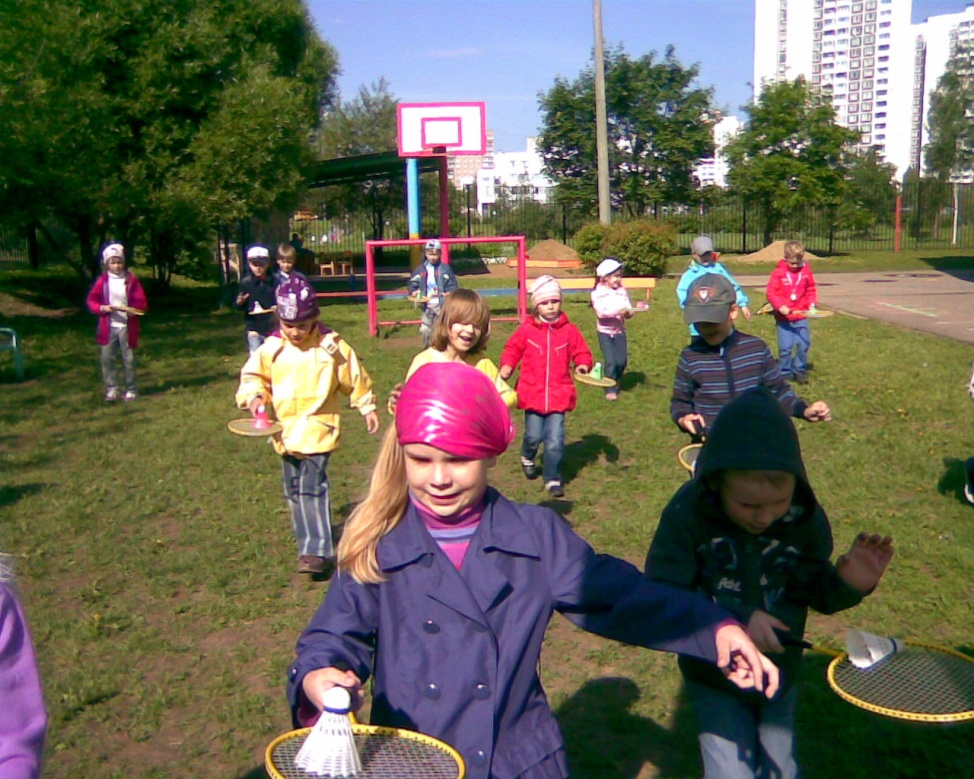
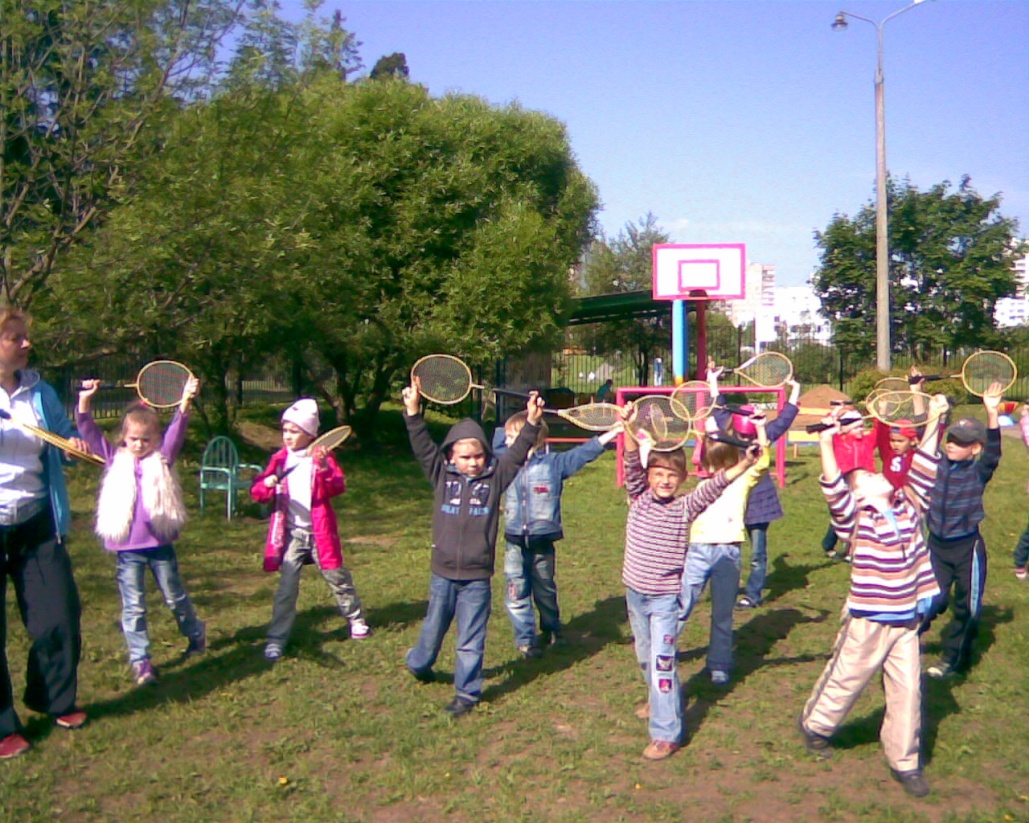
Badminton is a great game that is accessible to many. This game is played in almost every backyard, on beaches and during picnics. Probably, there is not a single person who has not tried to play badminton at least once.
However, no one teaches how to do it right. As a result, some are embarrassed to play because they don’t know how, others hold the racket incorrectly. Unfortunately, there are many of them, and they also teach their children. Still others lose interest in the game due to the fact that they get tired of just throwing the shuttlecock. They begin to figure out how to play on the score in order to increase interest. In other words, they are starting to reinvent the wheel, and in this case- badminton.
It is necessary to learn how to play badminton already in kindergarten. In the future, this will help one learn to play, feel more confident and demonstrate their skills by playing at every opportunity. Others will immediately learn to play correctly, and they will not have to relearn (otherwise, good players will always beat them, which will affect their interest in the game). Still others will know the rules, will be able to improve in the game or play badminton professionally. 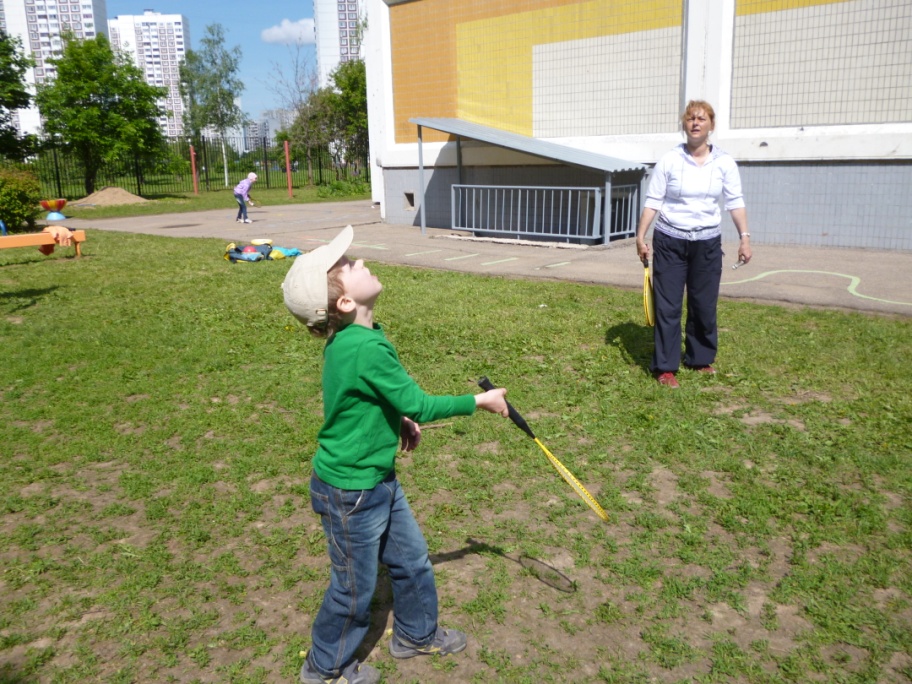
If we consider badminton with different points view, the game has a lot of positive and almost no negative.
Badminton does not require expensive equipment. Equipping a badminton court is much easier than, for example, tennis. Besides, the badminton court is located practically in any sports hall.
The rules of badminton are simple and do not require much study. It's easy to judge the competition. Enough simple technique games that are easy to learn. It is quite realistic to perform sports categories.
Badminton is a game that is suitable for people of all fitness levels. You can play it calmly, throwing the shuttlecock to each other, or you can actively, on the sports ground, giving great physical activity.
This is the most family game. It can be successfully played by people of all ages. Moreover, in different combinations, for example: a grandmother with a grandson, a father with a daughter, a young man with a girl, etc. They can play not only against each other, but also in the same team, when holding pair games.
To play badminton, two people are enough to fully play, which is impossible, for example, in volleyball, football or basketball.
Rackets in badminton are light, unlike tennis, and children can handle them freely. 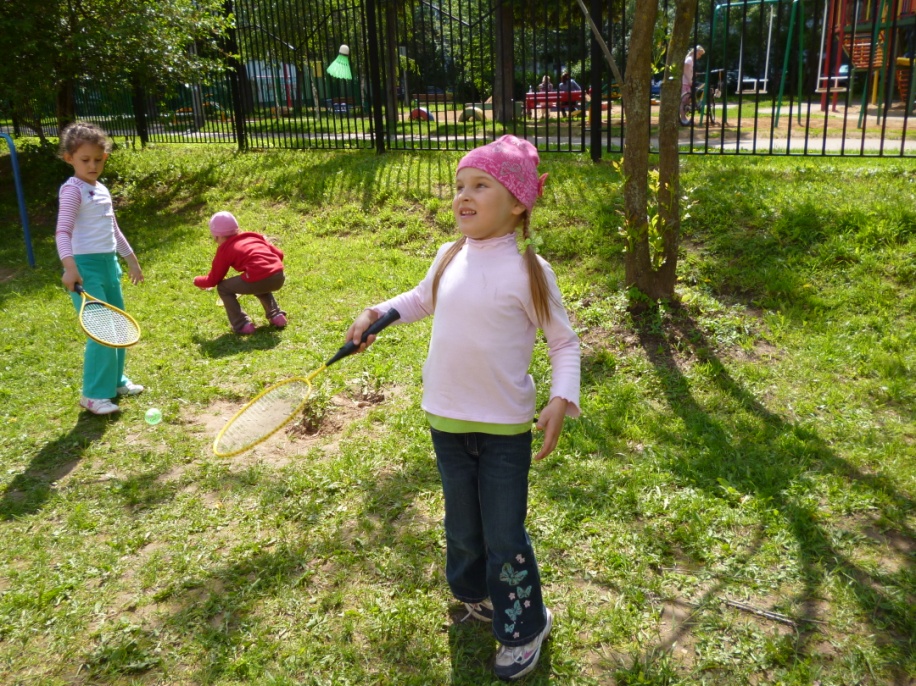
Playing badminton has a positive effect on vision, since watching a shuttlecock (either approaching or receding) trains the muscles that control the lens of the eye. And moderate loads at the same time do not allow visual fatigue.
A long game with a moderate load contributes to the normalization of weight, and frequent bending over a fallen shuttlecock reduces fat deposits in the waist area.
Badminton has, perhaps, one drawback: it is played with only one hand, which leads to one-sided development. But it should be noted that all sports games (for example, volleyball: serves, attacking blows) and throwing, jumping, running in a circle only in one direction suffer from this drawback. There is no “one-sided flaw” only in gymnastics and ski training. However, using the right training methodology, you can avoid this disadvantage or minimize it.
Another disadvantage could be attributed to the fact that the shuttlecock blows the wind, even a weak one. However, this is more of an inconvenience than a disadvantage. In addition, it is of little significance, given that most physical education classes during the school year can only be held in the halls. 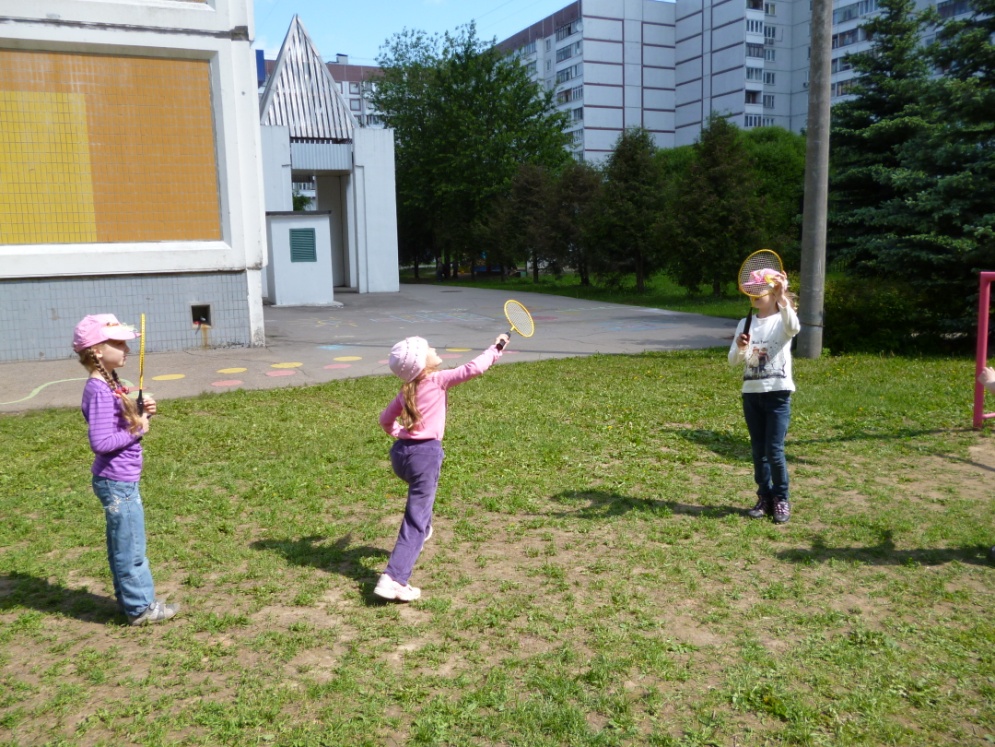
3. The use of elements of the game of badminton in the physical education of children of senior preschool age.
Learning the elements of badminton is necessary to achieve a "safety margin" of health in children, develop their motor abilities, and improve physical fitness.
New propulsion systems, which depend on the situation of activity, are formed mainly at the age of 5-7 years.
Qualitative transformations of the motor sphere of children at senior preschool age occur on the basis of the improvement of feelings and movements, the development of motor abilities. Children of this age should be given the opportunity to show their abilities, the ability to use their motor experience in a variety of ways. At the same time, it is very important that the child independently find solutions, show initiative, creativity, and feel free.
As the practice of physical education in preschool educational institutions shows, elementary outdoor games are clearly not enough to solve these problems, while a high interest in playing badminton, which contains complexly coordinated motor actions, is biologically conditioned and is associated with qualitative changes in the development of the child's body.
Equally important are the social and intellectual aspects of these games. P.F. Lesgaft noted that the child is always a mirror of the environment, in games he learns everything: the habits and customs of his environment, perceiving everything that he sees and learns more often from the people around him. These factors should be taken into account when developing a system of tasks, organizational forms and methods of teaching a game with elements of sports. 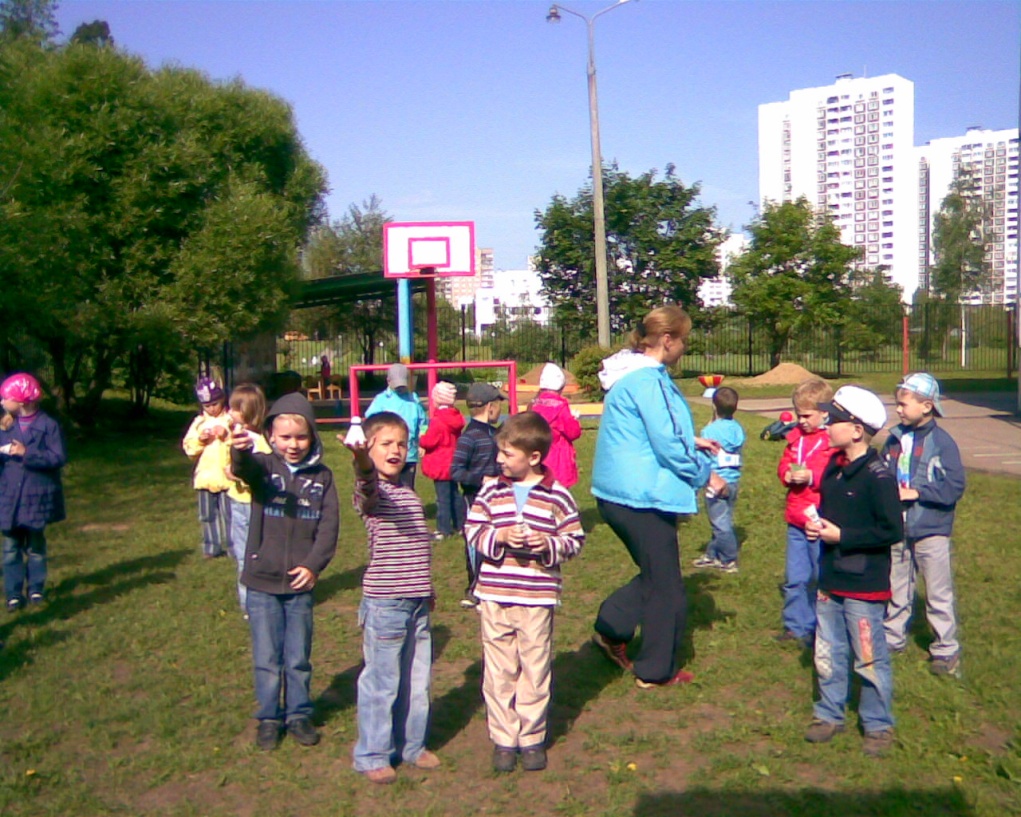
A number of principles need to be followed, including:
General didactic principles and leading provisions of preschool pedagogy, psychology, theory and methodology of physical education and development in the construction of the educational process;
An integrated approach to the selection of program content and methods of conducting classes in physical culture, as well as management techniques for both organized and independent motor activities;
The maximum variability in the use of the proposed content (in physical education classes, in sectional, individual work, independent motor activity).
The content of training is based on the requirements for the comprehensive development of motor functions, the relationship of the physical, intellectual and mental development of the child. It is supposed to use games and exercises with elements of badminton in combination with other sports and recreational activities, focus on the formation of independence in children, self-control, the ability to act in a group of peers, take care of their health.
The following are defined as the main educational tasks:
Formation of a steady interest in the game, sports exercises, the desire to use them in independent motor activity;
Enriching the motor experience of preschoolers with new motor actions, teaching the correct technique for performing elements of the game;
Promoting the development of motor abilities;
Education of positive moral and volitional qualities;
Formation of skills and stereotypes healthy lifestyle life.
Guided by the principle of interconnection different types activities in the learning process, it is necessary to ensure the unity of goals, objectives, organizational forms, means and methods of teaching and the content of classes. Step-by-step training is necessary, which determines the optimization of the pedagogical process.
The system of teaching the elements of the game of badminton is based on the use of entertaining game exercises, relay race games.
One of the conditions for the development of an effective system of motives and incentives in children is a variety of working methods, the use of both general pedagogical and specific methods of physical education, including techniques aimed at enriching motor experience, forming interest in the elements of playing badminton, using physical education aids, inventory, individual and group task cards, joint games of children and adults, encouraging creative initiative, uniting children with different levels of development and physical fitness in games.
To maintain the attention of children, the introduction of competitive moments, relay race games is effective. Encouraging children in the classroom and in individual work to compare and contrast, analyze and generalize, substantiate and evaluate contributes to the activation of their thoughts, teaches them to be independent, prepares the necessary psychological basis to solve creative problems. 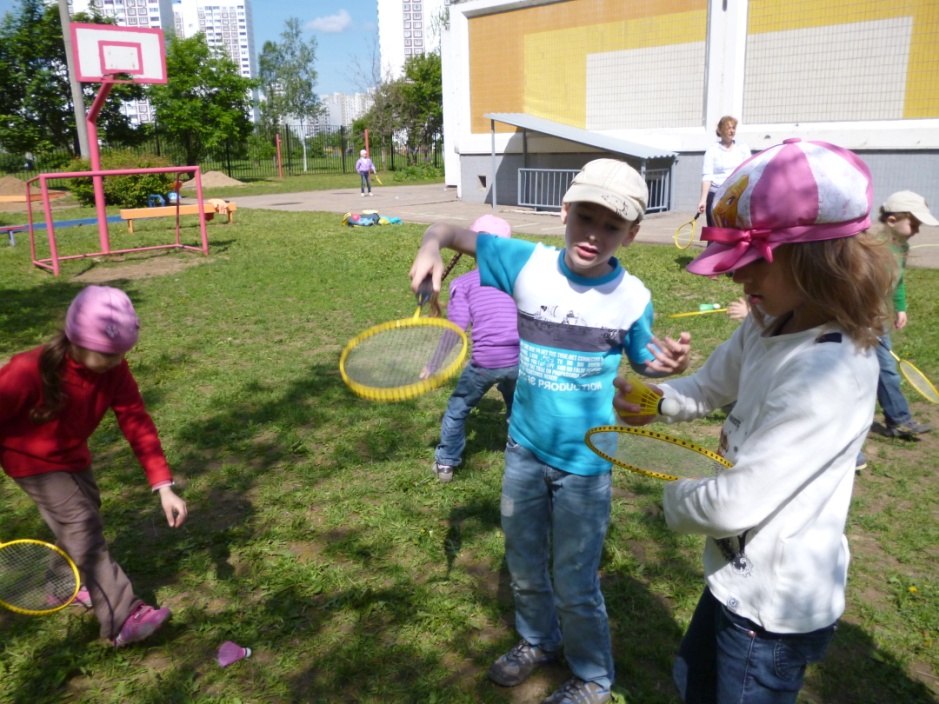
It is necessary to determine the content of athletic (general physical and special physical), technical-tactical and moral-volitional training, which provides an integrated approach to solving the tasks. Games, games-exercises are built on a variety of motor actions.
Classes can be held in the form of a game. Each teacher from the proposed variety of tasks can choose those that are adequate to the potential abilities of children, weather conditions.
It is very important to encourage children to use the learned games and game exercises on a daily basis.
However, teaching children the elements of playing badminton, developing their motor abilities and sports inclinations is not an end in itself, but a means of harmonious development of the child, a school for managing one's own behavior, forming positive relationships, and a prosperous emotional state. 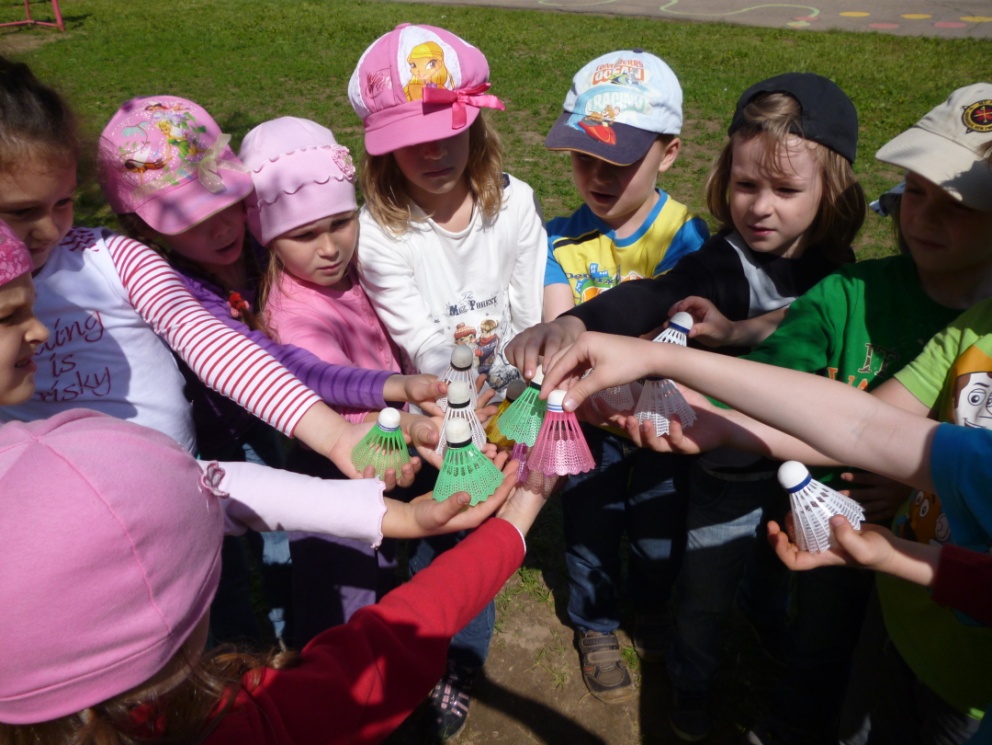
Risk factors include:
Problems associated with the emotional distress of children in a situation of "failure", and they may arise in games with elements of competition;
High mental stress associated with the assimilation of complex-coordinated actions in game situations;
High injury risk of individual games with elements of sports, which provide for the contact of players;
The need for dosing physical activity, since hyperkinesia can lead to an overstrain of the cardiovascular system;
Problems of combining the proposed system of collective games and individual abilities, the nature of the child.
Relay games, games with elements of badminton enable each child to feel the importance of participating in joint actions, helping each other to achieve results and success, that is, they introduce children to universal values human life: kindness, collectivism, mutual assistance. 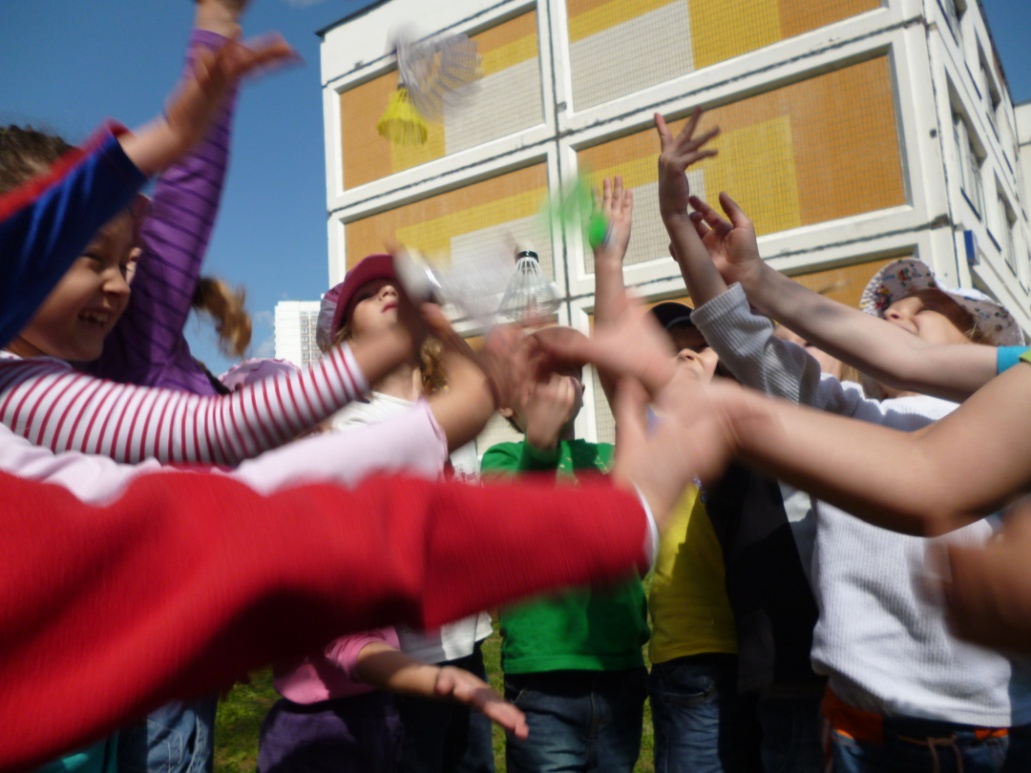
Education should be based on a personal-activity approach aimed at the harmonious development of the personality of a child of senior preschool age: thinking, consciousness and activity. It is necessary to rely on the conceptual provisions about the individual as a subject of joint activities and own development, as well as on a systematic approach to education. The methodological basis is the initial principle of domestic pedagogy and psychology, according to which the game is the leading activity of a preschooler.
Thus, the positive effect is due to the methodological foundations for using the elements of badminton in the pedagogical process. kindergarten: the possibilities of physical education are expanding on the basis of planning and organizing the process of development of motor abilities, the maximum approximation of classes to gaming activity, the correspondence of their content to the abilities and readiness of children. This makes learning socially and personally perceived by all participants in the process: children, educators, parents.
Teaching the game of badminton can be carried out both in the classroom and during individual and subgroup work with children. If possible, you can organize a badminton circle.
The badminton training program involves not only familiarization with the elements of the game, but also teaching them. It should have a specific distribution of material. The teacher is offered a set of various exercises and games that he can use in his work. At the same time, he will proceed from the conditions available to him, the age and level of preparation of the children, as well as the amount of time allotted.
The tasks of teaching the elements of playing badminton to children of senior preschool age in the classroom include familiarity with the properties of a shuttlecock, racket, and the history of the game; knowledge of the rules of the game; consolidation of actions with a shuttlecock and a racket; training with a variety of racket strikes depending on the game situation.
Badminton lessons should be a logical continuation of the entire educational process. Therefore, the lessons include exercises not only in badminton, but also from other sections of the program, which are distributed over the entire academic year. For example, running. It cannot be taught without running throughout the school year. Throwing - throwing itself or exercises that develop throwing muscles should also be present in almost every lesson, etc.
The badminton training methodology can be divided into the following parts:
1. Preparation for training.
2. Teaching technique.
3. Improving the techniques of the game.
Preparation for training includes a variety of preparatory exercises that develop the feeling of a shuttlecock, prepare muscles and ligaments for performing basic exercises, develop agility and speed.
Here exercises with shuttlecock, racket, shuttlecock and racket are used. In the first lessons they are individual, and then, as a rule, in pairs. These exercises are included in every session. 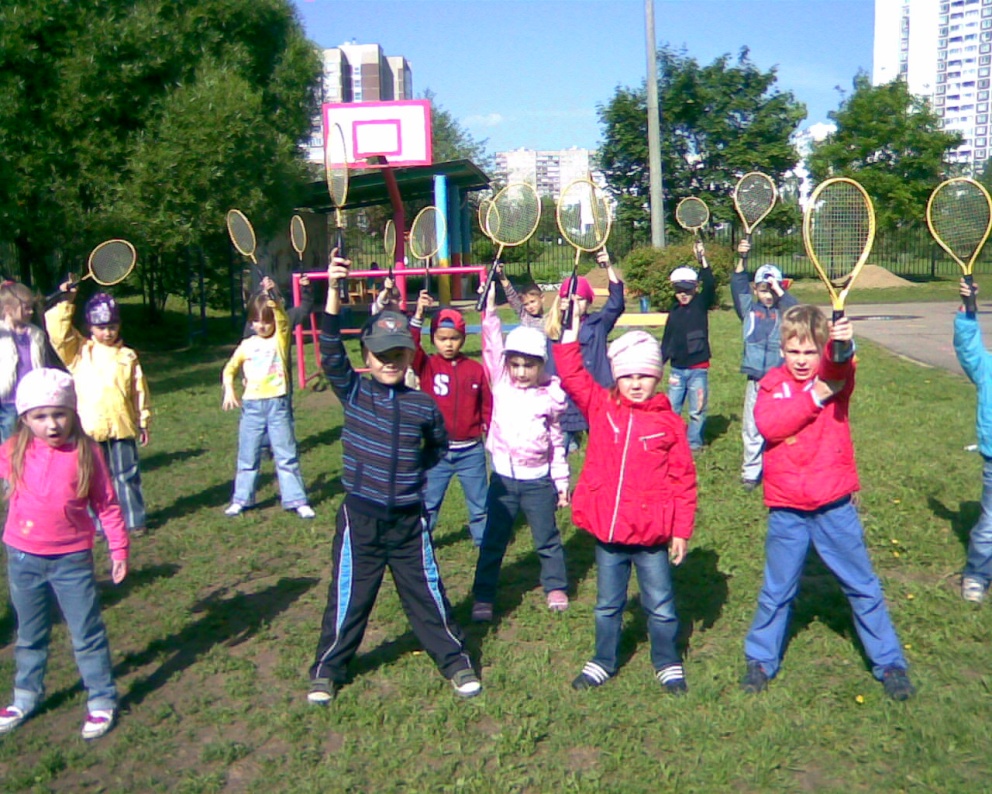
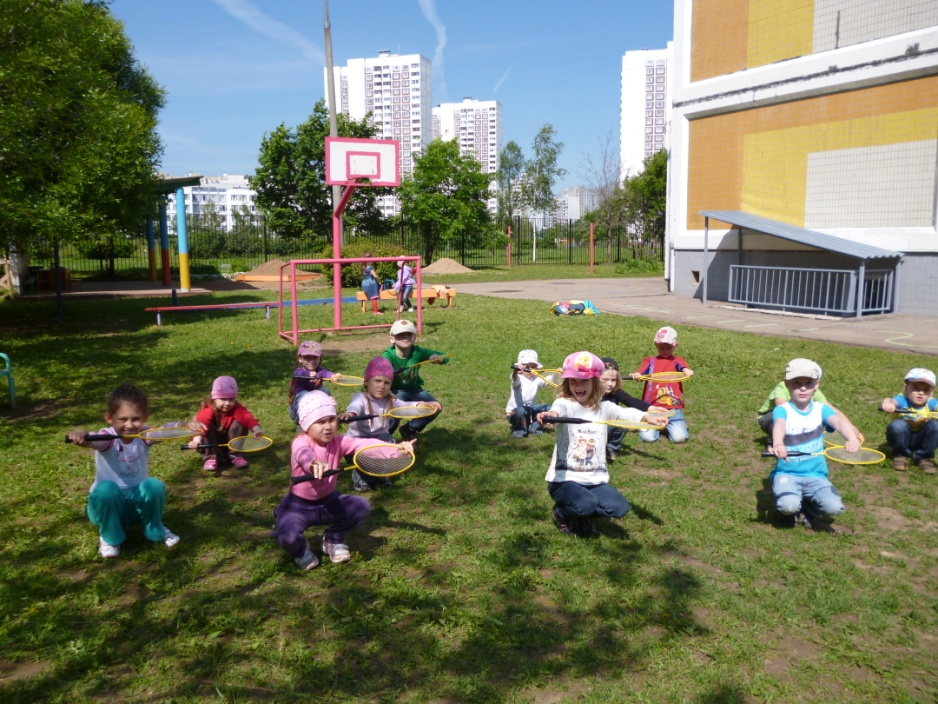
Technique training includes lead-in and imitation exercises, game techniques themselves, as well as exercises to consolidate acquired skills. All these exercises are included in the main part of the lesson.
At the stage of consolidating techniques, games and exercises are used. Improvement includes more complex exercises with a shuttlecock and a racket, imitation exercises based on signals, practicing individual game techniques, developing strength and speed of working muscles. All these exercises are included in the main part of the lesson.
The lesson structure is as follows:
First part. Uniform running or outdoor game with running.
Main part. Includes outdoor switchgear, exercises with a shuttlecock, racket or shuttlecock and racket, as well as training, consolidating and improving the technique of the game, as well as developing physical qualities. It should be built taking into account the capabilities of children.
Final part. Calm exercises. Summing up the lesson.
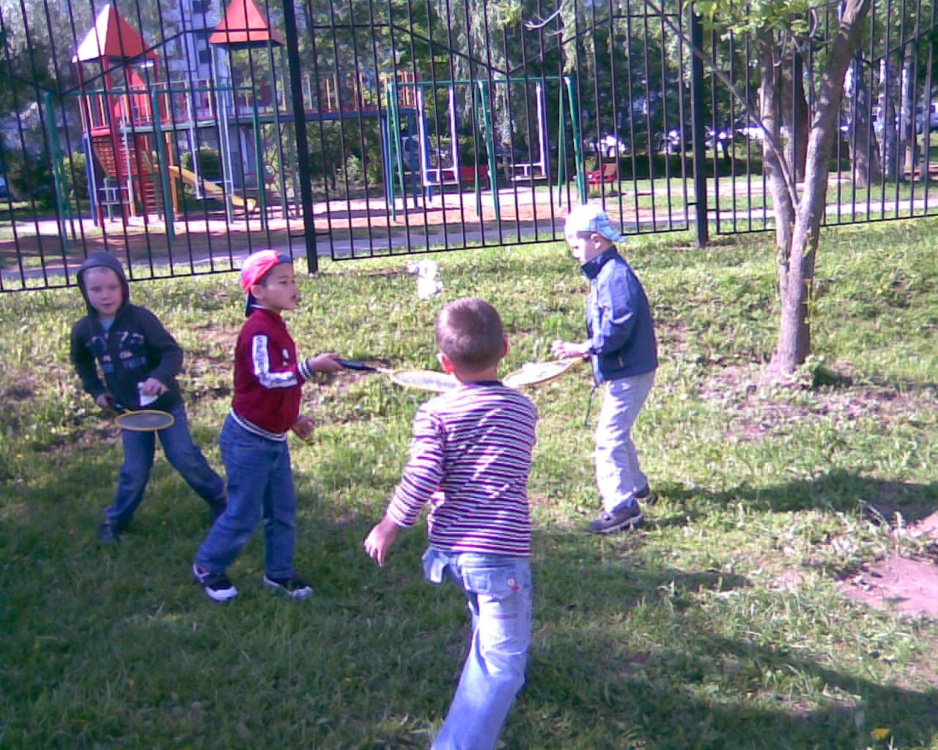
Almost all badminton exercises can be done in pairs. In this case, pupils have one of two ways.
1. Along the sidelines of the badminton court located in the middle. In this case, one student from a pair stands on one side, and the other on the opposite side. The distance between the children in the line is up to 1.5 m. When performing some individual exercises, the children of one of the lines (performing in this moment exercise) can be staggered so as not to interfere with each other
2. All children are divided into two large groups, which are located on different halves of the site. Children of one group in their pairs stand through the net suspended across the gym. If necessary, they can also be staggered.
Sometimes in the classroom it is useful to pair strong players with weak ones. The strong throws the shuttlecock more precisely, thereby helping the weak. In addition, he can suggest how to perform the exercise if he finds errors. At the same time, the weak, on the contrary, quite often throws the shuttlecock unpredictably, which, in turn, forces the strong to be ready for any surprises.
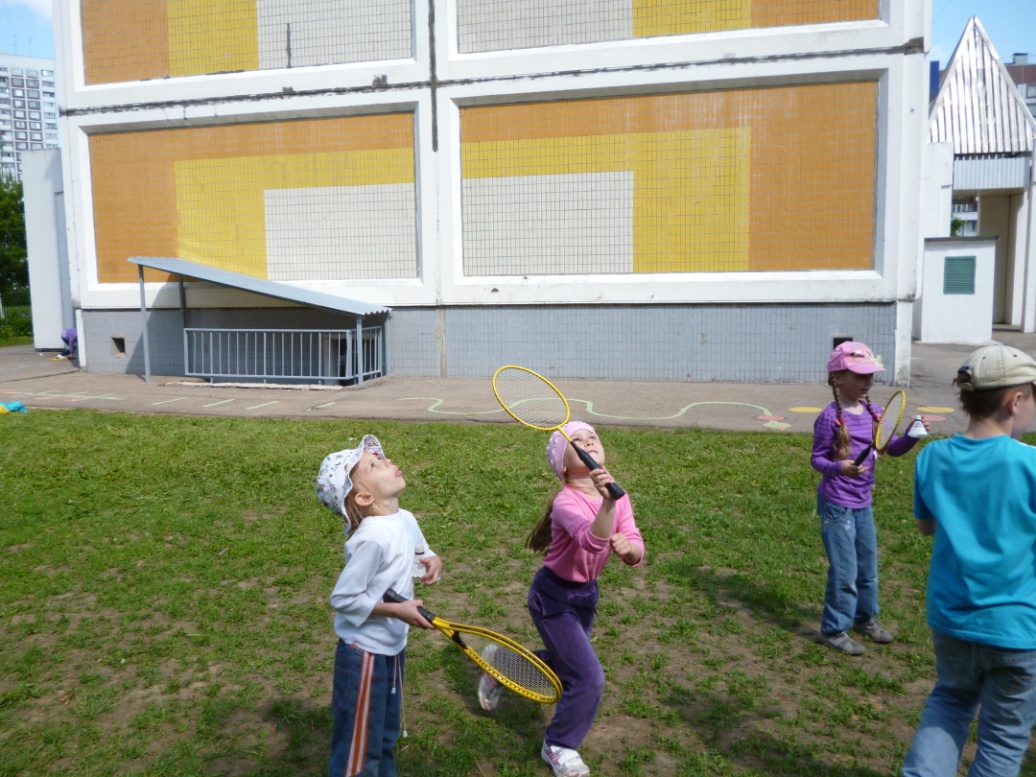
On the initial stage teaching preschoolers should be given as many exercises as possible that develop a sense of the shuttlecock, and exercises in juggling (hitting from the bottom up).
In "courtyard" badminton, the serve is performed with a blow from above and there are practically no blows from below, while in sports badminton, the serve is performed only from below. Therefore, most children at the beginning of training are practically unable to hit the shuttlecock when serving. Some children do not feel the distance to the shuttle and the speed of its flight, as a result of which they will not hit it with the racket head. Their shuttlecock, as a rule, flies at the level of the neck of the racket.
The worse the sense of shuttlecock is developed, the more time should be devoted to preparatory exercises. The criterion for the readiness of the child to master the technique is the free performance of juggling with the open and closed sides.
In the classroom, hand throws are often used. They develop a sense of shuttlecock, help in learning at the initial stage (since it is easier to throw with your hand than to hit with a racket), prepare for throwing and hitting from above.
All preparatory exercises must be performed with both the right and left hand. This develops dexterity, diversifies classes, has a beneficial effect on the brain and, most importantly, harmoniously develops muscles on the right and left sides of the body (which helps prevent spinal curvatures).
Some exercises with a racket are useful to perform with the left hand also because it is not “spoiled” by incorrect movements. Therefore, it is easier to understand what needs to be done with the right hand.
In most cases, the description of the exercises is made taking into account the fact that the player holds the racket with his right hand. Therefore, if the player is left-handed, then it is necessary to make appropriate adjustments. Similarly, it is necessary to act if the task is given to perform the exercise with the left hand.
One of the main conditions in training is hitting the shuttlecock right side. Children often do things in their own way, the way they are used to or the best they can do at the moment. At the same time, they do not at all think about the fact that this mistake will interfere with the further growth of skill. Then either you will have to get rid of it, or quit badminton, in which the child is beaten. Therefore, children should be reminded more often about which side of the racket to play where, and do more exercises to consolidate the right skills.
If the game with any side of the racket does not work out well, then you need to play more with this particular side. To do this, they specially throw a shuttlecock in the right place.
When teaching technique, one must move gradually and not try to embrace the immensity.
Stages of mastering technology:
Correct exercise imitation.
Hitting a thrown shuttlecock while observing the technique. Especially - the shock side of the racket.
Beating the shuttlecock in the direction of the partner.
Accurate beating to a partner (in the hands, under the right or left side for a strike).
Beating from the serve (partner throws a shuttlecock with a serve).
Beating off from other tricks of the game.
Application in games.
When teaching, one should adhere to the principle indicating the sequence: "CORRECT, EXACT, STRONG."
It is very important to go from simple to complex. it common truth, but for some reason in badminton it is often forgotten.
You need to start training with simple and effective movements that will be obtained from a novice player.
When teaching badminton in the classroom, preference should be given to singles, since in doubles games there is a greater chance of collisions and hitting each other with a racket or a racket against a racket, because of which they quickly break. Unlike sports sections and schools, different children are involved in the classes, including those with poorly developed coordination.
By the end of the school year, the child should have a certain level of physical fitness. The question is, at what cost will this be achieved and by what means? Therefore, it is important to approach learning in stages so that the child can independently cope with the task.
The first stage is one of the most important, because the way the child perceives the movement for the first time will entail a further desire or unwillingness to improve it.
At the second stage, the issues of correcting errors that arise in the development of movement are solved.
The third stage allows you to consolidate the skill of performing a movement in a non-standard situation and requires creativity to the solution of the task.
The fourth stage is used for the purpose of a kind of motor discharge. At this stage, it is supposed to achieve the greatest motor emancipation and high creative activity.
The fifth stage is a combination of motor actions of different complexity, studied earlier and mastered at the previous stages, which allows developing not only physical qualities, but also motor memory.
At the sixth stage, children can feel like real athletes. This stage also carries a cognitive load, as children get acquainted with the history of the development of our sport and the history of the Olympic movement.
The seventh stage is the final one. At this stage, not only the final result is taken into account, but also such qualities as motor actions, rhythm, plasticity, impulsiveness, accuracy, liveliness, excitability.
5. Formation of actions with a shuttlecock and a racket in children of senior preschool age when teaching the elements of playing badminton.
Preparing for Technique Teaching
Shuttlecock exercises are used to warm up and develop the sense of the shuttlecock (its speed and flight path), as well as to develop agility and speed. Throws are performed by holding the shuttlecock by the head, while the head is turned in the direction of the throw.
Individual exercises
1. Throw the shuttlecock up (alternately with the right and left hand) and catch it with both hands.
2. Throw the shuttlecock over your head from the sp. hands to the side.
3. Throw the shuttle up with the right hand under the right leg (lifting it bent at the knee), and with the left hand under the left leg and catch it with both hands.
4. The same, but toss the shuttle up with the right hand under the left foot, and with the left hand under the right foot.
Individual exercises with two shuttles increase the density of the lesson, increase the number of movements performed by each hand, develop harmoniously the right and left parts of the body, teach you to quickly switch attention (look) from one object to another, develop speed and dexterity. In all exercises, it is necessary to quickly shift your gaze from one shuttlecock to another.
I.p. in most exercises - standing with two shuttlecocks (each hand has a shuttlecock) and holding them in front of you.
1. Holding two shuttlecocks in your hands, alternately throw them up and catch them. Gradually increase the execution speed.
2. Standing with arms slightly spread apart, throw the shuttlecocks towards each other, trying to get the shuttlecock into the shuttlecock. The meeting of shuttlecocks can be performed at different levels: chest, knees, head, above the head. After each execution, it is desirable to catch both shuttlecocks or at least one.
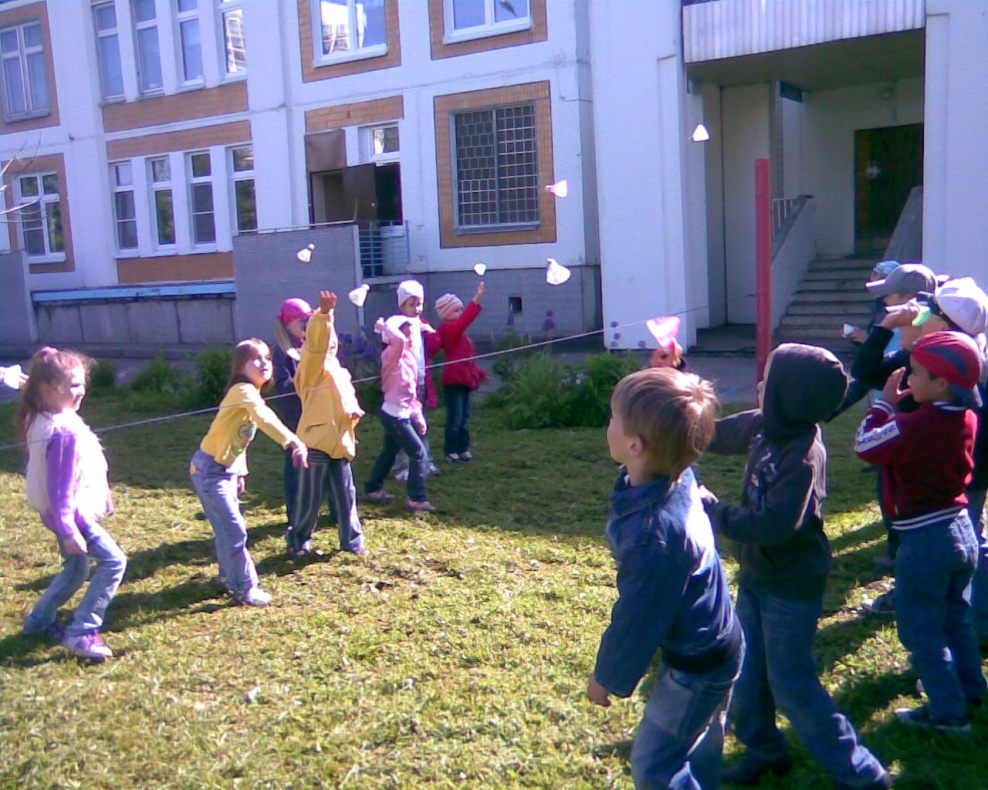
Pair exercises are performed, as a rule, without a grid, but some of them can be performed through a grid.
1. Throwing the shuttlecock to each other in a straight line, directing the shuttlecock to the chest, with a catch.
2. Shuttlecock throws to each other along a high trajectory, with catching.
3. Exercises 1 and 2, but with the left hand.
4. Throwing the shuttlecock to each other, trying to get into the partner's hand. The partner holds his right hand to the side at shoulder level. After doing several times, expose left hand aside and continue the exercise.
5. Throws the shuttlecock overhead, standing with your back in the direction of the throw. Throws are performed alternately with the right and left hand. The player who catches the shuttlecock stands with his chest to the thrower. 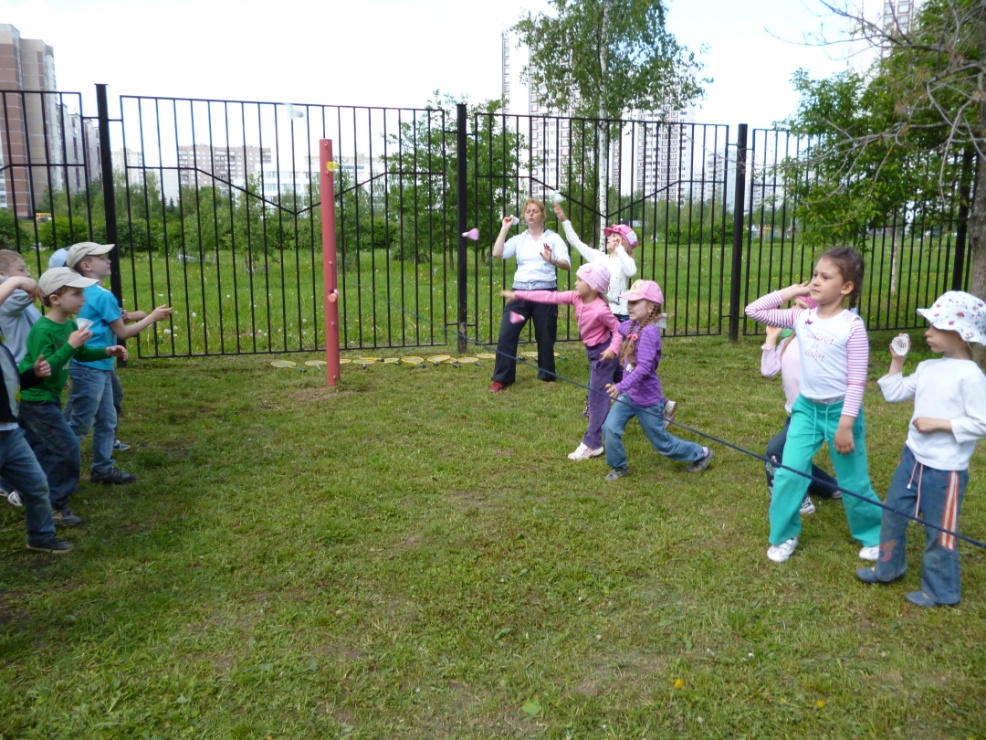
6. Throws the shuttlecock between the legs with an inclination forward, standing with your back in the direction of the throw. Throws are performed alternately with the right and left hand.
7. The game "Day and night with a shuttlecock." All players are placed in two lines along the middle line, at a distance of 2 m from each other. Shuttlecocks lie between them at the same distance from the players of opposite teams. One line is day, the other is night. The teacher calls the day - the children of this team run up to the shuttlecock, take it and throw it at the opponent, and the “night” runs away. And vice versa.
Pair exercises with two shuttlecocks
1. Throwing shuttlecocks to each other along a low trajectory with catching.
2. Throwing shuttlecocks to each other along a high trajectory with catching.
3. Throwing shuttlecocks up with a change of place. The players simultaneously toss the shuttlecocks up above themselves and immediately change places. Each player must catch the partner's shuttlecock.
1. The game "Talking with a shuttlecock". 2-3 or more drivers are selected, depending on the number of players. All drivers with shuttlecocks in their hands. Throwing a shuttlecock at the players, the drivers try to knock them down. Having thrown the shuttlecock, the driver, in case of a miss, runs after him, picks him up and throws him again, etc. Throws are performed from the place where the shuttlecock was picked up. In the event of a hit, the player changes roles with the leader.
2. The game "Throw the shuttlecock." The court is divided into two halves by a badminton net. Children are divided into 2 teams and are located in one line on their halves of the site, at a distance of 1.5-2 m from the net. Players of one team - with shuttlecocks in their hands. On a signal, they perform a throw for the net. Players of the other team pick up shuttlecocks and line up in the same way as the first players. On the signal, the second team takes the throw. The team with the most shuttlecocks thrown gets one point. Now the players are located at a distance of 2.5-3 m from the net and repeat the throws. So each time the players move away from the grid further and further. They do this until no one can throw the shuttlecock or only individual players will throw it. Then the game starts over, but the throws are made with the left hand.
3. The game "Clean your garden of stones." Children are divided into 2 teams and are located on their halves of the site. Each player has a shuttlecock. A badminton net is stretched on the middle line. On a signal, the players begin to throw shuttlecocks to the side of the enemy, trying to free their half from them. The shuttlecock can only be thrown from the place where it was picked up or caught. The team with the fewest shuttlecocks left after the signal wins.
Racket exercises
Warm-up exercises
From the exercises proposed below, a complex is compiled, which includes 2-3 exercises for the main muscle groups (arms, torso and legs). Each exercise is performed 8-10 times.
1. Circular rotations in the shoulder joints. racket in right hand, and the arms are bent at the elbows at about 90 °.
2. Taking the racket with both hands (the left covers the right), raise your elbows up, moving the racket as far back as possible behind your back (touching the head of the racket with your back).
3. Work with your hands, as during a sprint. The racket is in the right hand, and the arms are bent at the elbows at about 90 °.
4. Flexion and extension of the arms in elbow joints. In this case, the arms can be directed down, forward, up, back or to the sides.
5. Grip with both hands on the neck of the racket. Hand movements, as when rowing a boat.
6. Hands forward, grip with both hands on the neck, racket horizontally. Turn the racket to a vertical position with the handle, then with the head up.
7. Balancing the racket, holding it vertically, with the handle on the open palm. Perform alternately with the right and left hand.
8. Circular rotation of the racket head. Perform alternately with the right and left hand.
9. Move the racket head up and down. Perform alternately with the right and left hand.
10. The same, but left-right.
11. Rotation with a brush, turning the racket either open or closed side up. Perform alternately with the right and left hand.
12. Rotation with the wrist, holding the racket like a hammer. Perform alternately with the right and left hand.
13. In I.p. the racket is held with two hands (right by the handle, and left by the rim of the head) and is located near the chest. Lean forward, stretching your arms to the floor, and return to the sp. The exercise can be performed from different sp. (hands down, forward or up).
14. I.p.: as in the previous exercise. Turn to the right, turning the shoulders and twisting the torso and straightening the arms forward. Then return to i.p. and repeat the exercise to the left.
15. I.p.: as in the previous exercise. Tilt to the right, stretching your arms up. Return to I.P. and repeat the exercise to the left.
16. Deep squats. From ip: hands with a racket at the chest (either down, forward, or up) sit down, stretching your arms forward (up or bending your arms and bringing the racket closer to your chest).
17. Jumping, working with the legs, like with a rope, and imitating the rotation of the rope with a racket. Perform alternately with the right and left hand.
18. Running in place with high hips. Racket in the right or left hand.
Simulation exercises can be performed independently or on a signal:
1. Right hand open side, standing still.
2. The same with a lunge to the right.
3. Backhand with closed side, standing still.
4. The same with a lunge to the left.
5. Strike from below with the closed side, standing still.
6. The same with a lunge forward.
7. Overhand blow with the open side.
8. Hit from above with the closed side.
Shuttlecock and racket exercises
Individual exercises
1. Juggling with the open side of the racket. The player, being in a playing stance, strikes the shuttlecock with the open side of the racket, directing it upwards.
2. High juggling. Each time send the shuttle up as high as possible.
3. Juggling combined with movement. The player is positioned behind the sideline of the court. While juggling, he moves to the opposite touchline.
4. Catching a shuttlecock with a racket. Throw the shuttlecock from below with your free hand. Then put the head of the racket under the dropping shuttlecock and, along with the shuttlecock, smoothly catch it with the head of the racket.
Pair exercises are divided into two groups:
1. One racket for two.
2. Each player with a racket.
In the exercises of the first group, one player with a racket, and the other with a shuttlecock. The player with the shuttlecock helps the first to perform the exercises. He throws the shuttlecock in a convenient place for a strike or holds the shuttlecock in a certain place.
The exercises of the second group are performed with a sufficient level of preparation of preschoolers. Children should be able to freely perform strikes in pairs. All exercises can be performed without a net or through a net.
26.10.2012
Most juniors, veterans and amateur athletes prefer to use rectangular or oval hand brushes. And although their use entails more labor-intensive and longer work on skis than when using rotary brushes, they are cheaper, safer and more convenient to carry. In addition, it is hand brushes that should be used for the final cleaning and polishing of the base structure before starting.
Rotary brushes are cylindrical brushes used in conjunction with an electric drill to speed up the cleaning process. They are preferred by coaches or technical staff of teams who have to prepare many pairs of skis on a regular basis.
When using rotary brushes, do not start the drill too fast or apply too much pressure to the brush. Both of these actions contribute to the creation of unnecessarily high temperature, which softens and smears the paraffin instead of effectively removing it from the structure. Also, don't buff the base with a rotary brush thinking that a "shiny" base will slide faster. Tests have proven that skis with a "matte" base are faster than "shiny", especially when high humidity(when snowballs are easily molded).
When using drills, remember that a standard (corded) electric drill typically runs at 2500 RPM, while cordless drills maximum speed is only 1200 rpm. Use the pitch of the drill sound to determine the speed: run the drill at maximum speed, and then reduce the speed to the required, listening to the sound.
Copper brush. Use it after sanding on the stone and before waxing to prepare the structure. Also, a copper brush can be used to remove "cold" ointments (note: they are very hard). Walk the ski in a back and forth motion at a moderate pace with light pressure at 800 rpm. It is necessary to make two passes from the toe of the ski to the heel.
Horsehair brush with medium bristle length (6 mm) and medium hardness. Use to clean the structure from hard "cold" ointments. Walk the ski in back and forth movements at an average pace with medium pressure, at a speed of 2500-3000 rpm. It is necessary to make two passes from the toe of the ski to the heel.
Soft nylon brush with long bristles (10 mm). Use for cleaning the structure from soft ointments and for polishing. Walk the ski in back and forth motions at an average pace with light pressure, at a speed of 2500-3000 rpm. It is necessary to make two passes from the toe of the ski to the heel.
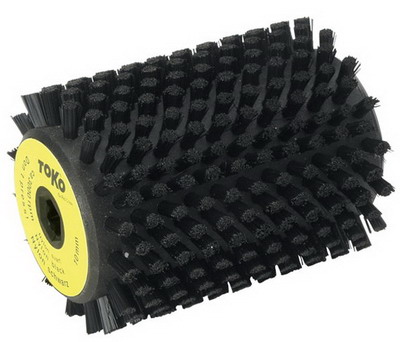 |
Nylon brush with short bristles of medium hardness. Use for grinding, as well as cleaning the structure from accelerators and harsh ointments. Walk the ski in back and forth motions at a medium pace with light pressure at a speed of 2500-3000 rpm. It is necessary to make two passes from the toe of the ski to the heel.
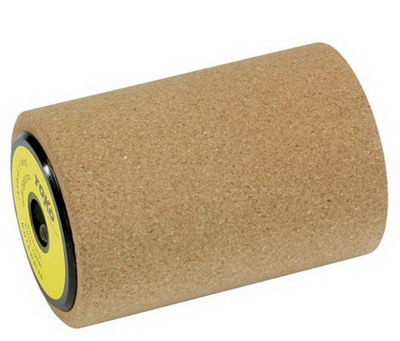
Cork drum. Use to apply 100% fluorine powder and solid accelerators. Due to the heat generated by friction, please reduce the contact time of the drum with the sliding surface of the ski compared to other brushes. Walk the ski in a back and forth motion at a fast pace with very light pressure at 800 rpm.
Before starting, you can finish with a manual cork brush.
 |
It is believed that the special set of a professional football player consisted of "plus 4". Which included: shirt, shorts, long socks or leggings and shoes - boots . However, few people know that at the end of the 19th century, another very important detail- “leg pads” orfootball pads . At first glance, it seems that they are not as important as, for example, boots Or goalie gloves. But without pads, you can only play in the yard. Although you can get injured in street football, as there will be no “armor”.
The first player to wear something similar to football pads was Sam Weller Widdowson football player of the English "Nottingham Forest". In 1874, he wore them to the game over woolen leggings, for which he was ridiculed, but soon after a strong blow to the shin, Sam, as if nothing had happened, began to play on. Since then, players have begun to use such armor in order to avoid numerous injuries. The football circle of authorities even had to include pads in the basic and mandatory equipment of the player.
Of course, today the shields are in many ways different from the uniforms of the nimble and resourceful Sam. Yes, and the pads were a kind of expression of the player's fantasy. For example, the honored master of sports, the goalkeeper of Spartak Moscow, Ivakin Valentin, recalls that his first shields were book bindings and all possible cardboard boxes. Of course, each "armor" was different from each other, Yuri Sevidov (the forward of the red-and-whites of the 1960s) presented leather stripes with bamboo sticks. The head of Spartak, Stepanov, constantly said that shields are simply necessary, because they protect the most painful places.
In general, everyone has already understood that the legs need protection. Therefore, it is not surprising that pads have become a special design stimulus for new solutions in which every football player finds himself. In this case, different materials and colors are used.
After each game, dry the form and pads thoroughly. And then your football armor will break all enemy kicks.
Description: War Thunder is a next generation military MMO game dedicated to...

"Titan Siege" is a large-scale online game on the theme of Scandinavian and ancient Greek...

Being an avid lover of German tank looks, I spent a lot of time...