Description: War Thunder is a next generation military MMO game dedicated to...


A self-made collage can be an interesting decorative element of the interior or a gift for the holiday.
Some do not stop there and use various decorative details to create collages: beads, ribbons, applications, buttons and others. In addition, colored pencils or felt-tip pens for drawing will not be superfluous.
Before you start creating a photo collage, you need to decide on its size and base. So, for example, large photopanels are recommended to be made on a hard surface. This can be a sheet of cardboard of a suitable size or plywood, cork, drawing paper.
In addition to the basics, a concept is also required. It is necessary to draw up a clear plan for what the future collage will be like. For example, for some holiday or travel. Based on the idea, magazine clippings and decorative elements are selected.
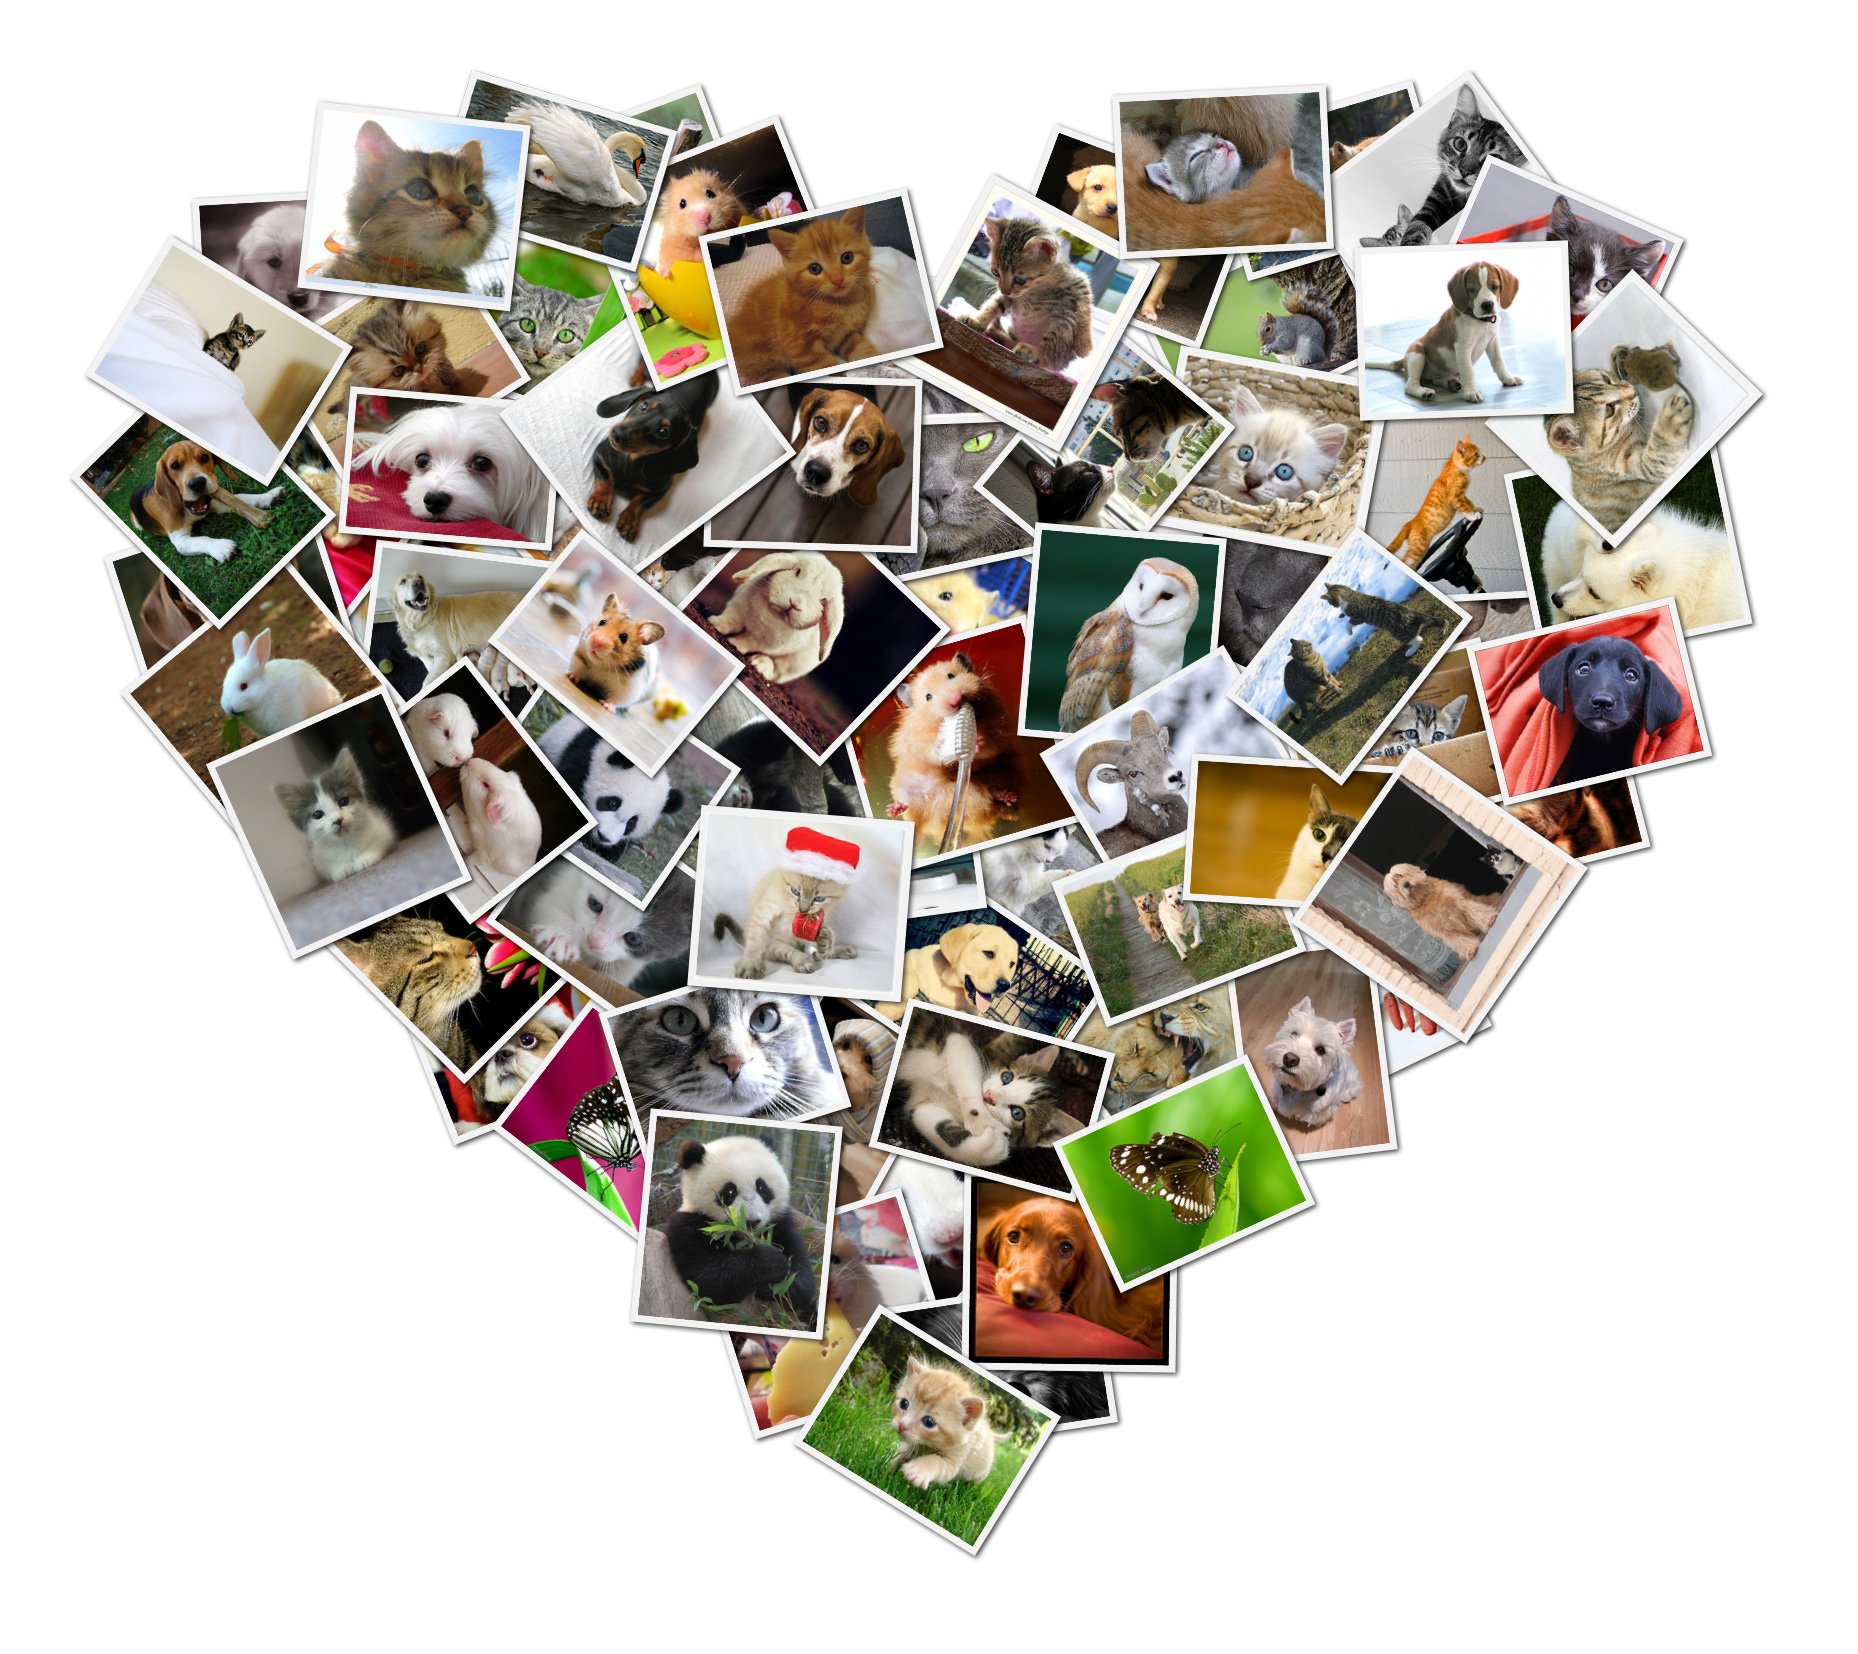
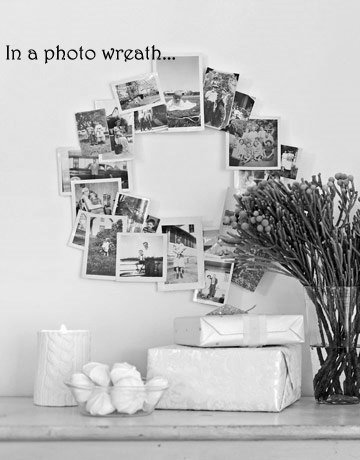
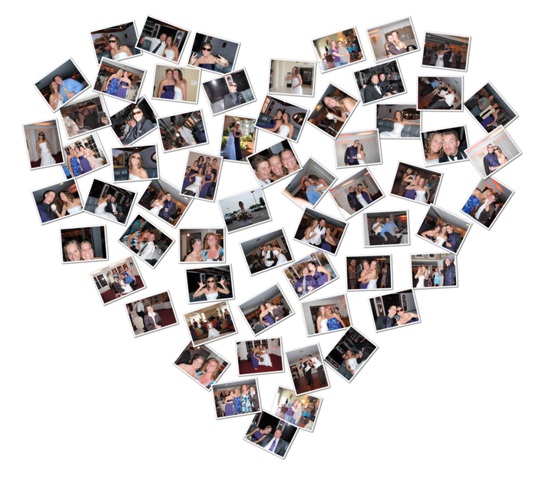
Images do not have to be arranged exclusively consecutively one after another. They can be glued diagonally, overlapped, with different steps between the photo, at an angle. It all depends on a well-thought-out concept. Also, pictures can be pasted in some shape. For example, hearts, filling it with photos of different sizes.
In order for the images to adhere tightly to the base, and excess glue does not come out at the edges, it is necessary to apply it on the photo, stepping back 5-7 mm from the edge. After all the photos are placed in a collage, you can supplement it with decorative elements, painting. Everything that can be glued is glued to a suitable glue.
So, for example, feathers, sand, ribbons hold well on PVA. But, beads, volumetric elements require a stronger glue. For example, from a special thermal gun or rubber-based. Drawing is usually applied either along the edges of the collage or in between photographs and clippings. After the photo panel is ready, it can be inserted into a frame to complete the work.
Making a collage on a computer is even easier, as all you need is the right program. Many support not only the creation mode, but editing, the ability to stick stickers, add signatures, which significantly expands the range of work.
Photo collages created on a computer can not only be placed in in social networks or on the site, but also print later in the photo workshop. If possible, the workshop can choose the right size for printing - from the standard A4 format to large wall collages.
Collage is a great way to express yourself creatively. In addition, with its help to create a completely unique interior decoration. The word "collage" is borrowed from French, and it means artistic application. It should be noted that a collage can be made up of the most different materials, however, it is most often based on photographs. How to make a beautiful photo collage with your own hands?
Master class on creating a collage "Family photo"
Surely you want to leave all the happiest and brightest moments not only in your memory, but also capture them in pictures. It takes a long time to print each photo, and it takes up too much space, doesn't it? The solution to everything is a photo collage that you can easily make yourself.
Tools: Adobe Photoshop CS6 photo editor, favorite photos ranging from 10 to 15 pieces, your imagination and a lot of enthusiasm.
Detailed step-by-step collage creation:
First step: You need to edit and transform the pictures that will be included in your photo collage. To do this, open Photoshop, adding the first photo to it. We will carry out all kinds of necessary operations and functions with it. For example, such as: cropping, removing points and objects, the ratio of brightness and contrast, increasing color saturation or photography in general. If you are sure that this is all you wanted to do with the picture, then save it to a separate folder. Open the next photo and do the same with it.
Second step: After you have finished working with each photo, you need to take care of where your pictures will be placed. We go on the Internet and in the search we find the picture that, in your opinion, is considered the best background for a collage.

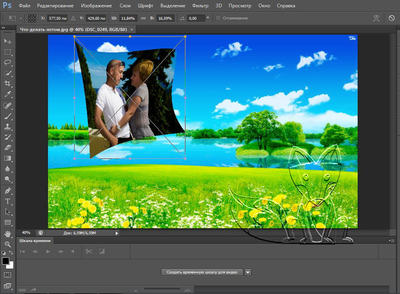
Third step: Now let's proceed directly to the creation of your future photo collage. Open in Photoshop the picture that you have chosen as the basis (background). Next, add the first snapshot to it and start working with it.
Use the warp tool to change the photo, changing its shape, size and orientation. With this operation, your collage will look beautiful and unusual at the same time, as you can give the picture a rather non-standard and unique shell and shape. Everything is only in your hands. Using the "scale" tool, you can change the size and location of the photo, and using the "rotate" function, you can use the ability to rotate the resulting figure (image).

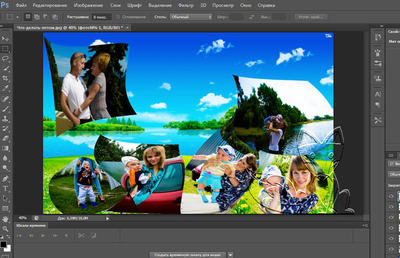
Fourth step: If you are sure that the first object of the photo collage is ready, then save it and proceed to the next pictures.
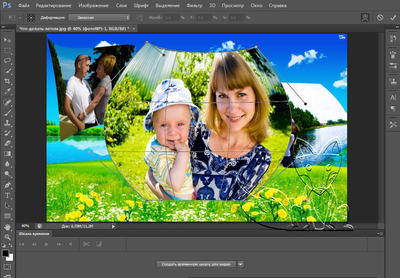
Fifth step: You can also change the shape of the photo in accordance with the previous one while adding a picture, that is, try to fit the shapes of the photos to fit each other.
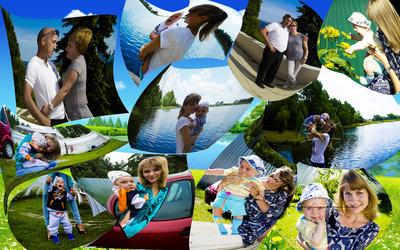
sixth step: We save the last applied photo and proceed to the transformation of an existing collage. Open the "Filter" window in the menu and play with it. Apply a blur effect to hide the borders between shots and add some kind of effect related to the glow (it will be better if these are warm shades). We save the finished photo collage and enjoy the resulting bright family picture.
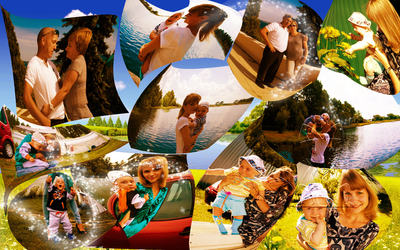
A photo collage is a great option for those who do not want to insert photos in separate frames, but want to admire several pictures at once. It is worth noting that the pictures may well be united by one theme - it can be some kind of holiday, seaside vacation or wedding. However, it is quite possible to afford to create a collage of photographs, selected to taste. The main thing is to let go own fantasy, because the collage should express the whole individuality of its creator.
In order to make a beautiful collage that will remind you of summer holiday, and realize your bold ideas, you need to arm yourself with paper of the required size, for example, whatman paper. In addition, it is recommended to choose materials for the collage, glue, scissors, felt-tip pens, paints, pens.
After that, you can insert a collage of photos into a frame. In order for the picture to take on a complete look, it is necessary to glue several shells and decorative glasses onto the glass.

DIY photo collage - useful tips
To make the collage look attractive, it is recommended to choose photos in a matching color scheme. They can be glued neatly side by side, but pictures pasted in random order look more advantageous. They can be tilted, slightly superimposed on each other, make frames from colored paper, circle with multi-colored felt-tip pens.
You can create a collage on absolutely any topic. For this, postcards, clippings from magazines and newspapers, candy wrappers, etc. are used. First, it is recommended to lay out the selected elements on a sheet of Whatman paper and not immediately stick them on. It is important to see which option will look the most successful. Photos can be placed diagonally, in the form of a pyramid, a mosaic, and some kind of background is also perfect, which will make the work more expressive.
Pieces of fabric, buttons are suitable as additional decorations. At the end, the collage is framed or glued onto thick cardboard.

If you plan to place a collage on the wall, it should create an integral complete composition - for example, with its help you can convey a certain idea or tell a story.
It is also quite possible to make a popular collage of desires. To do this, you should choose pictures of what you want to have in life - a house, a car, a family. In the center, as a rule, it is recommended to place your photo.
You can also use a picture frame to create a collage. To do this, you can pull the fishing line with reverse side and attach photos to it with clothespins. This idea is simple and original. And the best thing about it is that photos can be changed.
When creating this work, it is very important to give free rein to the imagination, we must not forget about the accuracy of the work - only in this case you will get a beautiful collage of photographs that will cheer you up and warm your soul with the best memories.
Do you love making photo collages?
I love it, my favorite hobby 30 220 220 0
Sometimes I play when I have time 66 220 220 0
Would like to try 116 220 220 0
No, a waste of time 8 220 220 0

I made this for my boyfriend's birthday. I didn’t have any thoughts what to do, I just broke my head, and then I just stumbled upon this idea on the Internet. I certainly got creative with this. I printed out our joint photos, bought a frame, various laces, beads, etc. After 3 hours, everything was ready. It seems that everything is so simple and banal, but he really liked it!
For me, a collage is the embodiment of ideas, scope for creativity. In connection with the streak of anniversaries of close friends, she began to make and give collages reflecting them life path, successes, career advancement, issue congratulations. I try to do this, taking into account the nature of my friends and their tastes. Have you tried to make such gifts to your friends? How do they feel about it?
Everything new is well forgotten old. I remember these collages from my childhood. My grandmother, who lived in the country, had huge collections of black and white photographs on the walls, connected by one large wooden frame. Parents did not continue this tradition - then it was unfashionable. and now I myself observe the return of this interesting contraption.
I made a collage of baby photos. Collected there the most favorite photos from birth. I added a maternity hospital tag, children's drawings, our common photo. Everyone liked it. The child now walks, points to pictures and tells who it is. And as a gift, I made a photo collage in the program for my friends. There I added different children's pictures to the photos.
I agree that much new is a well-forgotten old. Collages are wonderful things. I love them very much because just at one glance at a selection of photos, pleasant memories of an event, a trip immediately appear, and this can also be a great gift. close person to convey your feelings. At the same time, this is a creative process that captivates and can even become a permanent hobby.
The idea is certainly good, but for the collage you need to come up with an interior style so that it fits in there. It seems to me that such crafts can be done with a child. When they stick various shells on the frame and draw the sea, stick photos from the rest, then this is somehow vulgar and not original. Another dust collector will work. If we are to make a collage, then it must be original.
Here you read and it seems easier than a steamed turnip, but start doing it and immediately it will turn out, I don’t know what. IMHO, it's better to invite a normal designer and let him plan everything and make the collage itself. Of course, all this is far from free, but the result will be good. And your own kalyaki-paintings are unlikely to decorate your room. Well, unless they leave some memories of the process)))
Tamarka, well, not everyone's hands grow from there))) There are such home-grown masters that designers still have to learn and learn from them. In addition, a collage is not a redevelopment of an apartment. I think that this is also possible for us, mere mortals))) And if the masters do everything for us, then the house will no longer be ours. After all, the place should be decorated by the one who lives in it. So feel free to get to work, and what doesn’t work out doesn’t matter, but the process itself is so pleasant!
My friend made a very beautiful jewelry box for me. On the walls of the box and on the lid there is a collage of my photographs. I don't know how she did it, but she looks very beautiful. It is varnished on top, so there will be nothing for photographs. The usual collage on the wall no longer surprise anyone now. Everyone can do it. And such original things in a single copy.
As an interesting and informative decoration for your home, you can make a collage of family photos or, for example, pictures of your favorite pet. Now we will look at how to make a collage of photos with your own hands on the wall. These are not only even rows of photographs hung on the wall - it can be made in any form, framed or pasted on paper. Some ideas involve decorating the collage with ribbons, buttons, beads, etc.
Here is one of the interesting ideas on how to make a collage: make it from photos of your pet. You can also insert your photos there - after all, you are the hostess.
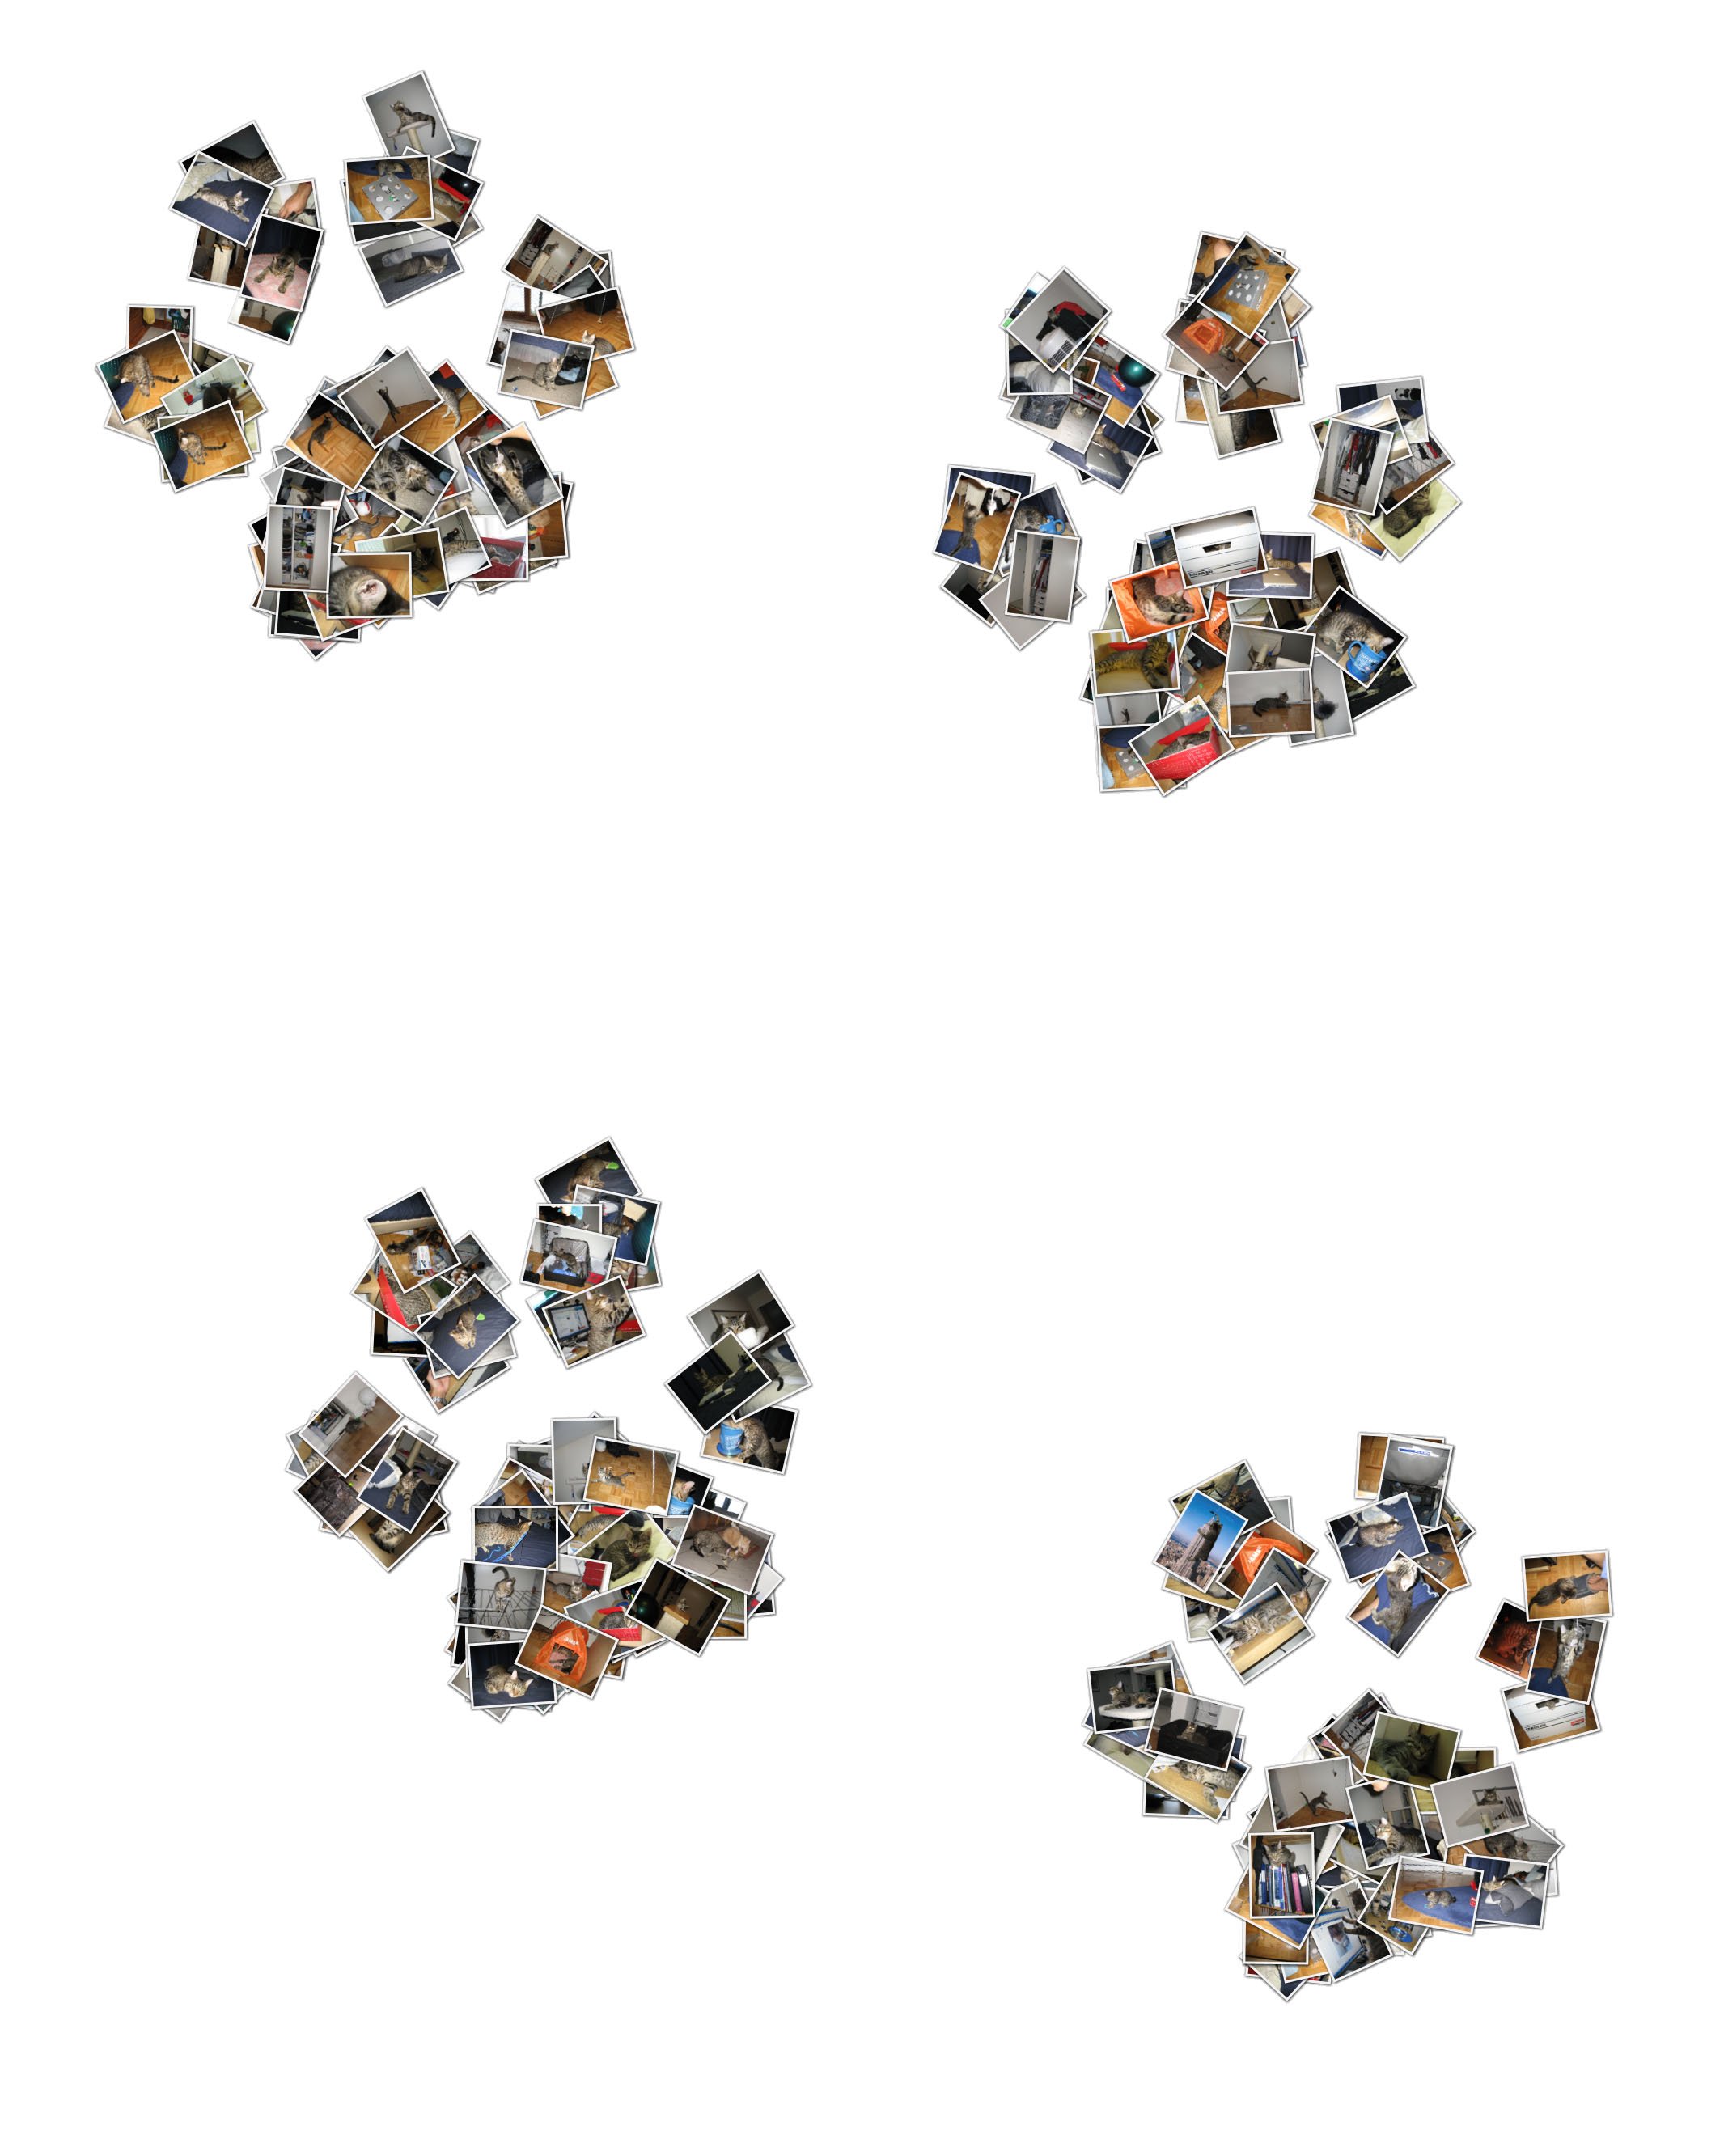
This work is extremely easy to do. A silhouette is outlined on whatman paper, according to which photographs are laid out. You determine the degree of saturation with photographs yourself, but it is better to make sure that there are no empty spots. But the photos should not overlap too much. Next, the pictures are attached with glue. After the glue has dried, for safety, the collage can be laminated and, if desired, placed in a frame.
1) You can place your mini-exhibition anywhere: in the living room, bedroom and even in the corridor. The main thing is that the theme of the collage should correspond to the placement.

2) The main advantage of a collage is that photographs, especially the most successful and beloved ones, do not gather dust in a photo album, but are available for viewing. And now you can see them not only on holidays, when you get a family album for guests, but every day.
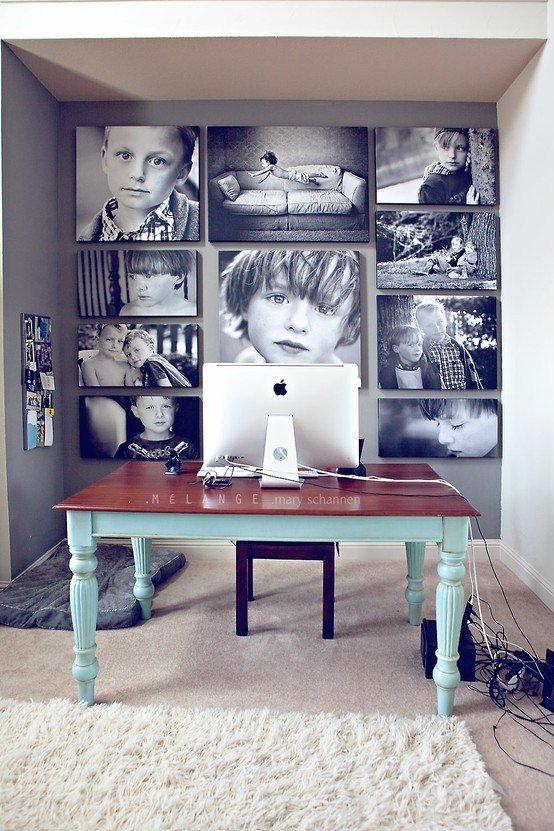
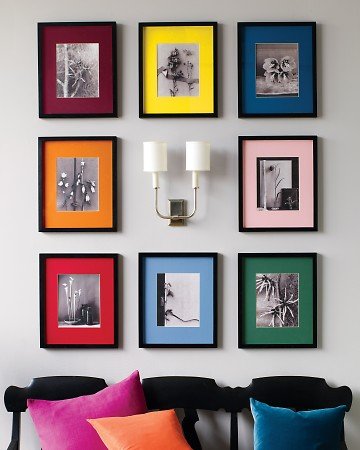
3) To organize the right mini-exhibition, it is necessary to think over, in addition to the subject matter, how to combine all the photos into one. The easiest, but also the most boring option is to buy identical frames and hang pictures in orderly rows.

4) If you categorically do not want to show imagination, buy the same frames, but then in very large quantities. Because to create an interesting collage, you have to hang them all over the wall.
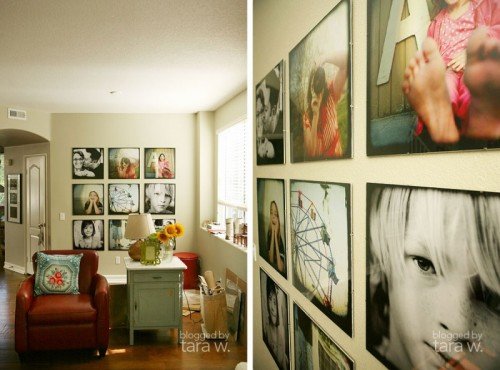
Or get a multi-colored portfolio.
5) Black and white photographs also look good, for which frames are not even necessary. By the way, real photo artists still perform their masterpieces mainly in black and white.
6) Do not post pictures in ascending order. It's not beautiful.

7) Frames can also carry their own idea. They can be not only a frame for a photo, but also an additional focus on it. Frames made by hand look especially advantageous.

8) When creating a collage, choose photos that blend harmoniously with each other.

9) A collage enclosed in a huge frame will look very interesting.

10) Several galleries can be combined into one common gallery.
Here are the basic principles for making collages.
The theme of such decoration can be not only family photos and photos of pets. You can also use landscapes, favorite pictures from magazines, other people's photos. The main thing is that all this should be combined both in color and in semantic load. If you have a rich imagination and good taste, you can even combine your photos with other people's compositions. You can draw a picture with your own hand on a sheet of drawing paper to which the collage is attached. It is better that at the same time you know how to draw, otherwise you can just spoil the overall impression.
In addition, it is not forbidden at all, and even decoration with all kinds of accessories is welcome.
Without noticing it ourselves, we just held a real master class on making a collage from photos with our own hands.
In this video you can see what other ideas there are and how to bring them to life.
Furnishing your home with beautiful interior details is not at all difficult and inexpensive, especially when you can do it yourself. One of these decorations can be a photo collage that will not only fill the empty space on the wall, but will also remind you of the happiest moments in your life.
Acquaintance with the technique of photo collage should begin with the name itself: collage is a word that came to us from France, where it means “sticking”. That is, the basic principle of a photo collage is several photographs pasted on a base (which can be paper, fabric, film, wood, plastic, and so on) of any shape and size. In general, a do-it-yourself collage is created not only from photographs. The main details can be any products of the same subject.
Making a photo collage with your own hands is easy, you just need to turn on your imagination and get all the necessary materials at hand to implement the idea. The process itself consists of several stages, which in no case can be interchanged:
There is a huge choice of basics for creating a photo collage with your own hands: from the simplest paper (whatman paper) to cut-out wood. A simple option is to stick your chosen photos on paper, which you can then color or sign. Styrofoam can become the basis, it will be convenient to attach photos to it using the buttons, and then change some pictures to new ones. A beautiful basis for the collage will be a wooden panel, a cut of a tree. A handmade wooden collage will look stylish in almost any interior.
It is important to choose the right size for the base so that the photos you like fit comfortably over its entire area. Pre-arrange the photos as they will lie on the finished version of the collage. Once you are sure that everything fits perfectly, we start cutting out the shape of the base (heart, circle, square, and so on), paint it or varnish it, depending on what material you have chosen.

As additional decorative materials for creating a photo collage with your own hands, absolutely any little things that you can always find at home can come in handy: old buttons, beads, coins, woolen threads, pieces of leather, and so on. All this will come in handy when designing a collage and will give it a special style, which depends on preferences. Among the mandatory materials that will have to be used for work, we note the following:
Like any painting, a handmade collage will look great in a frame. The composition will immediately become complete and can be hung in the most prominent place. You can buy a ready-made photo frame, order it in a framing workshop according to your size, make it from boards or in any other way. For example, for a photo collage with the theme “Vacation”, you can make a frame from shells that you yourself brought from the sea coast.
Since we live in a high-tech world and store all memorable pictures on a computer, developers have already come up with a lot of free programs that allow you to create do-it-yourself collages directly from digital pictures online and not only. What does it mean that there are so many processing methods that it is impossible to just take and decide on the style of the future collage. Professionals work in Photoshop, where there is a graphic editor with many functions. However, not everyone will be able to do it. How to make a photo collage on a computer using the Photo Collage program of the same name:

It also happens that there is simply no fantasy. You can sit all day and come up with what the photo collage will be like with your own hands, but you won’t come to anything. Help is already coming finished works from well-known and not so famous authors, looking at which you want to repeat the idea and bring your own details to it. On the Internet you can always find thousands of examples of work, among which there is sure to be something that you like. The main thing is to choose the one that you can really do with your own hands from all the options.
DIY photo painting can be made using ordinary boards and ropes. You won’t need any special skills to perform such a task, in addition to really wanting to see a beautiful do-it-yourself panel on the wall from your own photos. What you need to achieve your goal:
We divide the board into 4 equal parts and saw off the edges at an angle of 45 degrees so as to subsequently build a frame. Coat the edges with glue and assemble the frame. With a construction stapler we attach a rope in 4 or 5 rows. You can hang any photos on these ropes using clothespins. Here is such a simple and not expensive handmade panel that will decorate the house or be a great gift for friends. The frame can be painted in any color, the rope can be chosen absolutely any, the same applies to clothespins or other elements of the collage. A collage of photos with your own hands is ready!
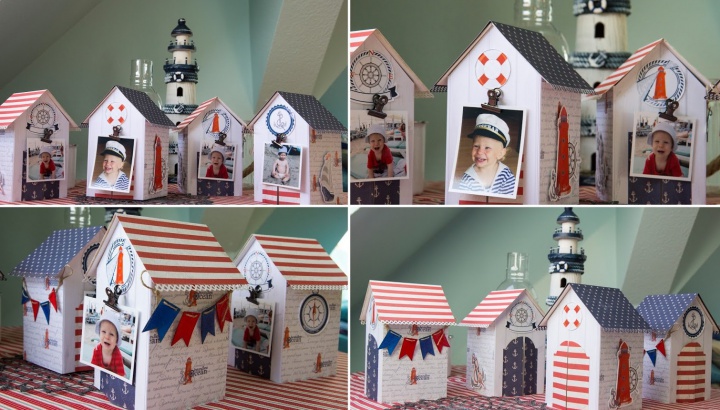
Collecting children's photos in an album is insanely interesting. However, it will be even better if you assemble a fun photo collage from them with your own hands. The easiest way is to use the program on a computer, where you can arrange photos as you like, and then print the finished collage in any size. If you have already printed photos, you can place them on a beautiful children's fabric, decorate with funny buttons and beads, and then pull them onto a frame. Each fragment of your collage should remind you of happy moments in the life of a child.
A collage is a graphic work or picture created by gluing flat or voluminous objects onto a base that differs from them in texture and color. A collage of photographs is a combination of several photographic images on one plane, it reflects the dynamics of time, the rich colors of life, its happiest moments.

We can say that the photo collage appeared simultaneously with photography. In the 19th century, photographers used combined printing to correct the technical features of photographs and add the necessary shades. In the 20th century, a collage of photographs proved to be very popular, it was actively used in advertising, theater posters, printed publications. The foundations of modern photomontage were laid by Welsman and Michaels, who created magnificent images from black and white photographs in the late 50s. They achieved the result we are striving for using computer programs. 
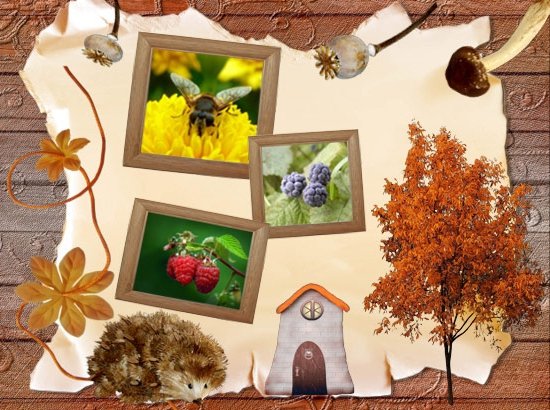
Can do DIY photo collage. This will require thick paper, drawing paper or cardboard, sharp scissors (if you cut out images), glue or double-sided tape, pencil, eraser, felt-tip pens. Using a pencil, you need to outline the outline of the object in the form of which the selected photos will be laid out, then glue the pictures with glue (it is convenient to use an adhesive pencil). You can circle them with a bright felt-tip pen, draw a picture between them corresponding to the chosen plot. Use hard cardboard to create a dainty frame for your collage.
Show your imagination: choose a spectacular way to arrange pictures - diagonally, in the form of a straight or inverted pyramid, mosaic, create a background that gives expressiveness to the work. 
Can create collage of photos using computer programs- Photoshop, Picture Collage Maker Free, Fotomix and many others, you can easily find them on the Internet. One of the simplest Russian programs for creating photo collages is PhotoCollage, and in CoreIDRAW you can create collages that are as similar as possible to those made by yourself. There are also online services that provide the ability to create collages from photos without installing a program on your computer. 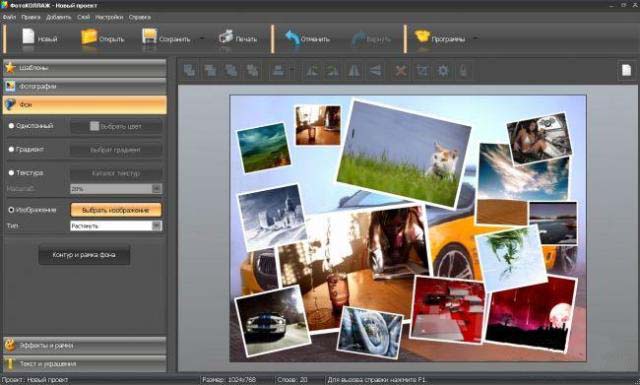
Convey the positive energy of a trip to the sea by combining some funny pictures, collect the best memories from your vacation in a photo collage. 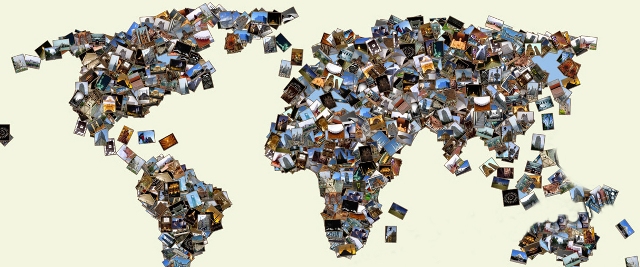
Take a look at your grandparents, for sure you will find old photographs, interesting postcards, letters, newspaper clippings that you can combine together to create a collage - a wonderful and unforgettable gift. 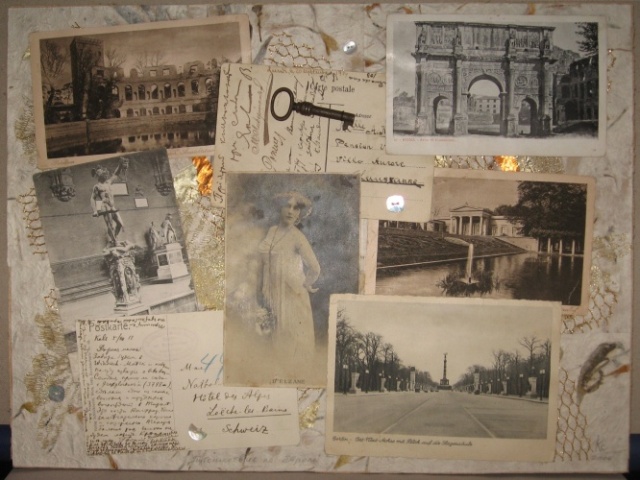
Choose the most romantic photos and combine them into a piece to present to your loved one on your anniversary. 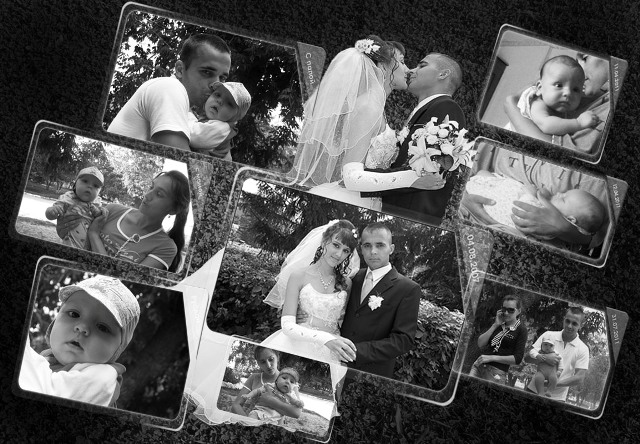
A great way to give the interior of the room originality and revive it is a collage, the creation of which will involve not only photographs, but also other objects. It can be pebbles, dried flowers, beautiful fabric, gloves, watches - whatever you want. Decorate the frame with straws, shells, dry leaves, buttons, lentils, or paint it with unusual paint. Pick up color scheme collage, given what objects it will hang next to. 
Use a picture frame for a photo collage: pull the fishing line from the back and attach photos to it with clothespins. The idea is original and simple to implement, and the most interesting thing is that the photos can be changed at will. Learn also about others
Description: War Thunder is a next generation military MMO game dedicated to...

"Titan Siege" is a large-scale online game on the theme of Scandinavian and ancient Greek...

Being an avid lover of German tank looks, I spent a lot of time...