Description: War Thunder is a next generation military MMO game dedicated to...


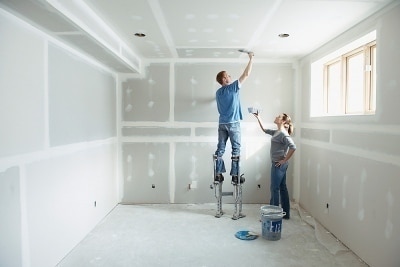
Take care of the furniture
But still, certain preparatory work should be done before installing a false ceiling? How to prepare the room for the installation of this coating? The key to high-quality and quick installation is the absence of furniture in the room. As a result, the installation itself stretch ceiling will be easier to produce, and it will be easier for workers to move around the room.
Large furniture such as cabinets or wall units can be left in the room. However, one should not forget the peculiarity of the suspended ceiling - their joints with the walls are the most responsible and important stage in the creation of the entire structure. This means that the distance between top furniture and the ceiling should be at least 30 centimeters, in addition, the cabinet should not be close to the wall.
Thus, you can significantly simplify the procedure for installing a film and a baguette, which will help to perform better heating of the entire structure during its stretching. Contemporary interior design may include exotic structures, stepped ceilings, or an elaborate lighting system. In such situations, the furniture should move away from the walls, no matter how high it may be.
Finish other wall and ceiling work
Another installation requirement stretch ceiling– other construction work on wall finishing and ceiling ventilation should already be done. In addition, the room must be free from construction debris Because cleanliness plays an important role in this job. Moreover, the installation of stretch ceilings provides for heating the room with the help of special equipment. Therefore, any items that can be damaged by elevated temperature must be removed from the room.
A stretch ceiling should be installed in an already living room. During its installation, a minimum amount of construction debris is generated, and after the film is stretched and warmed up, there will be no waste at all.
How suspended ceilings are installed
The whole process of creating stretch ceilings is not complicated: it is necessary to increase the temperature in the room, a film is stretched along its perimeter. As soon as the temperature reaches the required level, the film is fixed in baguettes. With the help of subsequent heating, the uniform tension of the polyvinyl chlorinated film is regulated.
Making it easy for installers to move around the room will help them get the job done faster. As a rule, it takes several hours to fix the stretch ceiling in one room. However, the area of \u200b\u200bthe room and the complexity of the design can affect this indicator. If you plan to equip the entire house or apartment with tensile structures, this may take several days.
The reward for your work will be a high-quality decorative ceiling. It is practical and durable, capable of pleasing the eye and benefiting the owners of the apartment for decades. And if you prepare a bathroom and install a stretch ceiling in it, then you don’t have to worry if the neighbors forget to turn off the taps. One square meter of coverage can withstand up to 100 kilograms of weight.
Many will agree that without proper preparation, almost any business is doomed to failure. This is also the case with apartment renovations. In order for the work to be done with high quality and serve you for a long time, it is necessary to prepare the surfaces on which the repair will be carried out in advance. In this article, we will discuss with you how the ceiling is prepared for stretch ceilings (in more detail: ""). Stretch ceilings are stretched over an already fixed profile along the perimeter of the room, so some work must be done before installing the profile. But first, we will consider why it is generally worth choosing stretch ceilings, and then we will pay attention to how the preparation for stretch ceilings takes place directly.
It is unlikely that there is another type of ceiling that could replace the stretch ceiling in newly built houses. Why can you say so? In new buildings, a slight shrinkage usually begins over time, and, as a result, cracks appear on a regular ceiling, which greatly spoil appearance apartments. If you have a stretch ceiling installed, then you will never experience such problems. In the worst case, the canvas may deteriorate, but replacing it will not take as much effort and money as completely repairing the ceiling.
Another undeniable advantage stretch ceiling - the ability to retain a large amount of water without losing its properties and without letting a single drop into the room. According to some manufacturers, one square meter of canvas can easily withstand up to 200 liters of water. This property will be especially useful for those who are sometimes “flooded” with water by neighbors from above. You should not wait until the ceiling overflows with liquid, so you need to remove water in a timely manner. This can be easily done by removing the sheet and then draining the water and cleaning the surface. After that, the ceiling is mounted back and is ready to further protect your room.
Stretch ceiling allows you to use a variety of types of lighting, whether it is LED lighting, spotlights or something else. With it, you can create a unique atmosphere at home without worrying about the technical condition of the ceiling.
Although the following property of a stretch ceiling is not unique, it provides great benefits to those who live in a room with increased humidity. Our type of ceiling is resistant to bacteria and fungus, so you will never see mold or other damage that is associated with the activity of microorganisms.
There are other advantages of using a stretch ceiling. Let's briefly list them:
All these differences distinguish the stretch ceiling from other types of ceilings. We hope that the information provided has helped you finally decide on the material that you would like to see in your apartment. Now it's time to start practical work. Let's look at how the preparation for stretch ceilings is carried out.
Proper preparation before installation is simply necessary so that in the future there will be no problems, including sagging of the web, condensation and other troubles. The canvas itself should be installed only after all technical and finishing work has been completed, such as preparing electrical wiring, leveling walls and ceilings, installing windows and doors. In general, preparation for installation can be divided into two categories: preparing the ceiling for stretch ceilings and preparing the room. You don’t have to prepare the room especially, since all the repair work takes place on the ceiling. But the preparation of the room still plays a huge role, so we will start our description with it.
It is advisable to remove all personal belongings and furniture from the room before the start of work. This will free up extra space and protect things from getting dirty. The furniture must be taken out first of all, since the fragile canvas can tear if it comes into contact with the sharp edge of the object.
However, there are furniture that cannot be taken out of the house due to its size or heavy weight. In this case, it must be moved to the middle of the room and covered with plastic wrap so as not to stain the surface.
If you want to install a wardrobe, then try to do this before starting work on the installation of stretch ceilings. Install a special bar on the cabinet, which is necessary for attaching the canvas.
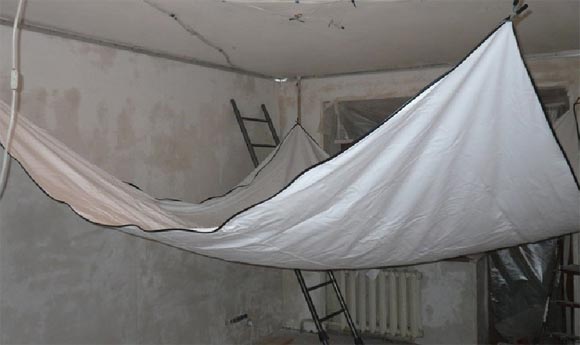
Of course, it is better to carry out any repair work without an established floor covering. But if it is already there, then it is necessary to protect its surface from damage by tools, ladders or moving furniture. It is best to cover the coating with thick cardboard that will not slip, but at the same time provide reliable protection. Although the risk of damage without protection may vary depending on the specific type of coverage, it is better to do the extra work than to regret your mistakes later.
There are three stages that are included in this subcategory:
Although such works are not the preparation of the foundation itself, they can be well placed in this category. The mounting surface does not require special preparation, as it will be completely hidden under the opaque canvas. This allows you to significantly save on the work of leveling the ceiling. But it is desirable to clean those areas where pieces of materials fall off so that they do not injure the canvas.
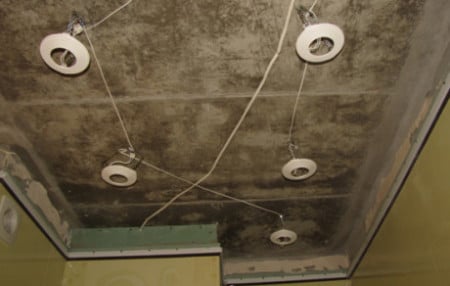
It is necessary to decide on the lighting even before you begin work on its installation. All lighting fixtures must be purchased in advance so as not to be interrupted during repairs. The described step is very responsible, since improper installation of lighting can, at best, reduce the shelf life of the ceiling, and at worst, lead to injury to your household.
Many lamps get very hot during use, which is unacceptable for stretch fabric. Therefore, the maximum power of incandescent lamps can be 60 W, and halogen lamps - 35 W. The power of other types of luminaires, such as LEDs and energy saving lamps, not limited. In this regard, you are provided with a wide selection of lamps. different type glow and different power. So that your room does not look gloomy, choose warm glow fixtures.
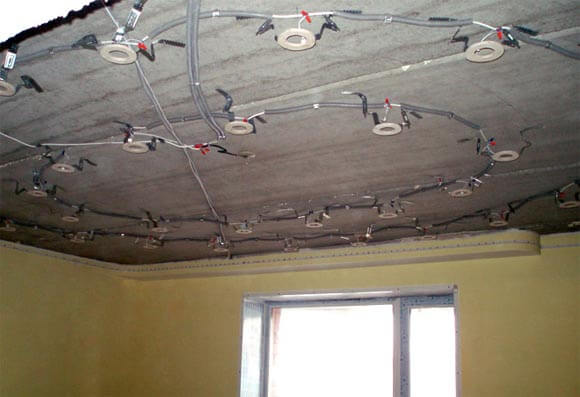
After that, designate places for lamps on the ceiling. Try to place them evenly so that the entire room is lit equally. Then you need to separate the wires and check their performance. At this stage, it is also necessary to clarify the placement of ventilation systems and other elements that will be located on the ceiling. Although later access to communications will be possible, for this you will have to partially dismantle the canvas. Therefore, make an effort to complete all the work as accurately as possible before installing the stretch ceiling.
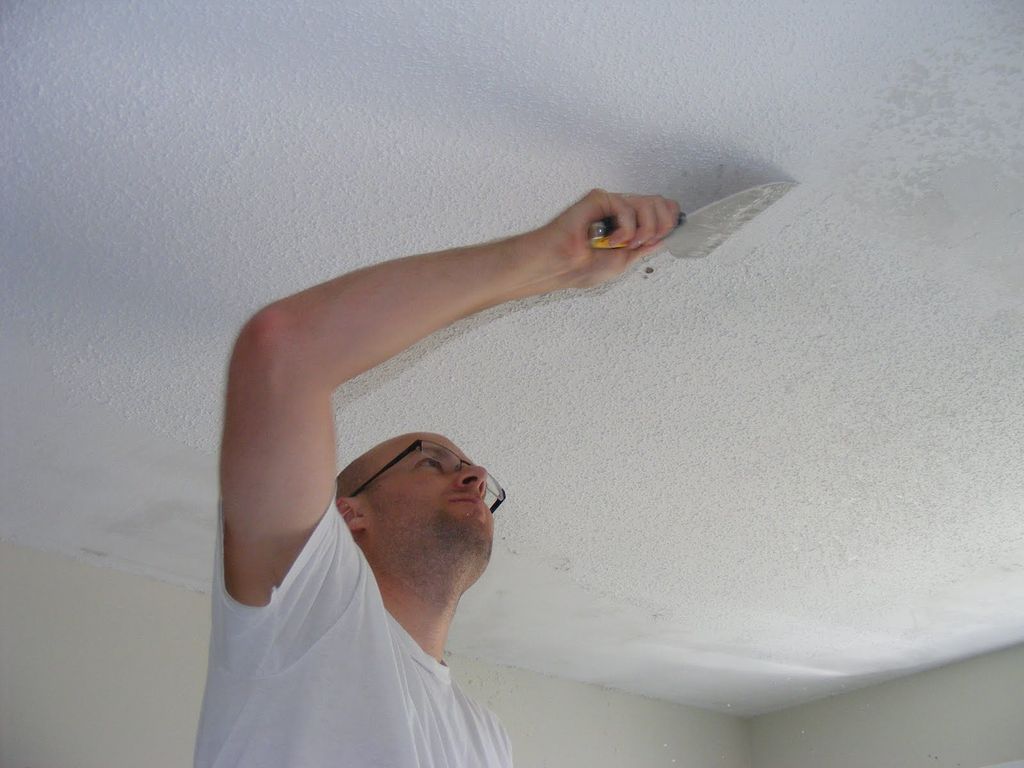
If you have not yet carried out repairs in your room, then prepare the walls for decoration in advance. This includes removing old paint, old wallpaper, surface leveling and other work. It is impossible to perform these works after the stretch ceiling is installed, as dust will settle on it. For the same reason, you should not glue the wallpaper before the ceiling is ready. Dust and other defects in the wallpaper will be even harder to remove than on the ceiling.
The degree of preparation of the walls depends on what work will then be performed. If you plan to stick ordinary wallpaper, then it is enough to get rid of the old finish. If you want to apply plaster or liquid wallpaper, then clean everything down to the concrete slab or brickwork. Along the way, remove all nails and screws, and also expand the cracks.
All surface defects must be removed. Deep cracks are sealed with gypsum, and then smeared with several layers of plaster. It is enough to cover large, but not very deep cracks with a cement-sand mortar (in a ratio of 1: 3), then apply gauze with PVA glue and putty the area. Each next layer is applied only after the previous one has completely dried.
After eliminating the defects, you can proceed to the full puttying of the wall. Puttying is carried out only in one direction, vertical or horizontal. You need to hold the spatula in different ways, depending on the surface. For example, to cover cracks, the spatula must be held at an angle of at least 30 degrees. Remember that the greater the angle to the wall surface, the thinner the applied layer will be. To avoid thickening of the mass, stir it from time to time with a narrow spatula. After the first layer has dried, clean it with a special abrasive grater, and after 24 hours with fine sandpaper.
In the end, it is necessary to prime the surface to strengthen it and remove dust. If you could not find a special solution for this on sale, try making it yourself. This is not difficult. In boiling water, gradually add 100 grams blue vitriol, 500 grams of carpentry bone glue and one bar of laundry soap, which can be crushed for convenience. Within 20-30 minutes, this mixture should boil on fire. After that, strain the resulting liquid through a fine sieve, and the primer is ready for use. Apply it in a thin layer with a fly brush to the surface.
How to prepare a ceiling for installation of a stretch ceiling, detailed video:
The installation of the profile will begin from the lowest point of the structure. It can be calculated by retreating about 6 cm from the base base. This distance will be the minimum height of the tension structure.
Things will be more difficult with multi-level stretch ceilings, since for each level it is necessary to apply markings separately, and the geometry of space must be strictly taken into account. Depending on the shape of the ceiling and the number of levels, the distance will increase.
The main advantage of a modern coating is that a different base can be used to mount matte or glossy canvases. However, situations are possible in which it is simply necessary to carry out preliminary work on the preparation of horizontal surfaces. In order to avoid various problems in the future, you need to know in advance how to prepare the ceiling for a stretch ceiling.
Particularly popular in recent times purchased films with photo printing applied to them. The unusually designed top of the room will become a bright accent of the entire interior.
All preparation of the ceiling for stretch ceilings consists of a certain set of works, many of which can be easily done on your own, without resorting to the services of specialists.
Preparation for the installation of stretch ceilings is required in several cases:
Large recesses and the junction of the stretch ceiling and walls are filled with mounting foam to completely eliminate the movement of air flows inside the structure, otherwise the PVC material will vibrate.
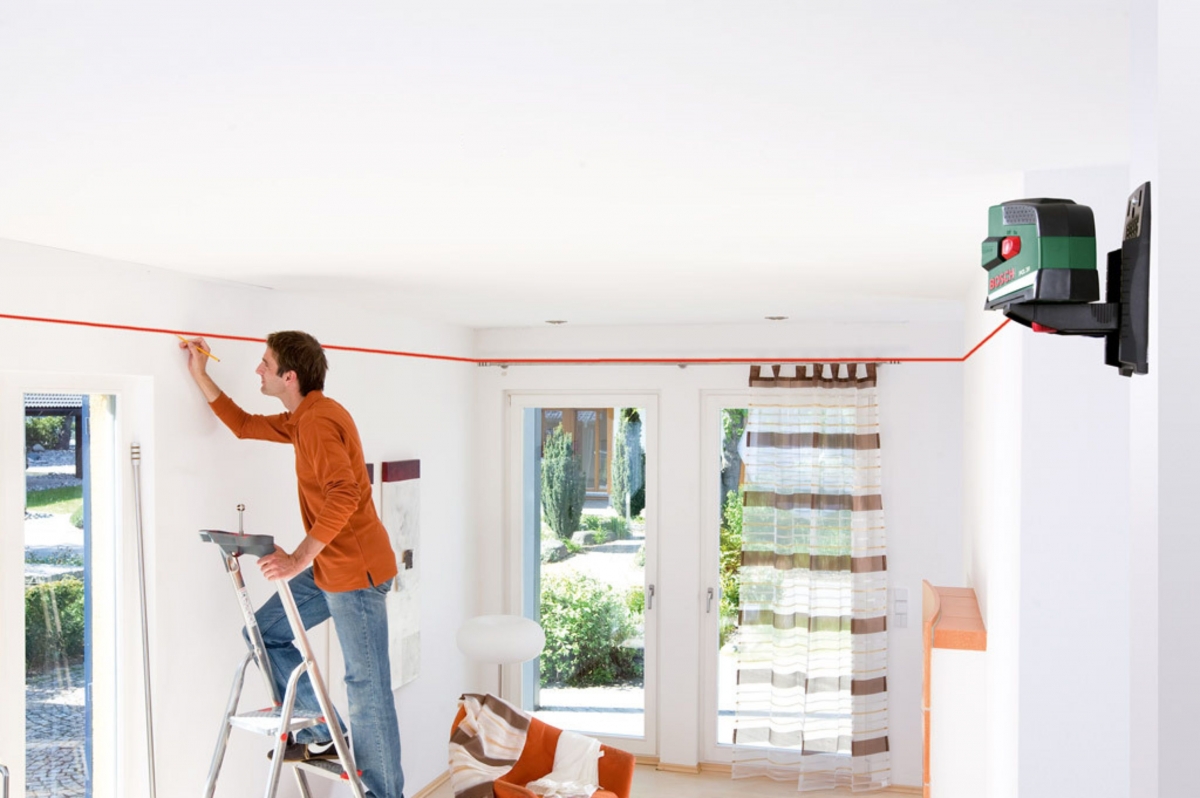
After the number of levels of the ceiling structure is known, the necessary light sources are selected and the height at which the PVC film will be installed is determined, they begin to apply markings on a horizontal surface.
To create markup you need:
The location of the lamps is transferred to the already prepared ceiling from the previously drawn up drawing or the position of the hanging chandelier is determined.
Curvilinear lines and circles are applied in a certain way:
To create smooth or curvilinear lines, you can take a thin elastic bar of the desired size. The rail is set according to the applied control marks and outlined with a pencil.

Preparing the premises for the installation of a stretch ceiling must necessarily include determining the exact location of the fixtures on the film. Holes cut in the wrong place cannot be masked, so you need to decide in advance on the choice of size and the exact number of lighting fixtures.
When creating lighting in a residential area, certain quality factors should be taken into account. PVC characteristics canvases:
Important! In order to avoid a health hazard, it is necessary to check the correctness of the electrical wiring used before installation.
So that the decorated room does not look gloomy and uncomfortable, designers advise choosing lighting fixtures that have a soft warm glow.
If necessary, preparation for a stretch ceiling may include work related to the placement of various communications and ventilation systems. After the repair, these systems will be securely hidden, and if necessary, the finished coating will need to be dismantled.

Sometimes in the process of work it may be necessary to lay a layer of insulation. In this case, when installing stretch ceilings, surface preparation can become a little more complicated.
Professional builders advise using mineral or basalt wool cut into slabs. Sheets are installed directly on horizontal floor slabs using special dowels. In this case, the PVC material acts as a vapor barrier.
If a vapor-permeable linen or satin coating is used to create a tension structure, then additional vapor barrier must be carried out.
It should be noted that, despite the seeming ease of the preparatory process, you should not do all the work yourself. The lack of certain knowledge and experience can adversely affect the quality of the work performed, and even cause breakdowns and emergencies.
Before the installation of stretch ceilings begins, the room should be prepared for the upcoming work.
To begin with, you should check the joints of the interface with the walls of the ceiling, since in these places there may be micro-holes leading to the street or to neighboring rooms. Usually, this problem concerns new buildings. If such a defect exists, it must be eliminated. If the ceiling coating is not processed, then it should be covered with a special bonding compound, which is suitable as a primer. This procedure is necessary so that small particles from the surface do not crumble onto the tension fabric. If tiles or wallpaper are pasted on, then they can not be removed, but only if they are securely fastened.
In the process of installing a stretch ceiling, if you do not know design features rooms, they can be damaged by a drill or puncher. Therefore, before carrying out work, this point should be clarified, and only then can work begin.

Ideally, before starting the installation of stretch ceilings, all furniture should be removed from the room. If this is possible, then you should move it away from the walls at a distance of at least sixty centimeters. Cover all furniture in the room with a cloth or film. Household appliances, electronics, carpets, flowers, antiques should be taken out of the room without fail. It is unacceptable to leave children or animals in the room at the time of installation work.
Before you start installing stretch ceilings, you should complete all painting and plaster repairs. All walls must be covered with wallpaper before starting installation work. It is important not to forget that wallpapering must be done up to the highest point of the wall, almost to the very ceiling, despite the fact that the ceiling will be lower after the installation of the stretch fabric, and will hide the topmost line. Another important nuance is that from the moment the room is pasted with wallpaper to the moment the stretch ceiling is installed, at least two days should pass, but it is best to wait three days, since the structure of the wallpaper is different, and it is necessary that they dry completely before starting work with the ceiling . The fact is that if the wallpaper does not completely dry out, then excessive moisture can provoke damage to the stretch ceiling. If there are carpets, paintings or icons on the walls, they must be removed for the duration of the ceiling work.
To carry out the installation of the stretch ceiling canvas, the temperature in the room heats up to about 30-60 ° C, therefore, if plastic windows located in this room, slopes with a border in the form of plastic corners, then they must be protected from overheating so that they do not deform. For protection, you can use ordinary masking tape. The windows themselves will not suffer in any way, since only thin plastic window fittings are prone to deformation.
If the floor installation has not yet begun, then it makes sense to carry out this repair work after the installation of the stretch ceiling. In the event that parquet or laminate is laid on the floor of the room, they must be protected from possible damage, such as scratches or dirt. For protection, you can use ordinary cardboard boxes, or, alternatively, put a thick cloth or film on the floor. In order to prevent the protective fabric from slipping, it can be fixed with tape.
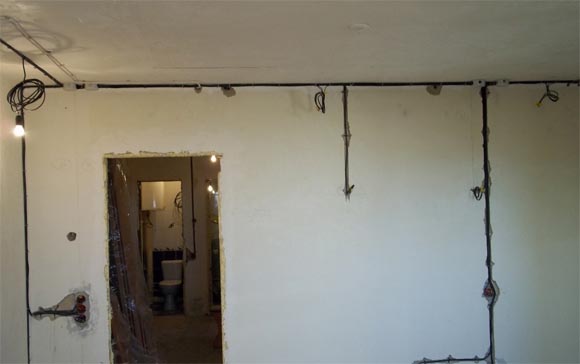
Before starting installation work, check the quality electrical wiring, which is located on the ceiling, as well as clarify the location of the ventilation system.
If you decide to make stretch ceilings at home, your choice deserves approval. This finish has many advantages, including the original appearance. In this case, the decorative canvas is stretched over a metal profile (baguette) fixed around the perimeter of the room. Prior to this, the preparation of the ceiling for the stretch ceiling should be carried out. What it is and how to do it, our article will tell.
Try to make the most of the space
If you carefully prepare in advance, then your finish will have the following advantages:
Before tensioning the canvas, those stages of construction production that are associated with dust and dirt should be completed:
Important! After the preparation of the room and the ceiling for stretch ceilings is hung, the room should be closed so that there are no temperature drops. It should not fall below +10 degrees.
So, let's start everything in order.
Clean and putty walls and floor slabs
Work on the installation of a tension structure should take place in the most free room. Therefore, free it in advance from furniture, household appliances, personal belongings, indoor plants etc. Move heavy cabinets to the center of the room, and cover the floor with cardboard (it can be scratched by a stepladder). All this is necessary so as not to damage the delicate PVC film or artificial fabric during installation.
When preparing the ceiling for stretch ceilings, do the following:
Note! With this finish, the ceiling does not need to be leveled and painted, because it will be hidden from view by decorative material. But by taking the above steps, you protect it from further damage by small falling particles.
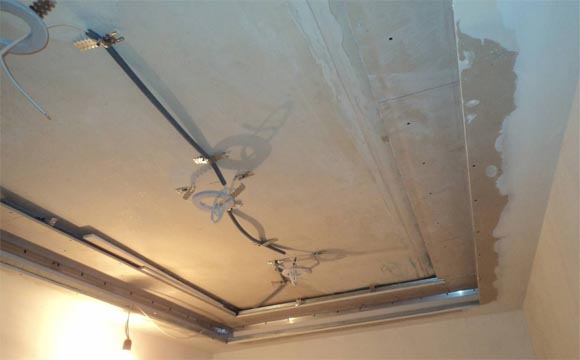
Preparing the ceiling before installing a stretch ceiling provides that electrical wiring will be carried out and places where lighting devices should be located - chandeliers or spotlights.
Make electrical wiring in advance and outline the location of the fixtures
On a note! Use up to 60W incandescent bulbs or 35W halogen bulbs to keep the artificial material from getting too hot. When choosing energy-saving LED lamps, the incandescent power does not matter, since they practically do not heat up.
Be sure to check the quality of the wiring done and specify the location of the ventilation pipes and other large elements that will hide the surface of the future ceiling. This is necessary so that later you do not have to dismantle the already stretched canvas.
At this stage, you need to act in the following sequence:
Important! Wallpaper should be pasted after the installation work is completed, otherwise they may be damaged.
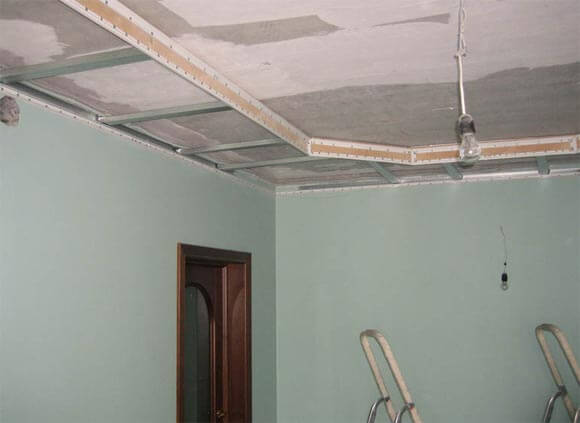
After completing these works, we begin to prepare the ceiling for the installation of a stretch ceiling, in other words, we make markings for attaching the profile.

Marking, installation of the profile and tension fabric
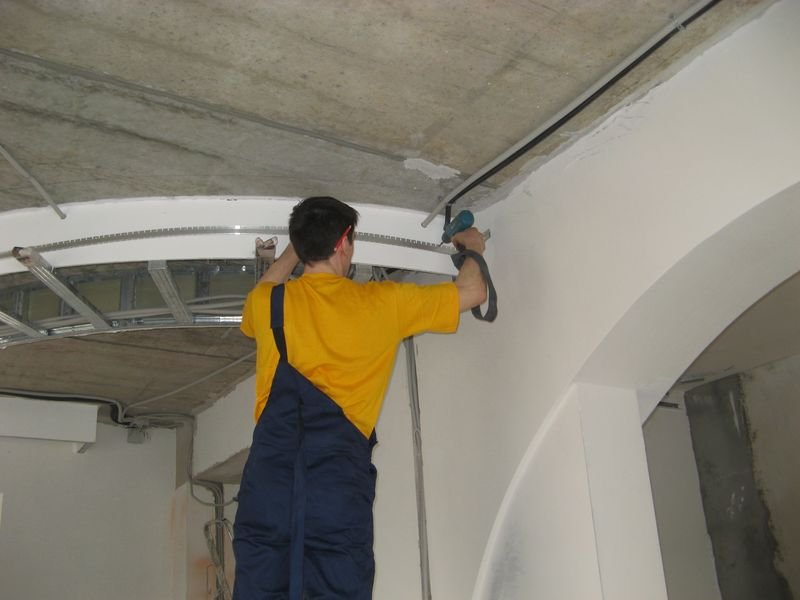
The decorative canvas will be mounted on an aluminum or plastic profile. You will need to fix it on the ceiling or walls with dowels "self-tapping screws". But before that, you need to do the following.
Now you know how to prepare the ceiling for a stretch ceiling. It covers different sides construction process and takes quite a lot of time. But if you don't do all of the above, your finish will suffer, either during or after installation.
We hope that our article will help you to complete the work in accordance with all the rules and enjoy a great finish for a long time. Good luck!
Description: War Thunder is a next generation military MMO game dedicated to...

"Titan Siege" is a large-scale online game on the theme of Scandinavian and ancient Greek...

Being an avid lover of German tank looks, I spent a lot of time...