Description: War Thunder is a next generation military MMO game dedicated to...

Installation of stretch ceilings is a time-consuming process that scares away many beginners. Indeed, in order to solve the tasks set, it will be necessary to prepare a sufficient set of tools, to study technical part, purchase equipment and materials.
At the same time, some points should be thought out even before fixing the stretch ceiling. One of these issues is the installation ceiling cornice. What types of cornices exist?
What installation options should be preferred? How much will the job cost? Each issue requires detailed consideration, which we will do.
The main advantage of ceiling cornices is the ease of installation. Most often, the fixation of the product occurs to the usual (base) ceiling, which is a concrete slab.
In such cases, there are no problems with fasteners, and all work (even for an amateur) takes no more than 15-20 minutes.
The situation is different when we are talking about drywall constructions. It should be borne in mind here that drywall structures cannot withstand a large mass. That is why it is recommended to give preference to light cornices and curtains.
If the task is to hang items made of heavy fabric, then the fastening should be carried out not to the ceiling, but to the wall.
The task is more difficult if you want to attach a ceiling curtain under stretch ceiling. Here you have to think, because it is impossible to fix the baguette directly to the PVC film - it will deform, and the ceiling will lose its appearance.
Here you will have to look for other options, which are listed below.
How to make a curtain under a stretch ceiling? There are three mounting methods:
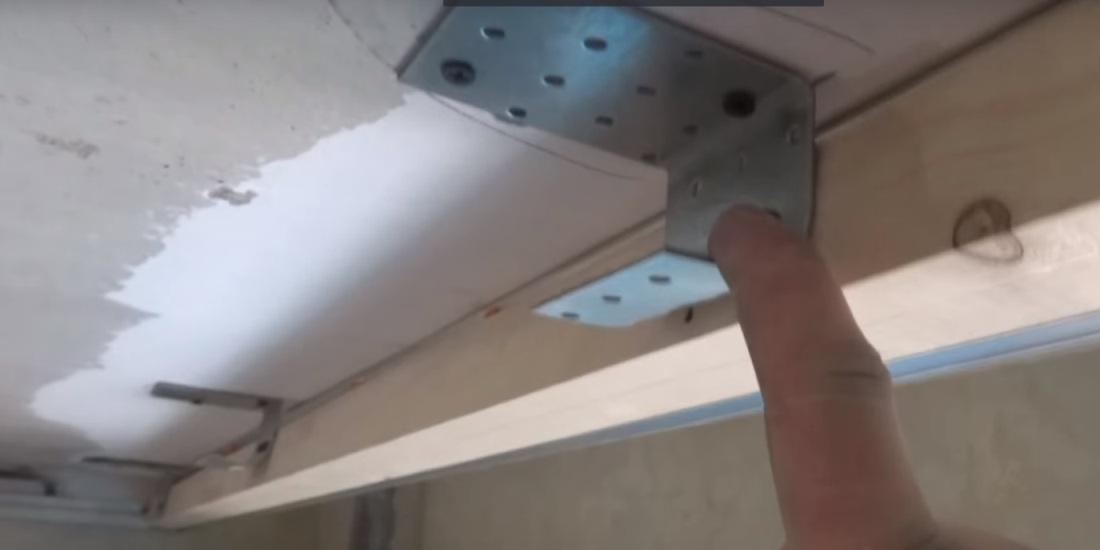
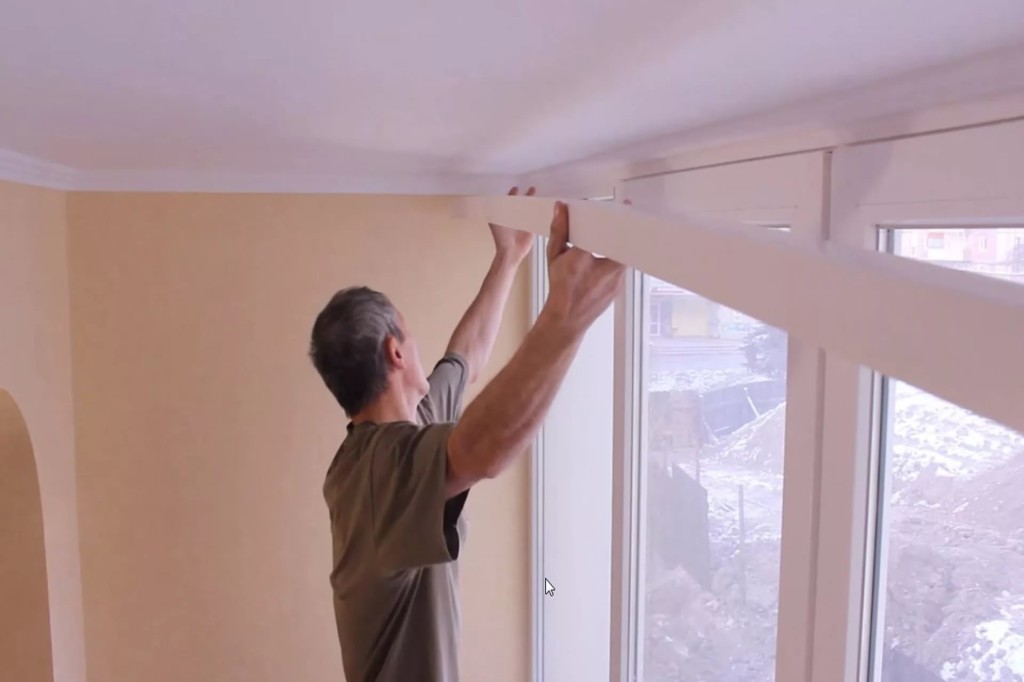
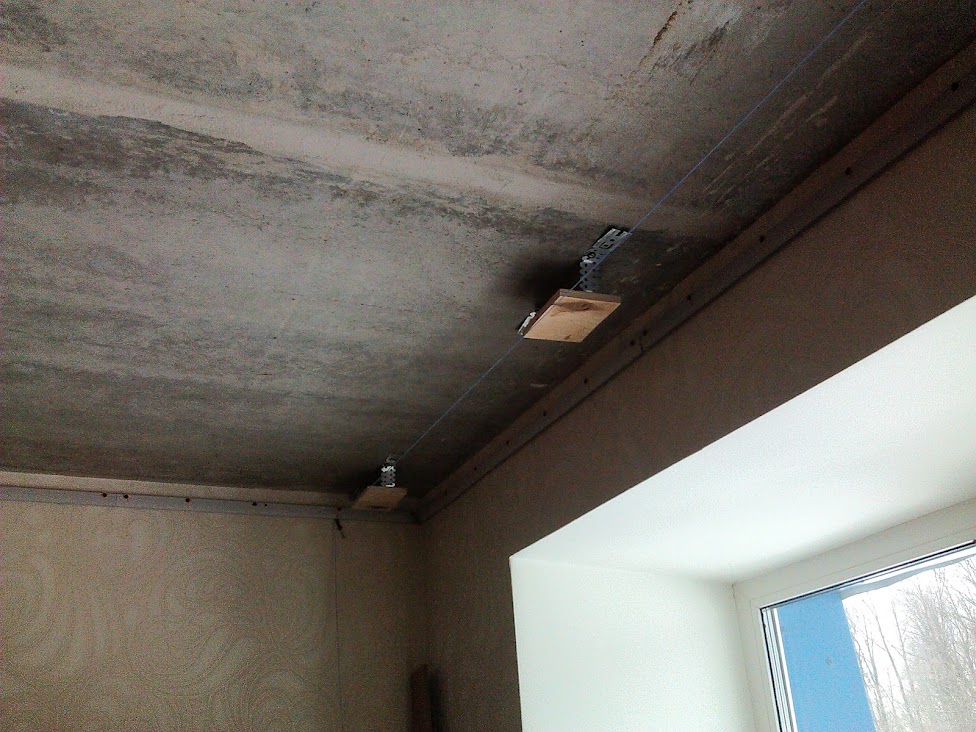
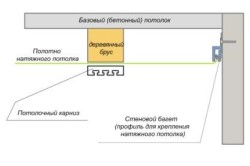
1. The first option is to fix the eaves on the tension structure. In this case, the installation is carried out using a base mortgage. A wooden beam is attached to the main ceiling, after which a PVC film is attached.
In this case, the bar is located behind the stretch ceiling (closer to the window). Next, a tension structure is fixed to the beam. Plus - in covering the entire area of \u200b\u200bthe ceiling.
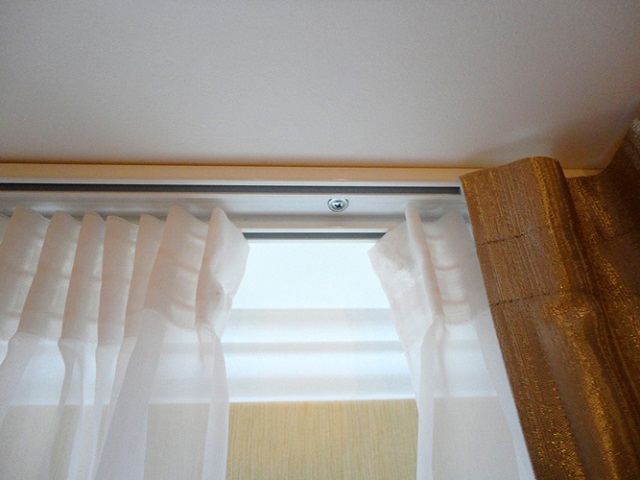
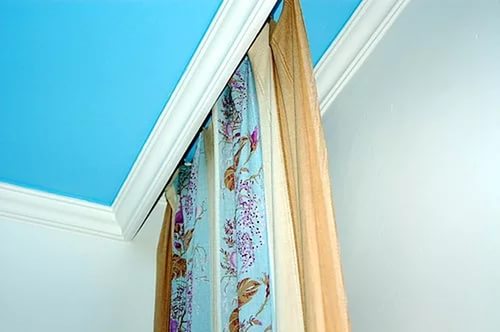
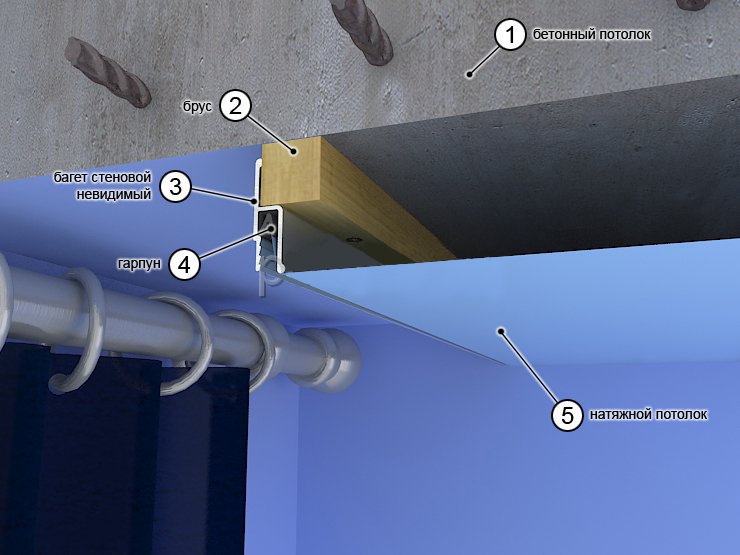
2. The second option is the installation of a cornice in a special niche (mounted near the window). It is in this design that the cornice is attached. Here, a bar is drilled to the base ceiling, located 25-30 cm from the window.
A wall profile is attached to the bottom of the beam, where the PVC film is inserted. With this design, the stretch ceiling does not reach the window, forming a niche.
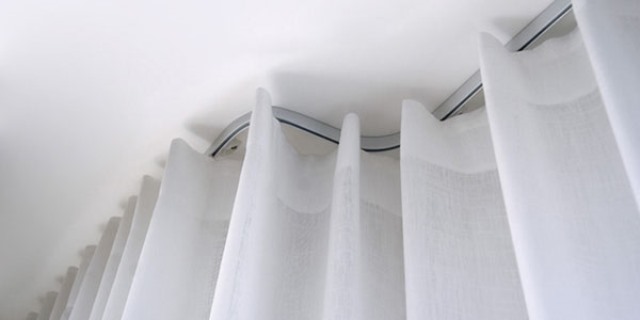
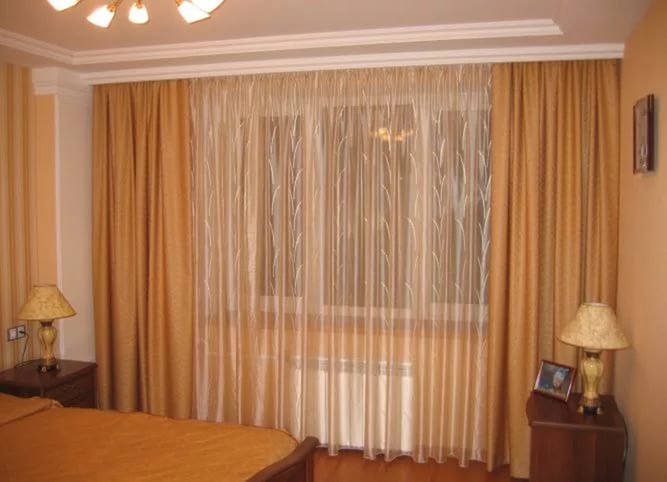
The resulting space is enough to install the cornice to the main ceiling. This option is considered "hidden". The advantage is a unique visual effect, due to which the curtains seem to fall from the tension structure.
The video shows design feature hidden curtains under the stretch ceiling
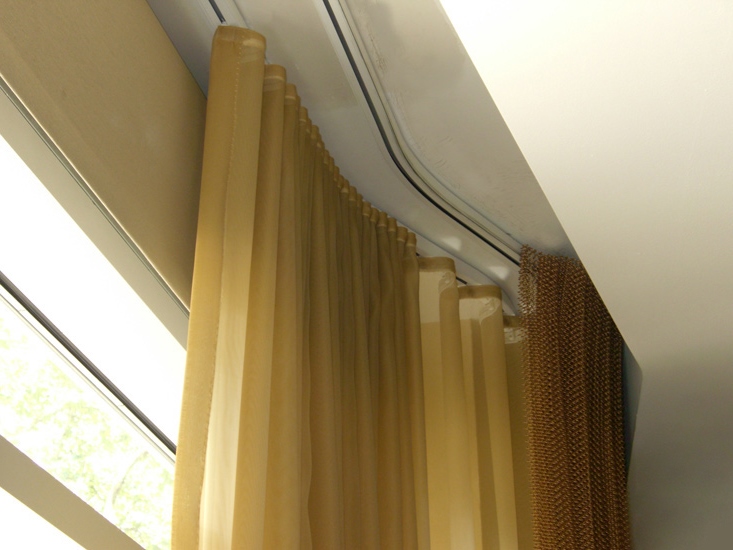
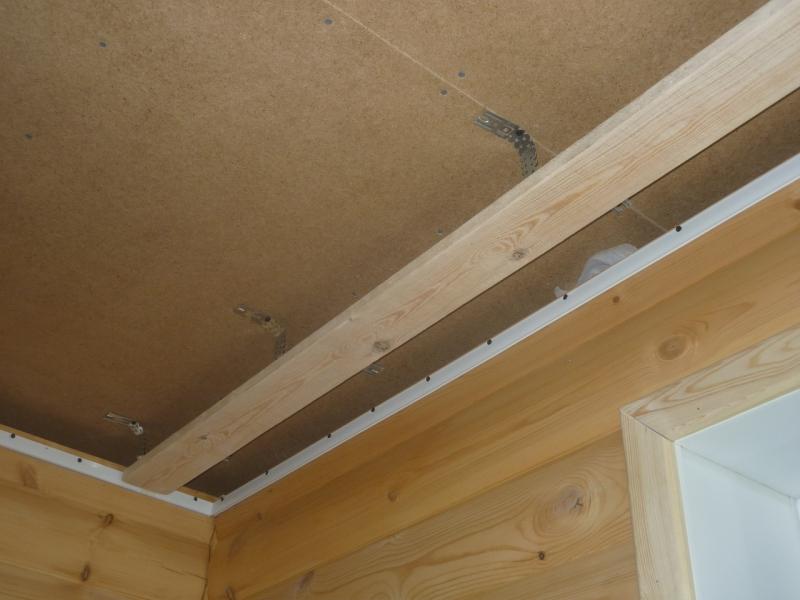
3. The third option is similar to the second one, with the only difference that the thrust beam is hidden behind a PVC film. This type of performance is considered the most aesthetic.
To implement the task, a beam is attached at a distance of 20-25 cm from the window, after which hidden profiles are fixed to the latter, where the film is refueled.
Thanks to the use of two types of profile (ceiling and bending), the fabric is bent and the beam is hidden behind the plane of the ceiling structure. Next, the cornice is attached to the main ceiling of the room.
The latter method is considered the most expensive, but this is easily explained - it is the most aesthetic, difficult to perform, and the space behind the timber is reliably protected from dirt and dust.
In addition, the resulting niche can be used to install spotlights or LED lighting.
Below we will consider in more detail the open and hidden method of mounting the eaves.
As discussed above, the open method of mounting the eaves is the easiest to perform and affordable.
Here the installation is performed according to the following algorithm:
Advantages of the option - ease of execution, high speed installation, minimal cost.
An important point in the process of performing work is the installation of curtains under a stretch ceiling. It is important to strictly follow the sequence of actions and a number of rules.
People who put aesthetics first, prefer installing a cornice in a hidden niche. But how to hide the curtain under the stretch ceiling so that it looks the most aesthetically pleasing?
Here the algorithm of actions is as follows:
There is an opinion on the Internet that only professionals with extensive experience and special equipment can handle the installation of a stretch ceiling. But it's not. If you have certain knowledge and tools, you can do the work yourself.
To understand the compatibility of the cornice and stretch ceilings, you should know as much as possible about the types and features of products that exist on the market. All cornices are conditionally divided into ceiling and wall.
According to the material, the cornices are classified as follows::
All considered types of cornices are presented in different colors, which allows you to choose the best option.
All cornices are conditionally divided into three types:
When choosing curtains, it is worth considering a few tips:
Before you buy a curtain for a stretch ceiling, and decide on the type of cornice.
At the same time, it is worth presenting total costs for the purchase of the product and its installation.
So, installing an open curtain under a tension structure (when ordered from specialized companies) will cost 500-700 rubles per linear meter.
It is worth knowing the cost of curtains, which varies depending on the type.
Here the rates are as follows:
In addition, there are certain costs associated with the purchase of accessories.:
As for the installation of a hidden curtain, here the cost is higher - 700-900 rubles per linear meter. Here, in the role of a cornice, the use of a ceiling type of construction is allowed.
If the installation is carried out personally, then first of all it is worth focusing not on costs (they are approximately identical), but on the availability of certain skills and the planned design.

To figure out how to attach a curtain to a stretch ceiling, you should know the options and advantages of each type of attachment.
Before starting the installation, it is worth studying the prices and photos of the curtains under the stretch ceiling. The section above is devoted to the cost of doing the work.
As for the photos, here you should pay attention:
The more information in front of your eyes in the form of photographs, the more accurately the work will be done, and the better the end result. In this case, there are always two ways:
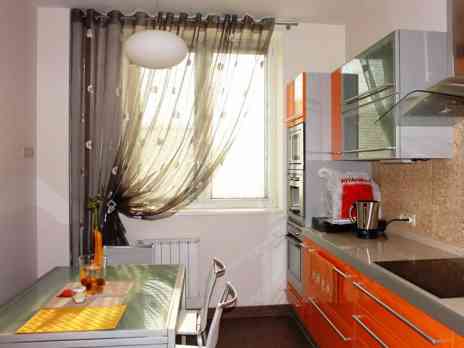
When carrying out repairs, every detail must be taken into account, including the design of the window. The question of how to fix the ceiling curtains must be addressed even before the start of the repair.
Decorative framing gives the room its own personality, increases the level of comfort. Methods for attaching curtains to the ceiling will tell the article.
The installation of ceiling curtains should begin with measuring the size of the required cornices and determining the type of curtains that are preferred.
This should:
It is advisable to provide protrusions on both sides of the opening of 15 - 40 centimeters, which depends on the width of the window.
There are several ways to install a baguette on the ceiling.
Their features are presented in the table:
| Advantages | Flaws |
|
|
|
|
|
|
|
|
|
Low structural strength, which limits their use with a significant weight of curtains. |
|
|
|
|
For fastening curtains and curtains, special rings are required. |
|
|
|
|
|
Tip: Ceiling curtains should be chosen so that they fit into the overall concept of the room. A simple plastic structure in an antique-styled room with a massive chandelier and imitation of wooden beams would be inappropriate: in this case, it is better to choose a dark-colored wooden structure.
Before you fix the ceiling curtain, you should choose the right product in accordance with the design, material and dimensions of the structure.
For this:

Preference should be given to a lightweight plastic construction.
This will make the room visually wider.
The installation of a ceiling curtain depends on the type of coating on the ceiling in this room.
They are:
Special preparation is not required when installing curtains on a reinforced concrete or wooden ceiling.
To work, you need to purchase:
Work instructions:
Tip: Usually plastic and wooden cornices have pre-drilled holes for attaching them. Do-it-yourself marking of the installation of the structure should be carried out along these holes.
How to attach a ceiling curtain in a room with a suspended plasterboard ceiling or PVC wall panels?
This can be done in three ways:
The eaves are fastened with self-tapping screws to the existing frame through drywall or plastic panel.
Tip: Anchors for fastening should be chosen for a screwdriver, and not with nuts.
How to hang a ceiling curtain on a stretch ceiling?
Tip: When installing a fabric stretch ceiling or PVC film with a harpoonless mount, this cannot be done in any way. In this case, it is necessary to choose a regular curtain to the wall.
When planning the installation of such a ceiling, there are no problems with fixing the eaves. But preparation is required.
For this:
Tip: The cornice should be fixed before the fabric is stretched. This will reduce the risk of damage to the thin film.
The video shows how to fix ceiling cornices in detail.
Modern technologies make it possible to fix cornices on the ceiling with liquid nails, which can withstand a load of up to 80 kg / cm². To begin with, it is carried out preliminary preparation- the base is cleared.
For this:
Properly selected fastening of curtains to the ceiling allows you to emphasize and complement the interior of the room. At the same time, a not very successful option will be very striking and spoil the overall impression. To correct an error in choosing a cornice, you can use lambrequins or decorative strips that hide an unsuccessfully selected curtain mount.
Straight curtains made of plastic do not have a large selection in terms of color. However, their relative cheapness and the simple installation of curtains on the ceiling with their own hands make this particular type of ceiling cornice very popular.
Plastic curtains are characterized by standard lengths. Although this parameter is not so significant, since any length can be obtained by increasing an additional piece of a similar curtain, and the excess can be cut off.
Since the direct-type plastic curtain is light in weight, its installation is possible in specially designated niches of a suspended and stretched ceiling type.
In a set with curtains, fasteners and structural components are supplied. Some kits provide a ready-made track solution with a pre-existing hole for attaching to the ceiling surface. But there are also products of this kind in which holes must be made independently. Consider how the curtains are installed on their own according to the second scenario (without a hole for mounting).
Back to index
The set of tools you will need to install the curtain:
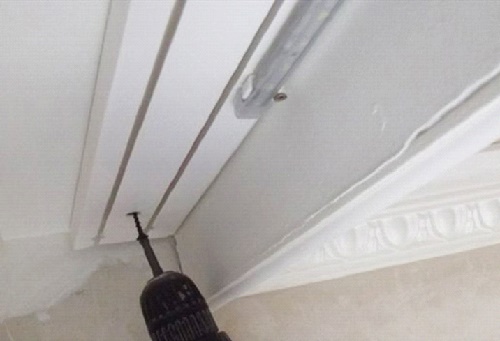
Using a perforator, make a hole in the ceiling. If there is no desire to see how concrete dust scatters throughout the space during drilling, you can substitute a tube from a working vacuum cleaner. For such manipulation, you will need a partner who will hold the vacuum cleaner tube. In the absence of such, it is possible to install the curtain with one hand, and with the other hand, you can bring the vacuum cleaner tube.
Plastic plugs are inserted into the ceiling holes separately from the screws. After that, the installation of the curtain occurs as follows: it is again lifted up and, with the help of a clamped bit in a screwdriver, the self-tapping screws are twisted.
At this step, the installation of the curtain (basic installation steps) is considered complete.
Aesthetically unattractive visible holes in the plastic are masked with self-adhesive furniture plugs. They are selected by color. This problem does not arise if the plugs are included with plastic plugs.
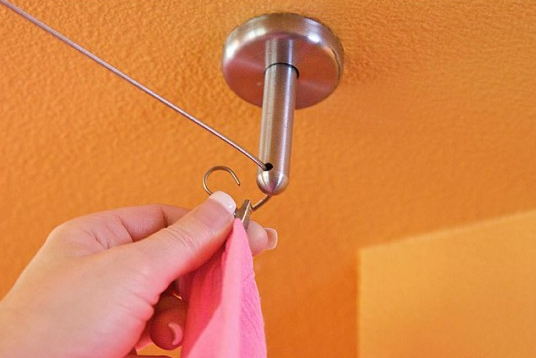
And in conclusion, I would like to tell you how to properly hang the curtains to the eaves. Indeed, many complicate their task by first hanging hooks on the curtain, and only then they cling curtains to them. Such an approach is wrong and even difficult.
It is much easier to do the opposite: hook the hooks on the eyelets on the curtains and then bring them to the ceiling rail.
The installation of curtains with such a sequence of attaching curtains is especially applicable for high ceilings - from 3 meters or more.
But there is also a drawback: if you have already made a suspended or suspended ceiling, without providing for the installation of such cornices, then installing a ceiling curtain will be impossible.
When making repairs, we strive to fulfill everything in at its best. When it comes to decor, our task is to decorate the room beautifully and comfortably. That is why it is better. This option will visually make the room higher, hide uneven corners in the room, and the convenience of their use is beyond doubt.
The first step is to understand what result you want to achieve in the interior. If your goal is to cover the entire wall with curtains, take appropriate measurements from wall to wall. Please note: it is better to choose a cornice of a slightly shorter length than you measured, and not cut the finished product.
Installation of the ceiling cornice can be made on any rigid base.
When mounting curtains to a concrete or wooden base, use a level to check the ceiling for unevenness. When there is a significant skew, it is very difficult to attach the product.
When you need a long cornice, you can join several pieces. And this is done in advance, before installation. The product is cut off with a hacksaw or grinder. You can also use a regular hacksaw with a small tooth.
Back to index
Required tools:
Back to index
We drill holes in the eaves. The scheme of fastening the curtain to the stretch (suspended) ceiling depends on the location of the embedded elements of the base. For other types of ceilings, we mark up as follows: a hole in the center, from which we evenly distribute the remaining holes along the entire length of the product (at a distance of 40 cm). If your cornice has several tracks, holes are needed in each of them.
Now we act depending on the type of overlap:
For a concrete floor, we apply the structure to the ceiling and mark the attachment points with a pencil. For a wooden ceiling, it remains to attach the cornice with screws and hang hooks. We make holes in the concrete ceiling with a puncher. Length about 5 cm.
We insert the dowels into the holes, apply the product and fasten it with screws. When you have inserted the hooks for the cornice, it remains to secure them with special plugs. The complete set of ceiling cornices includes both those and other elements.
Attaching curtains to the ceiling is not such a difficult task. But the appearance of the room will depend on how correctly the calculations are made and how smoothly the structure is attached.
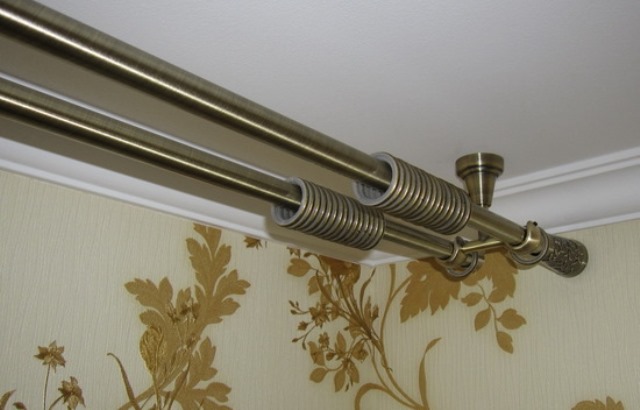
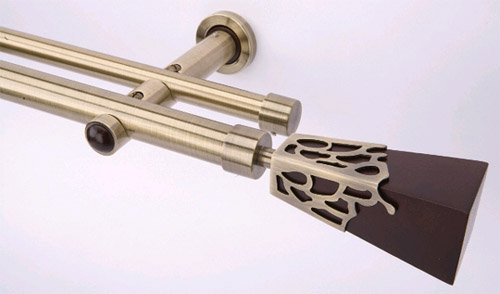
That's the repair and finishing work left behind. The choice of curtains and cornices according to your idea is carried out. The next step is the installation of curtain rods. Their purpose is not limited to a practical function. In the design of a modern apartment or cottage, the cornice should be considered primarily as an addition to the interior. Experienced home master any task is up to the task - whether it is the installation of a string cornice or a lifting mechanism for Roman blinds. But for beginners, nevertheless, it is recommended to start with the installation of round cornices, which include all the necessary fasteners.
Depending on what materials they are made of, cornices can be metal, plastic or wood. According to the type of construction, they are divided into single-row (only curtains or only tulle), two-row (both curtains and tulle) and three-row (curtains, tulle and lambrequin). Of course, the installation of multi-row structures will require more experience and skill, but it gives more scope for creating extraordinary volumetric compositions.
When carrying out installation, an inexperienced master may have a question: how to make a curtain rod reliable. It must be remembered that the more complex the design of the cornice, the greater its weight. So, the stronger should be the surface on which the installation will be performed. Otherwise, the probability of collapse of the structure increases. Therefore, sometimes you have to sacrifice the aesthetic aspect in favor of the safety of loved ones and choose a lighter design.
To make heavy curtains fasten more securely, you can add a small amount of epoxy resin to the hole prepared for self-tapping screws and insert fasteners. Installation of the cornice is continued after the resin has completely dried.
The following tools and materials will help to significantly speed up the process of installing the eaves:
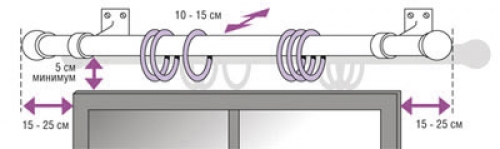
Before starting installation, you need to make sure that the cornice does not interfere with opening the window. Another important point- so that the curtain does not lie on the window sill, the brackets must exceed its protruding part in length. It is necessary to take into account the dimensions of the heating pipe if it runs along the wall at the location of the eaves.

When marking under the brackets using a tape measure and a level, pay attention to the distance along the edges of the window opening. It should be the same, except for the case when the installation of the eaves is carried out along the entire wall.
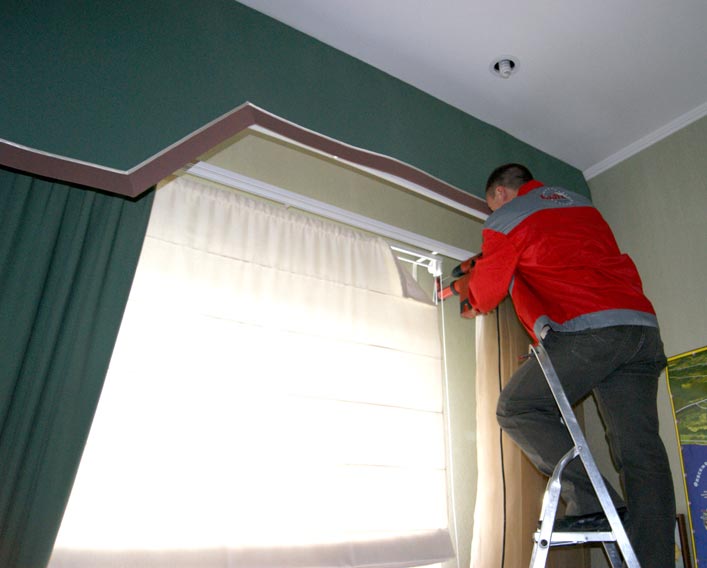
Usually, the installation of a wooden or plastic cornice bracket is carried out with one self-tapping screw and a dowel, and a metal one with three.
First you need to drill holes for the dowel and install it there. Then the bracket is fixed with screws. Before the second bracket is fixed, check the distance again. After docking with the rod, you should check the reliability of the connection.
Rings on the bar are put on in advance. The rod is fixed in such a way that one ring remains behind the bracket (in front of the tip) on each side. It is much more convenient to first put the hooks on the curtain, and only then attach it to the rings.
On each edge of the rod, you can wear decorative fleurons. A variety of decorative elements along the edges of the rod will not allow the last ring with the curtain to slip off.
Even if you have no experience in installing cornices, do not be afraid to try to do it yourself. Many salons selling curtains and even builders provide such a service as installing curtain rods (the price depends on the length and model of the curtain rod).
When buying a cornice, check the presence of fasteners. Sometimes it is better to replace the standard fasteners with a more suitable one. For installation in loose walls, you will need self-tapping screws and dowels 5 * 80.

If the length of the round cornice exceeds 2 m, then a third additional bracket for fixing in the center is indispensable. In this case, it is reasonable to opt for an open-bracket design, where the rod with rings is simply threaded into a small recess. Then it will not be necessary to remove the cornice from the wall every time.
When installing the ceiling cornice, make sure that the curtain protrudes slightly beyond the edge of the window sill and radiator.
To keep the folds of the curtains even, use a special edging tape top edge, equipped with cords for assembly, they pull the curtain together by adjusting the size of the folds, and only after that, rings are put on every 10 cm.
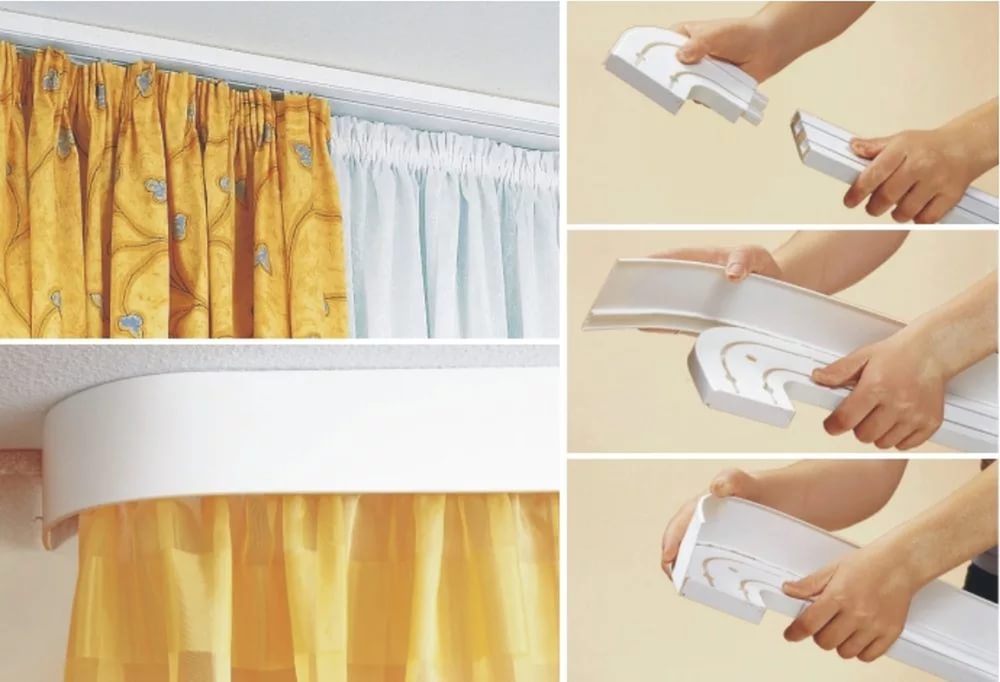
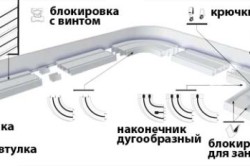
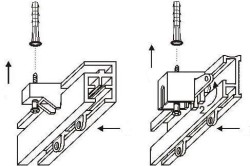
It is possible to mount the rail target cornice both to the wall and to the ceiling. The flexibility of the design allows you to install such cornices on bay windows and other non-standard window openings. Rail curtain rods are supplied complete with screws, brackets, stoppers, sliders and rings to prevent slipping, rollers and hooks.
The latest of the range of rail curtain rods are equipped with a mechanism for "overlapping" the runners, which allows you to close the curtains with an overlap if necessary. Such a cornice looks less massive and fits well into the interior. But, unfortunately, such a mount is only suitable for curtains made of light fabric.
The installation of the rail cornice also begins with markings. When installing the cornice on the wall, the edges of the brackets are placed 5-7 cm above the window opening. When mounted on the ceiling, the distance from the wall depends on the features of the layout, as well as the size of the heating radiators and should be at least 10 cm.
In the process of mounting the rail cornice above the bay window, marking with a tape measure is somewhat difficult. Everything must be measured carefully. Therefore, in order to determine the location of fasteners, it is better to use a level.
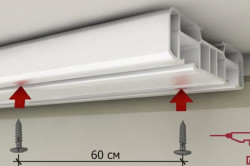
In addition to the extreme points of the rail, it is necessary to note the places where the brackets are installed. To do this, you need to put marks on equal segments (about 25 cm) along the entire length. In the marked places, you will need to drill a hole, and then, using the screws included in the kit, carefully screw the bracket.
Now a rail must be attached to the front side of each bracket. At the final stage of installation, you need to tighten the adjusting screws located on the brackets along the entire rail. Only then are limits set.
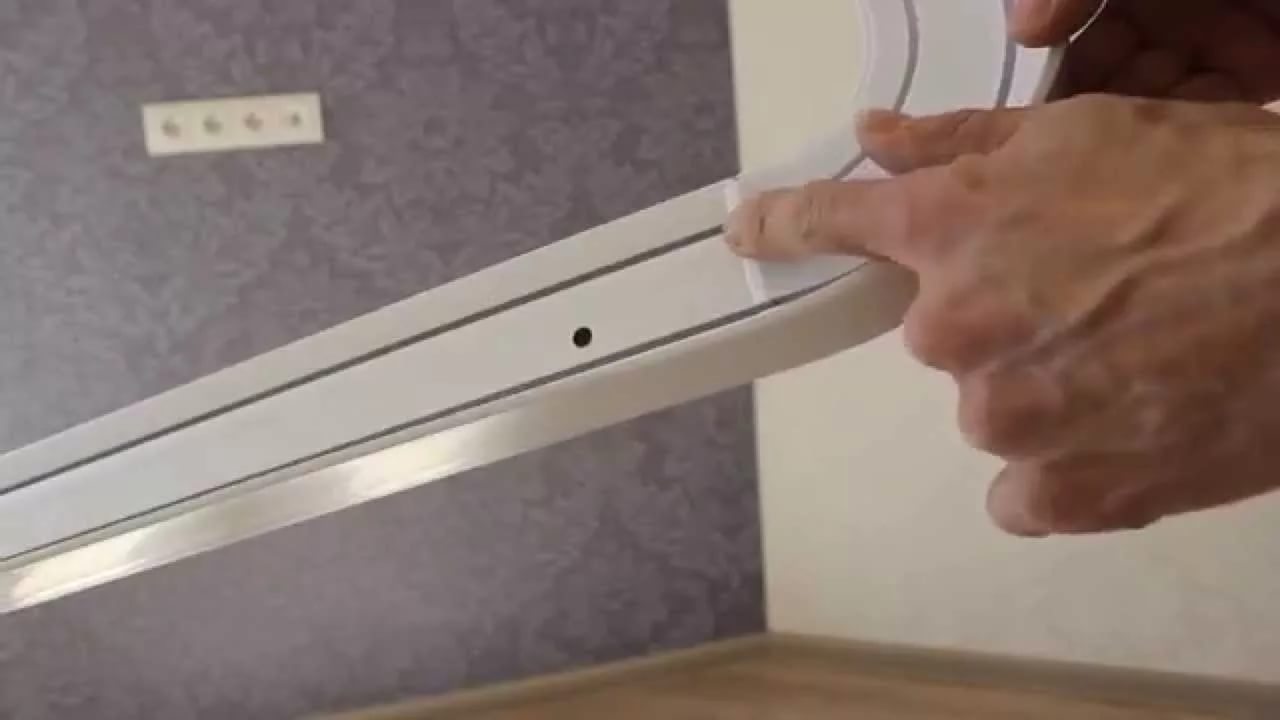
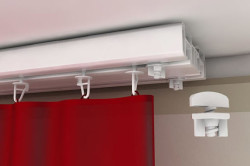
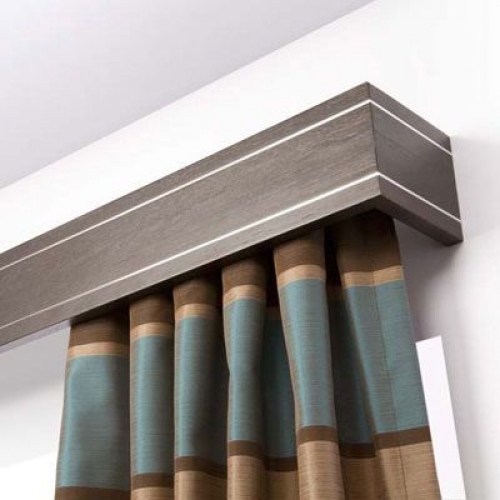
Profile cornices are often installed on the ceiling. Although, it is possible to carry out installation on the wall. The coloring can be any - from golden to a shade of dark wood. If you pick up a cornice to match the ceiling, it will be almost invisible. Profile cornices can be equipped with a mechanical drive, which is especially important if the long length of the curtains does not allow you to open the window manually. AT expensive models elements for fastening curtains inside the profile are covered with teflon. This design improves the sliding of the rings in the recesses in the base.
Installation profile cornice carried out in the same sequence as the rail and in the same way - on self-tapping screws with dowels. Curtains are attached to the base with Velcro or rings.
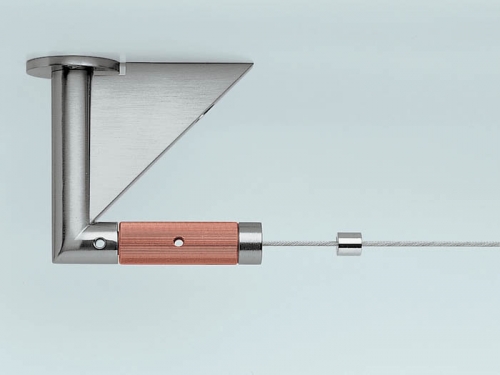
As a basis for fastening the curtains of such a cornice, a string made of a steel or polymer thin cable acts. This type of cornice is not suitable for hanging tapestry fabric and other heavy curtains. The cable, of course, is able to withstand such loads, but pulling it so hard that there is no sagging in the center will be difficult in this case.
String cornices are often placed on the ceiling. They can be single or multi-row.
The factory packaging contains everything you need for installation: two boxes with a tension mechanism, strings, clips or hooks, as well as dowels and screws.
Dowels are hammered into the holes in the ceiling, and then the fasteners are screwed. A string is threaded into the mounts and fixed with a tensioner. After that, the structure is closed with plastic boxes. Then the clamps collect the upper edge of the curtains.
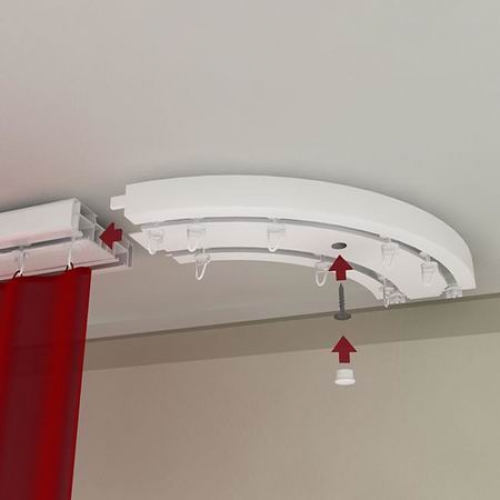
This device is a hollow ceiling rail connected to a baguette strip made of wood or polymers with sidewalls. Self-tapping screws, dowels, plugs (used to disguise holes for screws) and fabric hooks are also included.
First you need to assemble the structure according to the manufacturer's scheme: connect the baguette bar and the tire. Inserts in the form of corners are attached to the sidewalls, and then the base is attached.
In pre-marked places, holes for dowels are made. The structure is attached to the wall with brackets, and the cornice itself is screwed to the ceiling with the upper plane. Sometimes the baguette cornice is attached only to the wall.
After mounting the base of the eaves, you can proceed to fasten the draperies. The lambrequin is fixed to the facade of the cornice with a special adhesive tape sewn to the fabric. Curtains collect curtain tape in folds, put on hooks with rollers. The rollers are threaded into the holes of the tire, after which the sidewalls are closed with special stoppers.
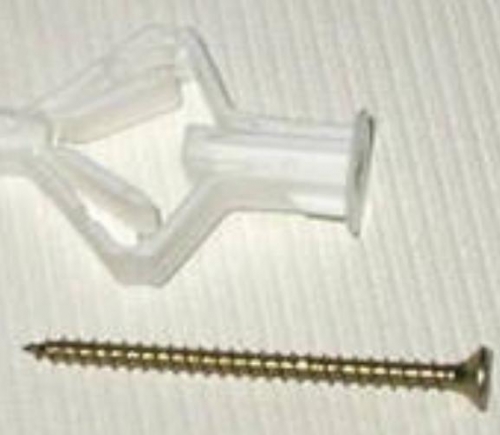
Installing a cornice on drywall involves the same set of works. Only one nuance. In order for the cornice (any) to be fixed firmly, special dowels for drywall are used - a butterfly or a molly dowel with a characteristic ability to straighten the side planes, thereby contributing to a more reliable fastening of the product. It is worth considering that even this type of dowel can withstand loads of no more than 5 kg for ceiling and a maximum of 8 kg for wall mounting.
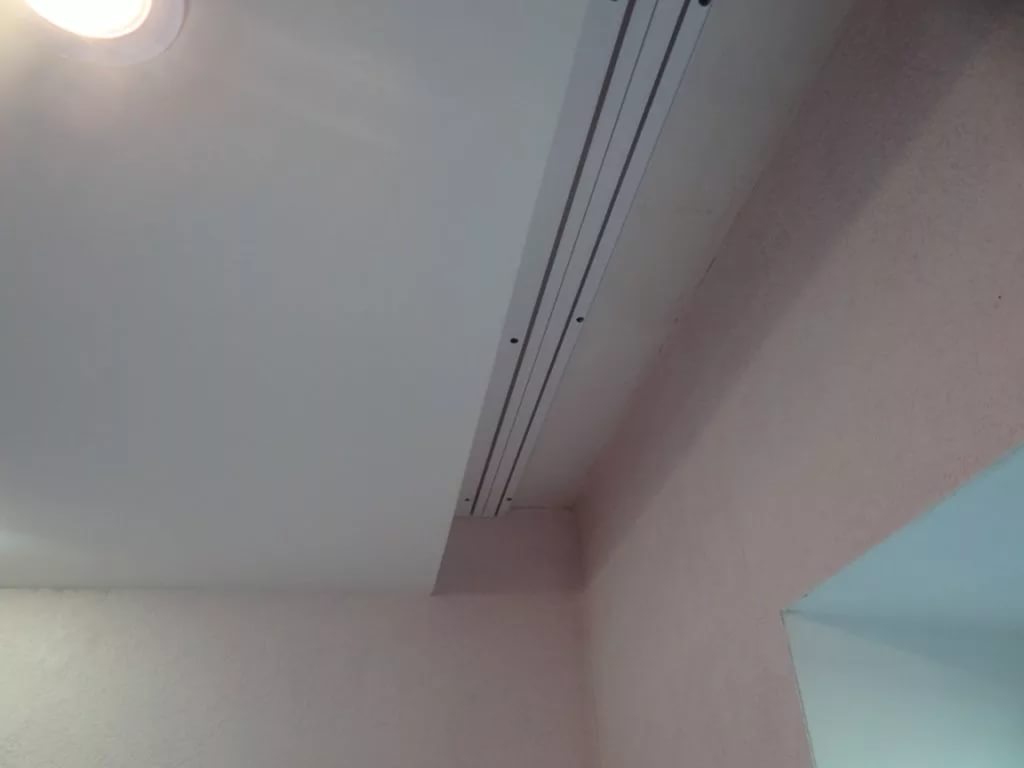
The owners of stretch ceilings will have to install the cornices differently. If the cornice is located in the ceiling cavity, the basis for fastening will be a beam, the length of which corresponds to the dimensions of the cornice, and the thickness is slightly less than the distance from the base ceiling to the film surface.
The beam is fixed using dowels. After mounting the frame of the stretch ceiling and installing the canvas, markings are applied at the points where the timber is attached. Then, rings are attached to the place of future punctures so that the canvas does not tear. Holes inside the ring are carefully burned. Now you can attach the cornice.
Proposals from manufacturers are varied. You can choose models of curtains in any of the stylistic directions - be it modern, simple-minded, but no less original country motifs, functional high-tech or restraint and aristocracy of the English style. The choice of cornices and the method of their fastening depend on the style of the room, the chosen textiles, the material from which the ceiling and walls are made.
Description: War Thunder is a next generation military MMO game dedicated to...

"Titan Siege" is a large-scale online game on the theme of Scandinavian and ancient Greek...

Being an avid lover of German tank looks, I spent a lot of time...