Description: War Thunder is a next generation military MMO game dedicated to...


This is a very important stage in the renovation of the bathroom, and the essence of it is that you must think carefully and decide what work you will need to do in the bathroom, and what you want to see when it is completed. It will be nice if you first get acquainted with the design ideas bathroom on the Internet, as well as go to hardware stores, and figure out what materials you will use when repairing it. design project involves drawing up a sketch of the room, and a schematic indication of the location of all the main elements in it: plumbing, furniture, lamps, mirrors and various accessories. It is necessary already at the design stage to know which sink, bath, shower and toilet you will purchase, or buy all the plumbing in advance - this is important for correctly orienting the points of water supply, sewerage and electricity.
The choice of materials for bathroom renovation should also be taken with all responsibility, because the bathroom is a place with high humidity and difficult temperature regime, which means that the requirements for the quality of finishing are higher here.
It all starts with the dismantling of plumbing and doors (unless, of course, a decision is made to replace all these elements of the bathroom). A bathtub, a sink, a toilet bowl - all this is not particularly difficult to dismantle. It becomes much more difficult to remove the old, or whitewash, from the walls and floor. The next step is the analysis of water supply and sewerage systems.
The layout of water and sewer pipes is carried out in accordance with the sketch of the bathroom drawn up earlier. Installing plumbing and sewerage is a rather difficult task. Today there are several possible options for plumbing:
Metal-plastic can be interconnected by means of crimp or press fittings. The second method is more reliable in terms of durability, but requires certain financial investments and the availability of a special apparatus for installation. The advantage of a metal-plastic water pipe is that the structure is not susceptible to corrosion, the disadvantage is that such a pipe is afraid of frost, and freezing of water in it will lead to unpredictable consequences.
Polypropylene is the most affordable option. It is also not subject to corrosion, has low thermal conductivity, does not require a large number accessories during installation. Its installation is carried out using a welding machine.
The largest indicator of durability has a copper pipeline. It withstands very high temperature changes and is not subject to deformation. True, the price of such a water supply system can hit your pocket hard.
Properly made electrical wiring is also an important indicator of the comfort of the bathroom. It is necessary to provide for all the details - from the location of lamps, sockets and switches to the installation of ventilation. All electrical wiring must be waterproof.
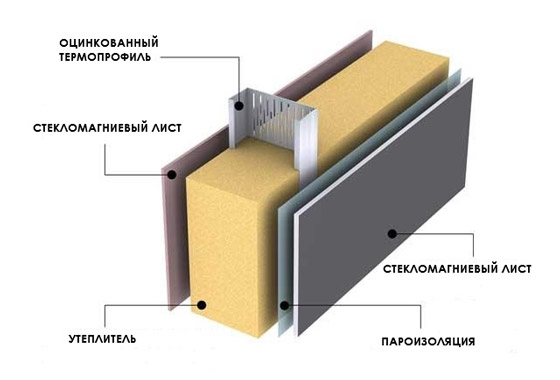
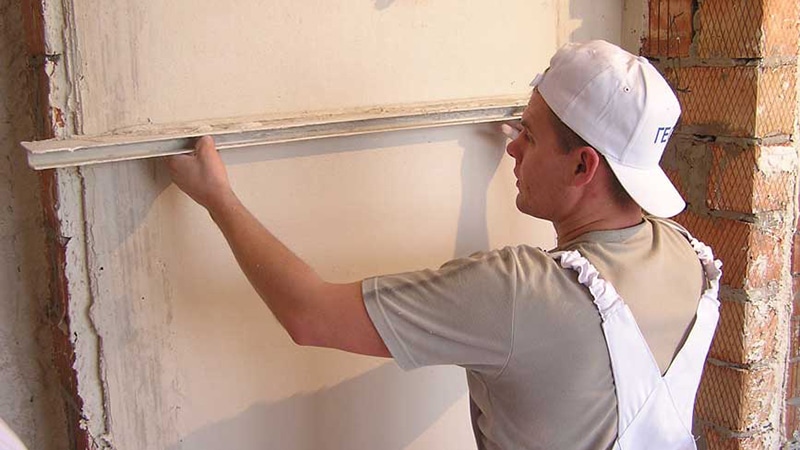
Alignment of the walls in the bathroom is done in two ways - by plastering or by installing drywall:
The floors are leveled using special screeds. great attention at this stage, give waterproofing surfaces.
The door frame is installed before the start of fine finishing work. Usually, in order to save space, the door is opened outwards.
Do-it-yourself bathroom renovation is impossible without high-quality finishing of the walls of the room. What materials are especially popular?
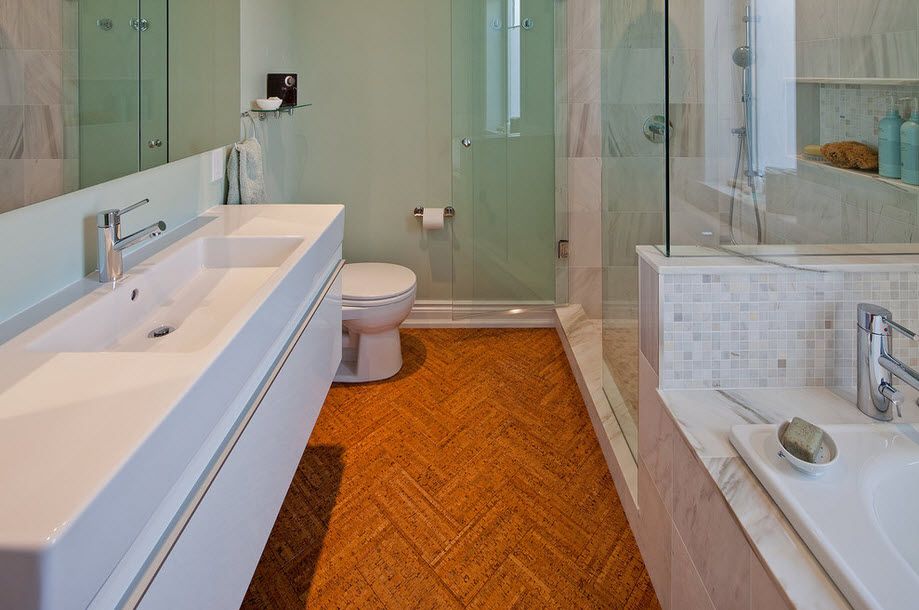
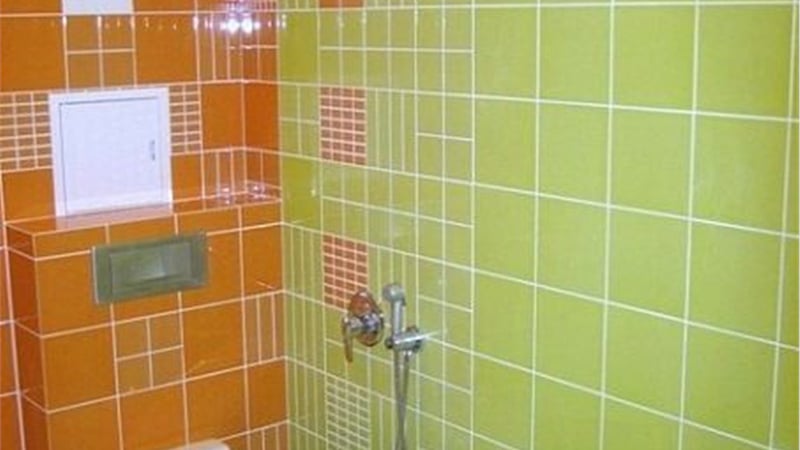
It is a traditional way of decorating the walls in the bathroom. There are really many advantages of such a coating - hygiene, environmental friendliness, water resistance, durability, ease of maintenance. In addition, the construction market offers a large variety of colors of ceramic tiles. There are also disadvantages: the laboriousness of the wall finishing process, as well as the considerable price of the coating, because it requires the purchase of a large number of additional materials for laying.
They gained their popularity due to the following advantages: affordable price, ease and simplicity of installation, high moisture resistance, wide color palette, undemanding maintenance. Do not need preliminary alignment of the walls. The disadvantage of the coating is the mechanical instability of the panels.
- this is a very economical and easy way to change the interior of the bathroom. The choice of colors here is simply unlimited, in addition, the paint will make any artistic fantasies of the owner of the apartment come true. However, the coating is very short-lived.
wood is an exclusive way to decorate the walls in the bathroom. It is very eco-friendly, elegant and comfortable. But this method of finishing requires a lot of knowledge and takes a lot of time. In addition, the tree needs special care.
mosaic is a unique finishing material and very expensive. Mosaic can be glass, stone, ceramic, patterns or whole panels are laid out from it on the entire wall. The complexity of the process is very high.

The modern market offers big variety bathroom flooring:
It is the undisputed leader among bathroom materials. Its advantages and disadvantages have been presented above. For the floor, its cold surface can also become some inconvenience of this coating.
is the safest and most exclusive bathroom flooring solution. It is a warm, eco-friendly, durable material. For rooms with high humidity, special types of wood are used. But, like any tree, parquet requires careful and regular maintenance.
- a cheaper alternative to parquet with all its pluses and minuses.
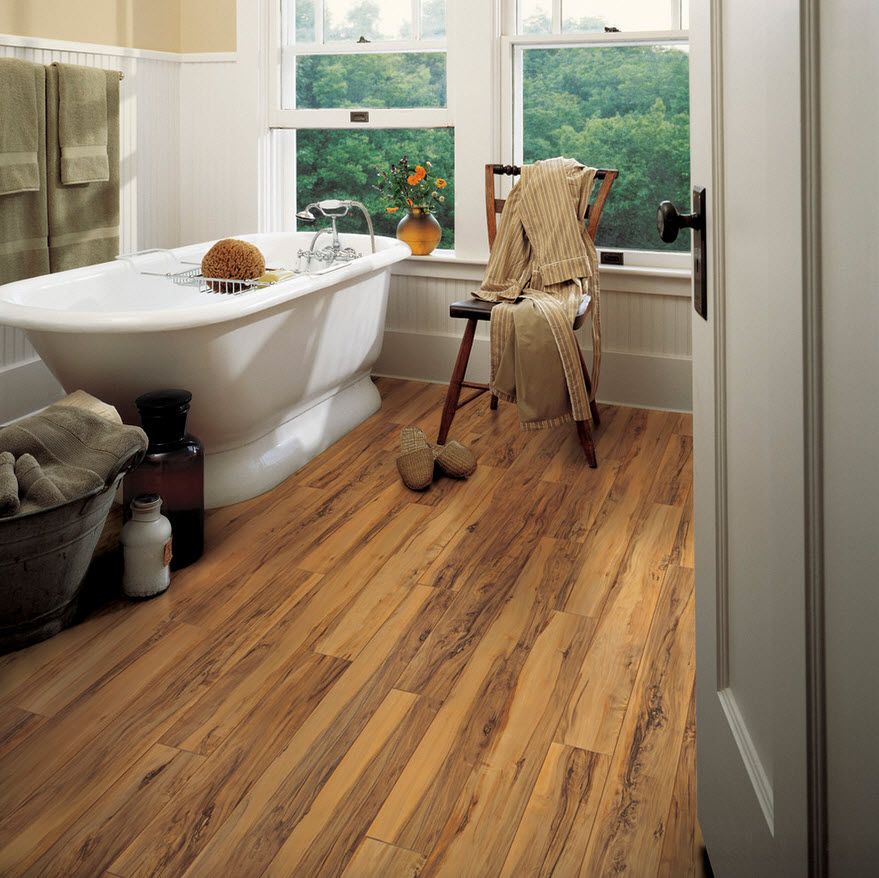
- the moisture resistant version of this floor covering will be the perfect solution for any bathroom. The material is very soft, warm, pleasant to the touch, environmentally friendly and easy to care for. He will not tolerate only chemical and aggressive surface cleaners.
great for the bathroom. Among other things, an interesting and unusual 3D pattern can be applied to the material.
High humidity, as well as the risk of leaks from neighbors living above, place special demands on the ceiling in the bathroom. Options finishing materials- a huge variety and each has its own advantages and disadvantages:
painting is the cheapest and most short-lived way to finish the ceiling in the bathroom. The advantage of paint is a huge variety of colors and the possibility of a unique ceiling design. High quality acrylic paints are moisture resistant, easy to apply and dry quickly. They will also protect the surface from mold and mildew.
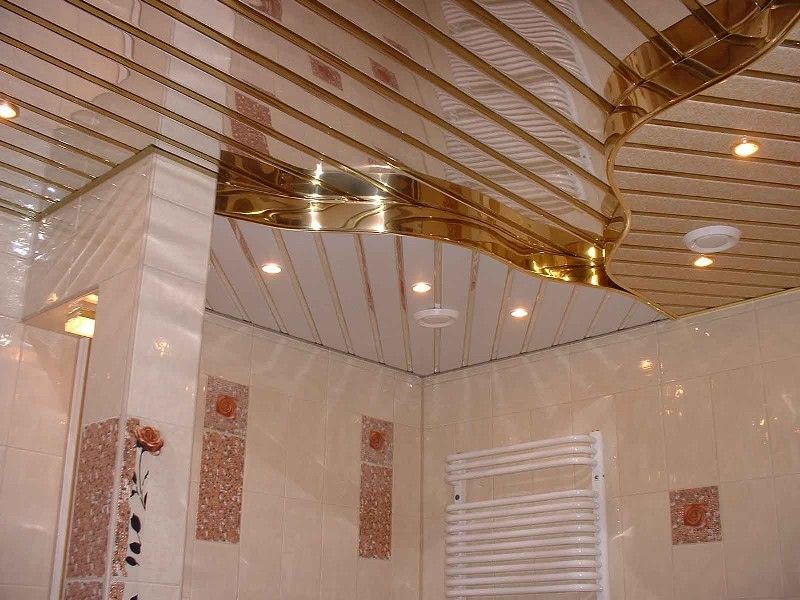
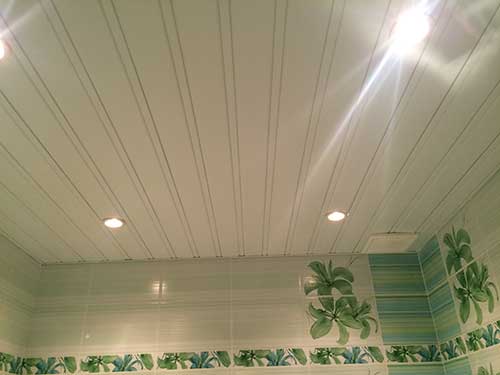
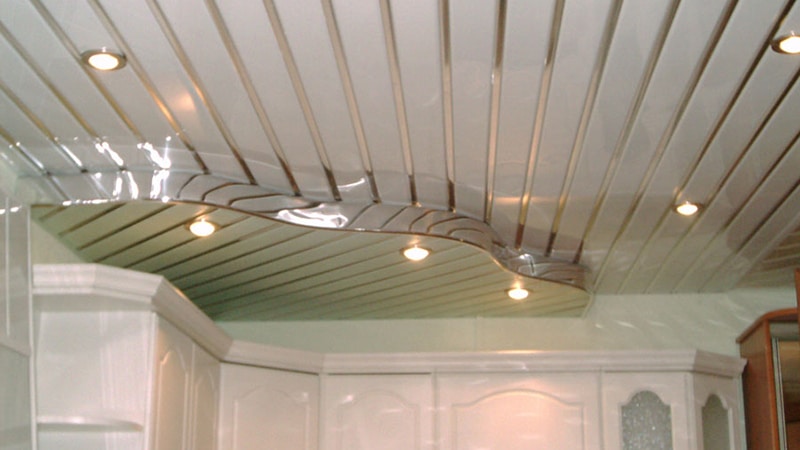
PVC panels. Popular for their high resistance to moisture, ease of installation and maintenance. Very diverse in color and can be adapted to any design. The disadvantage of such a ceiling is a decrease in its level by 2-3 cm.

- very practical with its resistance to leaks from above, as well as a variety of textures, colors and designs - for every taste. The disadvantage of coating is non-environmental material and high price.
. This category of suspended ceilings involves the use of moisture-resistant materials made of metal, mineral fiber or drywall. In the event of a leak, such coatings absorb moisture, swelling in height. A damaged plate is very easy to change. The tiled ceiling cannot boast of a variety - they are usually presented in white or pastel shades. Another disadvantage is the lowering of the ceiling level by 5-10 cm.
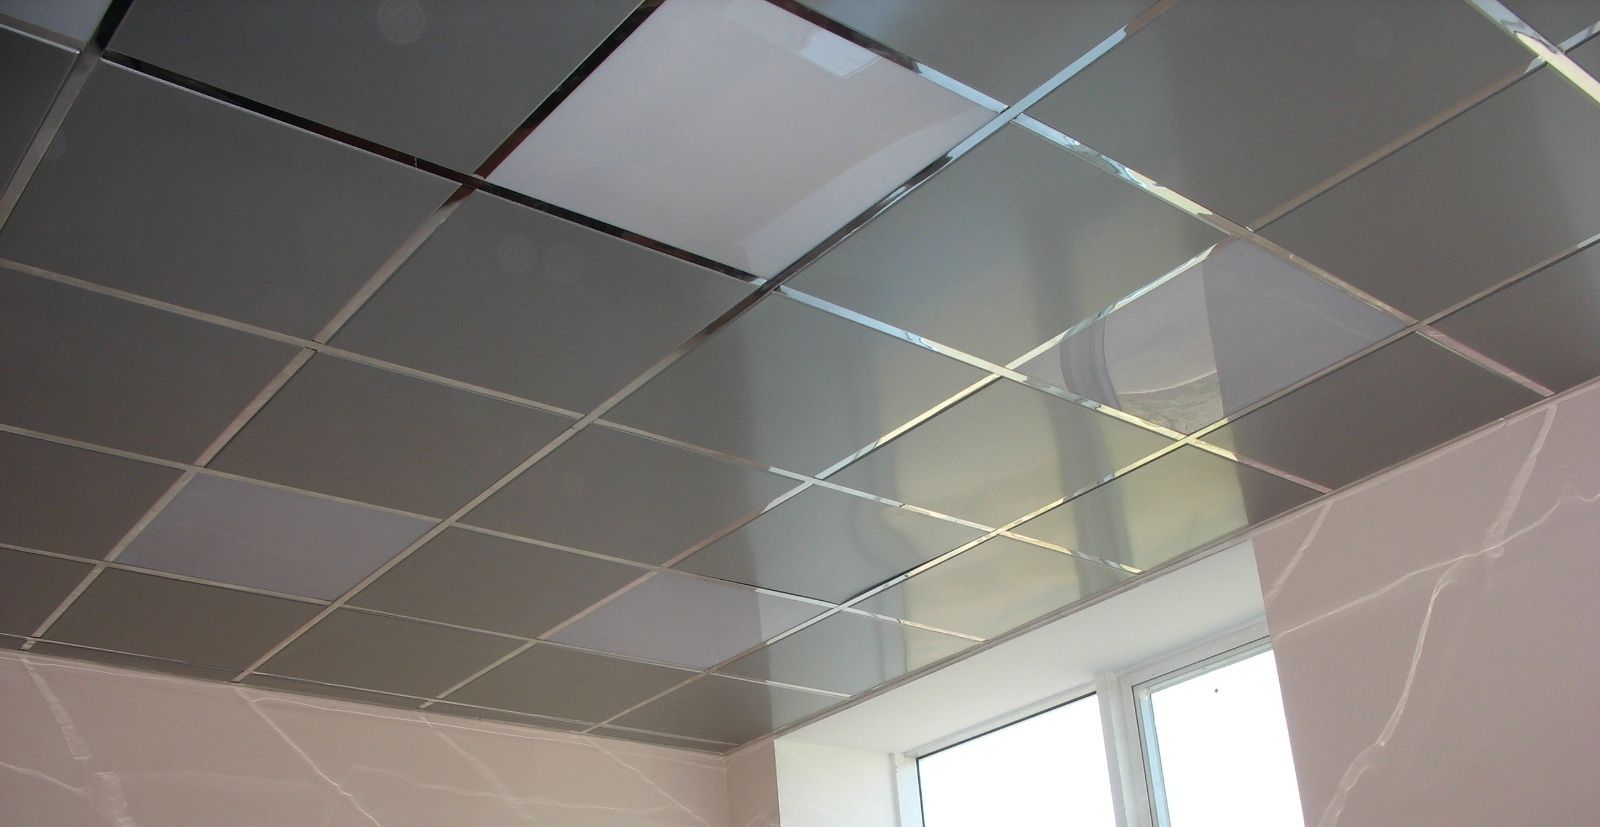
. Made from steel or aluminium. It does not rust, does not absorb moisture, is represented by a wide colors. Allows you to equip ceilings of any shape and configuration. The price of such structures is higher than tiled ones.
The do-it-yourself bathroom renovation is completed by the installation of sanitary equipment, furniture and accessories. The toilet, bathtub and sink are connected to the water supply and sewerage. The same is done with the shower and washing machine. Cabinets are hung and installed, lamps are connected, mirrors, holders and various hooks are placed.
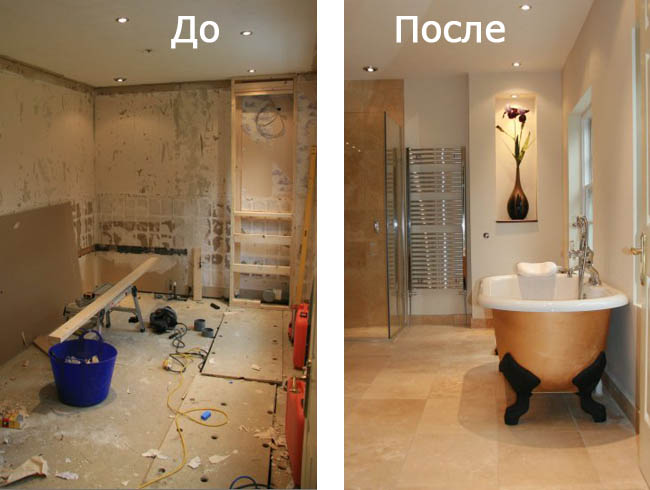
A competent, responsible approach to do-it-yourself bathroom renovation will delight its owner for a long time and will become his pride for many years to come.
Each person spends a lot of time in the bathroom: in the morning, an invigorating shower charges with positive energy, and in the evening, a hot bath relaxes after work. have a hard day. Therefore, this room should be cozy and comfortable. How to make repairs in the bathroom with your own hands?
Making repairs is a rather difficult task, but you can always try to cope with it yourself. So, we make repairs in the bathroom, get acquainted with useful information, follow recommendations and valuable tips.
Important: the bathroom is a room with high humidity Therefore, materials for repair must be chosen vapor and moisture resistant.
How to make a bathroom renovation without resorting to the services of professionals? First you need to properly prepare and take care of the right tools.
Namely:
Bathroom renovation steps:
How to make repairs in the bathroom when the steel pipes are old and almost completely damaged by rust. It is worth starting a major overhaul of the bathroom from the replacement of pipes.
For long service life, a thick lime layer has formed inside the pipes, and such pipes can leak at any time.
Important: plastic pipes bad hold high temperature and high pressure, and are also quite sensitive to chlorinated water.
When the bathroom and toilet are repaired with their own hands, the recommended option for replacing pipes is polypropylene pipes.
Advantages of polypropylene pipes:
Do-it-yourself bathroom renovation also includes replacement.
To date, three main types of mixers are produced:
Characteristics of single-lever mixers:
Important: single-lever mixers break very often, because they do not tolerate solid particles and salts dissolved in water.
Characteristics of two-valve mixers:
Characteristics of thermostatic mixers:
Before the direct process of replacing pipes and a mixer, you must:
Tip: when dismantling, a lot of dust is generated, so you need to wear goggles and a respirator.
Tip: before joining pipes, make sure they are at the right angle and create as few joints as possible, this likely locations leaks in the future.
Modern bathroom renovation involves the replacement of electrical wiring, which is carried out by placing the cable in drywall sheets or plaster.
Important: the connection of sockets and lighting lamps should be carried out only outside the bathroom in junction boxes.
The leveling of the floor and walls of the bathroom is carried out using special cement-based mixtures. The walls are plastered, and for a screed.
Tip: Apply better 2-3 mortar layer, this will improve the adhesion of the facing tiles to the wall.
Tip: when purchasing a tile, you should add ten from the top to the main amount, it will be needed in case of damage.
There are several options for finishing the ceiling in the bathroom:
Tip: for evenness when laying, the seams can either expand or narrow.
Tip: when using glue, you must carefully study the instructions, because if it is not followed, destruction and falling off of the tile may occur.
Tip: the glue that has come out must be immediately removed with a sponge, not allowed to dry out.
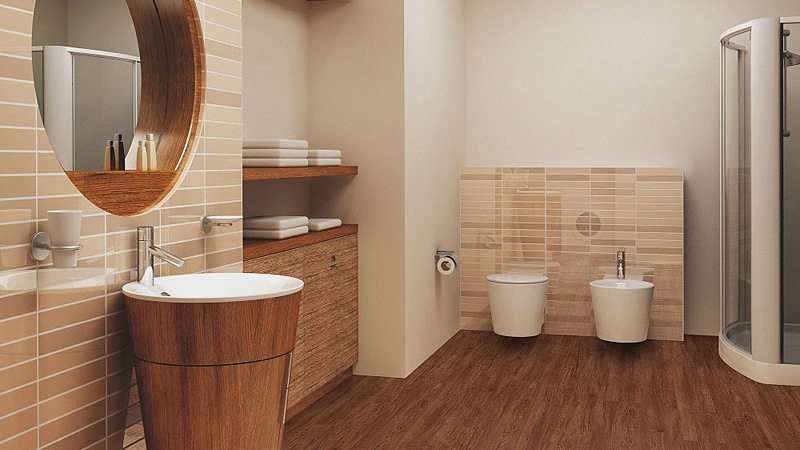
What repairs to make in the bathroom, what plumbing to choose? There is a huge selection of plumbing fixtures on the market today.
Bathtubs are different:
Bathroom installation steps:
Tip: before sealing, you need to draw water into the bathroom, this will give a certain load, and the seams will be able to expand as much as possible, or put a plastic rim on the seam.
There are several options:
The first option is considered the best option, since with the help of a pedestal you can hide pipes.
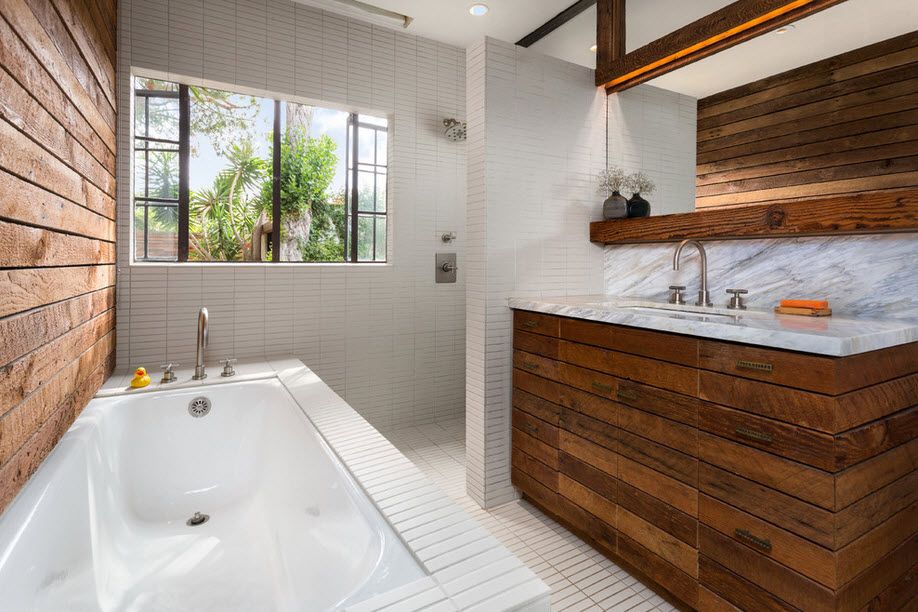
To decorate the walls of the bathroom, you can use different materials. Renovating a bathroom with plastic compared to ceramic tiles is inexpensive.
Plastic is a moisture-resistant, durable and hygienic material, so bathroom renovation with plastic can be affordable for those who do not have large financial opportunities, so he wants to do a simple redecoration in the bathroom.
Repairs in different apartments are different from each other.
Answers to many questions can be found in the book "Bathroom Renovation for Dummies".
Renovating a bathroom on your own takes a lot of time, besides, this process is very dusty and dirty, so repairs in this room must be done first.
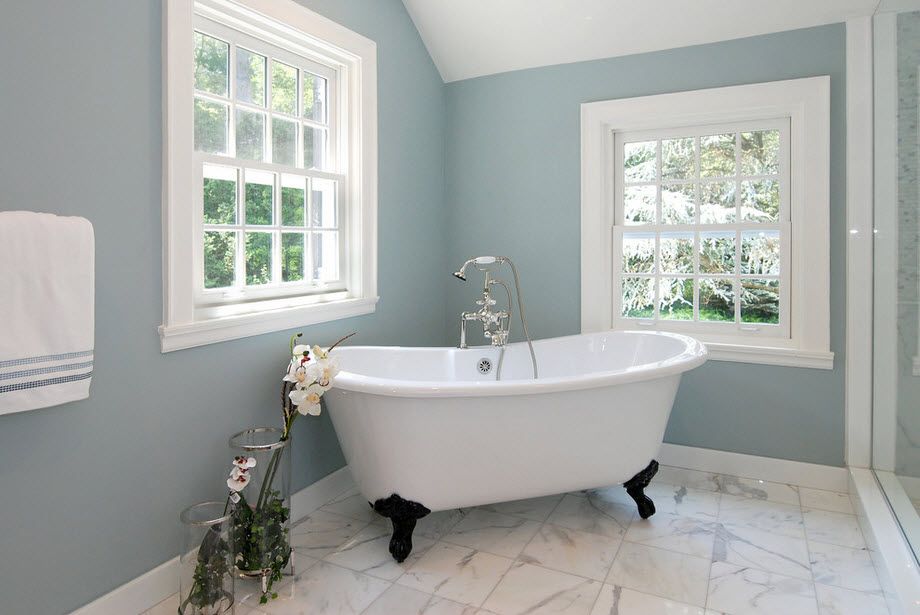
Each room in the house is interesting in its own way. The bathroom is no exception - it is in it that you can begin to embody those ideas that have not been implemented in other rooms. Wanting to reduce costs, owners often want to start DIY bathroom renovations. In this article, we will consider all the subtleties and nuances of this process, as well as what should be followed when deciding to do finishing work in a new building and Khrushchev.
Updating this room is a rather troublesome business, therefore, before starting work, it is necessary to draw up a clear action plan and calculate all materials and costs. Planning is an important stage of any repair, because at this stage there is a preliminary arrangement of large items - a bathtub or a shower cabin, a sink and a toilet bowl (for combined rooms). If the parameters and characteristics of the bathroom allow you to place a washing machine in it, then it should also be indicated on the plan. This will facilitate the further process of visualizing the pipe locations.
To take into account the work with the wiring, it should also be noted those places where it is planned to place the lighting fixtures - common to the entire room (on the ceiling surface) or located in certain places.
Additionally, it is worth specifying all the items that you plan to place in the bathroom - shelves, cabinets, hooks, hangers, soap dishes and more. detailed plan will help you to imagine the future premises in more detail, and correctly calculate the items needed for the purchase.
In order to fully appreciate the scale of the required work, it is necessary to completely dismantle old materials and plumbing - this can be done by hand. The condition of the floor, walls, ceiling without old material may differ significantly from what you see every day and, accordingly, will require the purchase of additional finishing materials.
After the space is completely freed, its measurements are taken, which are needed to compile a list of necessary materials. The list should include the following items:
It is advisable to include approximately 15% of the reserve for unforeseen circumstances in the amount of material.
On the Internet you can find a large number of photos and videos that tell in detail about the materials and work with them. I would like to note that the bathroom is a room with high humidity, and in order to increase the period of use, it is necessary to take high-quality materials.
The advantages of finishing with PVC panels include:
Today, a huge selection of finishing materials is presented on the construction market, one of which is PVC panels for walls and ceilings - a huge selection of colors, textures, thickness and width allows you to choose a material based on your preferences and the characteristics of the room. What you should pay attention to when deciding to use the material when finishing the bathroom:
PVC plastic panels can not only decorate the walls of the bathroom, they are widely used for finishing the ceiling. The material can be fixed both with glue and self-tapping screws - the second option is the most optimal, although more time-consuming - if necessary, the ceiling can be dismantled. However, this mounting method is not suitable for small spaces, as it will visually reduce the space, making the bathroom seem low.
Finishing work in a new house is not recommended to start immediately after construction is completed, because the building needs shrinkage. Anticipated emergency situations in a new building require the ability to quickly dismantle structures.
Advantages of finishing works in a new building:
But it is worth noting some of the difficulties that may accompany this process in a new building:
Doing all the finishing work on the bathroom with your own hands in Khrushchev or a new building is not an easy task, but with proper skill and availability necessary tools everything is possible. Do the work yourself or turn to specialists - everyone will have their own choice. It is worth remembering that, despite all the difficulties associated with finishing work, the problems with finding reliable and qualified workers can often be greater.
Bathroom renovation in a new building 60 thousand rubles
Careful preparation, a competent choice of materials will facilitate independent work and allow you to make a high-quality renovation of the bathroom with your own hands. In order to perform the work with maximum efficiency, you can watch the corresponding video or photo on the Internet.
Do-it-yourself bathroom renovation costs 1.5-2 times cheaper than the same renovation made by a team of workers. Therefore, if you have the necessary knowledge, skill, free time If you want to save money, then this option is for you. But remember that an inexpensive do-it-yourself bathroom renovation can be inferior in quality to repairs made by professionals.
Cheap bathroom renovations are, by definition, do-it-yourself projects. Therefore, preparation for it includes several stages. Let's look at each of them.
First of all, you need to decide on the future design of the bathroom, draw the layout of the bathroom - this will further depend on complex work with pipes and plumbing, and the need for additional wiring.
Familiarize yourself with the prices in the construction markets. So you can understand whether all your ideas are feasible and how they fit into the budget.
For example, we will give a table with the cost of materials for an inexpensive self-repair of a bathroom:
You need to buy building materials based on the area of \u200b\u200byour bath. The volume of necessary materials can be suggested to you by the seller himself in the market or in a hardware store.
3-5% is laid on the battle of tiles when repairing a large bathroom and 7% when repairing a small one.
When buying cement, mixtures, sand, grout, putty, sealant or silicone, you need to add 30% to the required volume. Let it be better for you to have an extra bag of dry glue than it ends at a crucial moment.
Bathroom renovation is carried out in a strictly defined sequence:
Let's proceed directly to the repair itself and consider in detail each stage.

Do-it-yourself work with steel pipes is fraught with many difficulties, but today it is the cheapest option on the market. Another disadvantage is that such pipes rust inside and they will have to be changed relatively soon.
Porcelain stoneware is a little more expensive than tile, but its strength is many times higher. Even smooth porcelain stoneware is completely non-slip, which is why we highly recommend choosing it as your flooring.

Tip: When buying, ask a consultant in the store to get 5-6 tiles from different packs and check their sizes.
You are doing a DIY bathroom renovation as shown in the video below, so choose a slow drying adhesive. It will allow you to work without haste, eliminate errors in time and control the quality of masonry.
A spatula will fit with 4-6 mm deep teeth unless otherwise indicated on the adhesive label.
Buy a tile cutter with a diamond drill, and for laying porcelain stoneware or tile with seams, it is best to use plastic crosses.
Let's say your previous bathtub is not worn out yet, then you can update its appearance with an acrylic liner. But we recommend sending the old tin "trough" for scrap.
Before you start repairs, turn off the water and strip the bath to the “bare” walls. The wiring will also need to be turned off. During the repair, you can use a portable lamp and an extension cord - this is not usual, but safe.
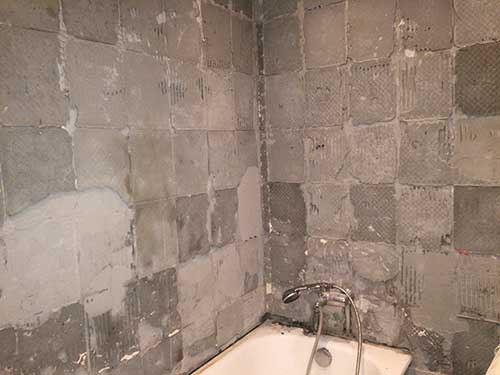
Clean all walls, ceiling and floor. Start working from top to bottom. Use a respirator when cleaning. The tile is easily removed with a perforator and a chisel. Loose plaster is removed completely, Durable - leveled.
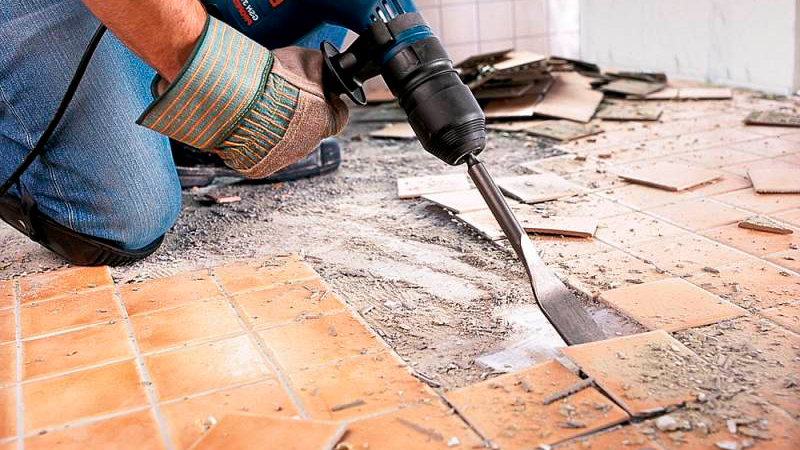
Old tiles and cement backing must also be removed from the floor. If the screed is good, you can leave it; if not, remove it with a puncher. If, upon careful inspection of the screed, you notice only one or two small cracks, they can be eliminated with a liquid equalizer.
The layer of the self-leveling floor should be approximately 3-3.5 cm. But before that, the floor is waterproofed with aquaizol or polyethylene terephthalate.
Important: It is necessary to cover the walls with waterproofing at least 30 cm.
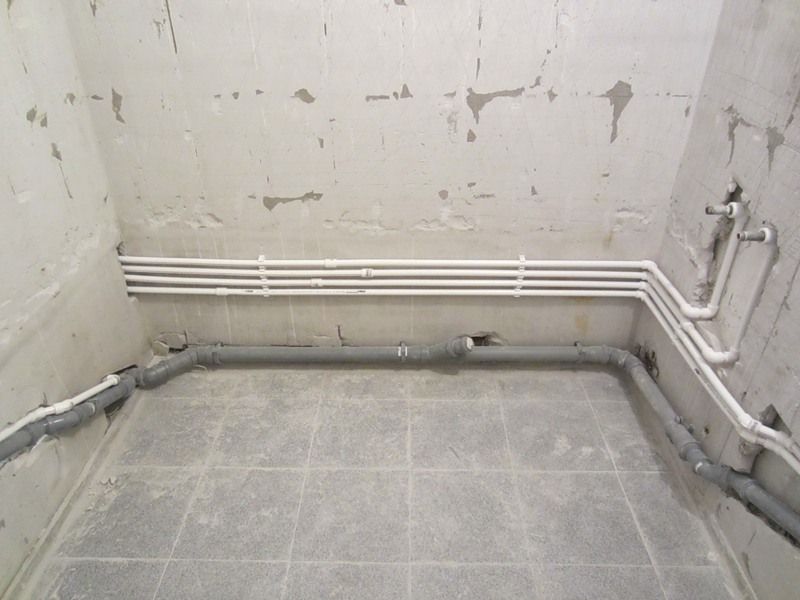
Sewerage should be done taking into account easy access to it for inspection, cleaning, removing blockages and necessary repairs. Therefore, we advise you to run sewer pipes along the bottom, along the walls, and close them with galvanized tiles. Galvanization is attached to silicone and, if necessary, access to pipes can be easily removed using a special knife.
The replacement of all pipes begins precisely with sewerage. You will be able to cope with this task in one, maximum two days, and then proceed to the water pipes.
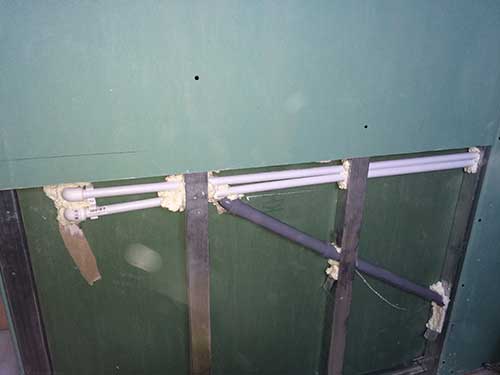
All wires are laid to the plaster. The wire with double insulation is hidden in the corrugation - plastic or metal, depending on the budget.
You need to plaster twice. Here, the quality of the work will play a big role, since you are plastering under the cladding. You will have to plaster, as always, starting from top to bottom.
Even in the warmest apartment, when repairing a bathroom, it will be necessary to insulate the ceiling. This will allow you to avoid the formation of condensate, which, by the way, is the main cause of problems with the safety of the repair.
For this purpose, it is best to use LSU (glass-magnesium sheet) on silicone or special glue. Remember that while it dries, you will need strong supports.
This is the most problematic part of the bath. Despite your decision to make an inexpensive bathroom renovation, the ceiling will have to be given Special attention.
The most suitable options for finishing the ceiling are artificial laminate or plastic lining. If you chose the first option, then before gluing the laminate, the inside will need to be treated with a special PVA emulsion. Here you will also need slats, which can be removed only after the adhesive has completely dried.

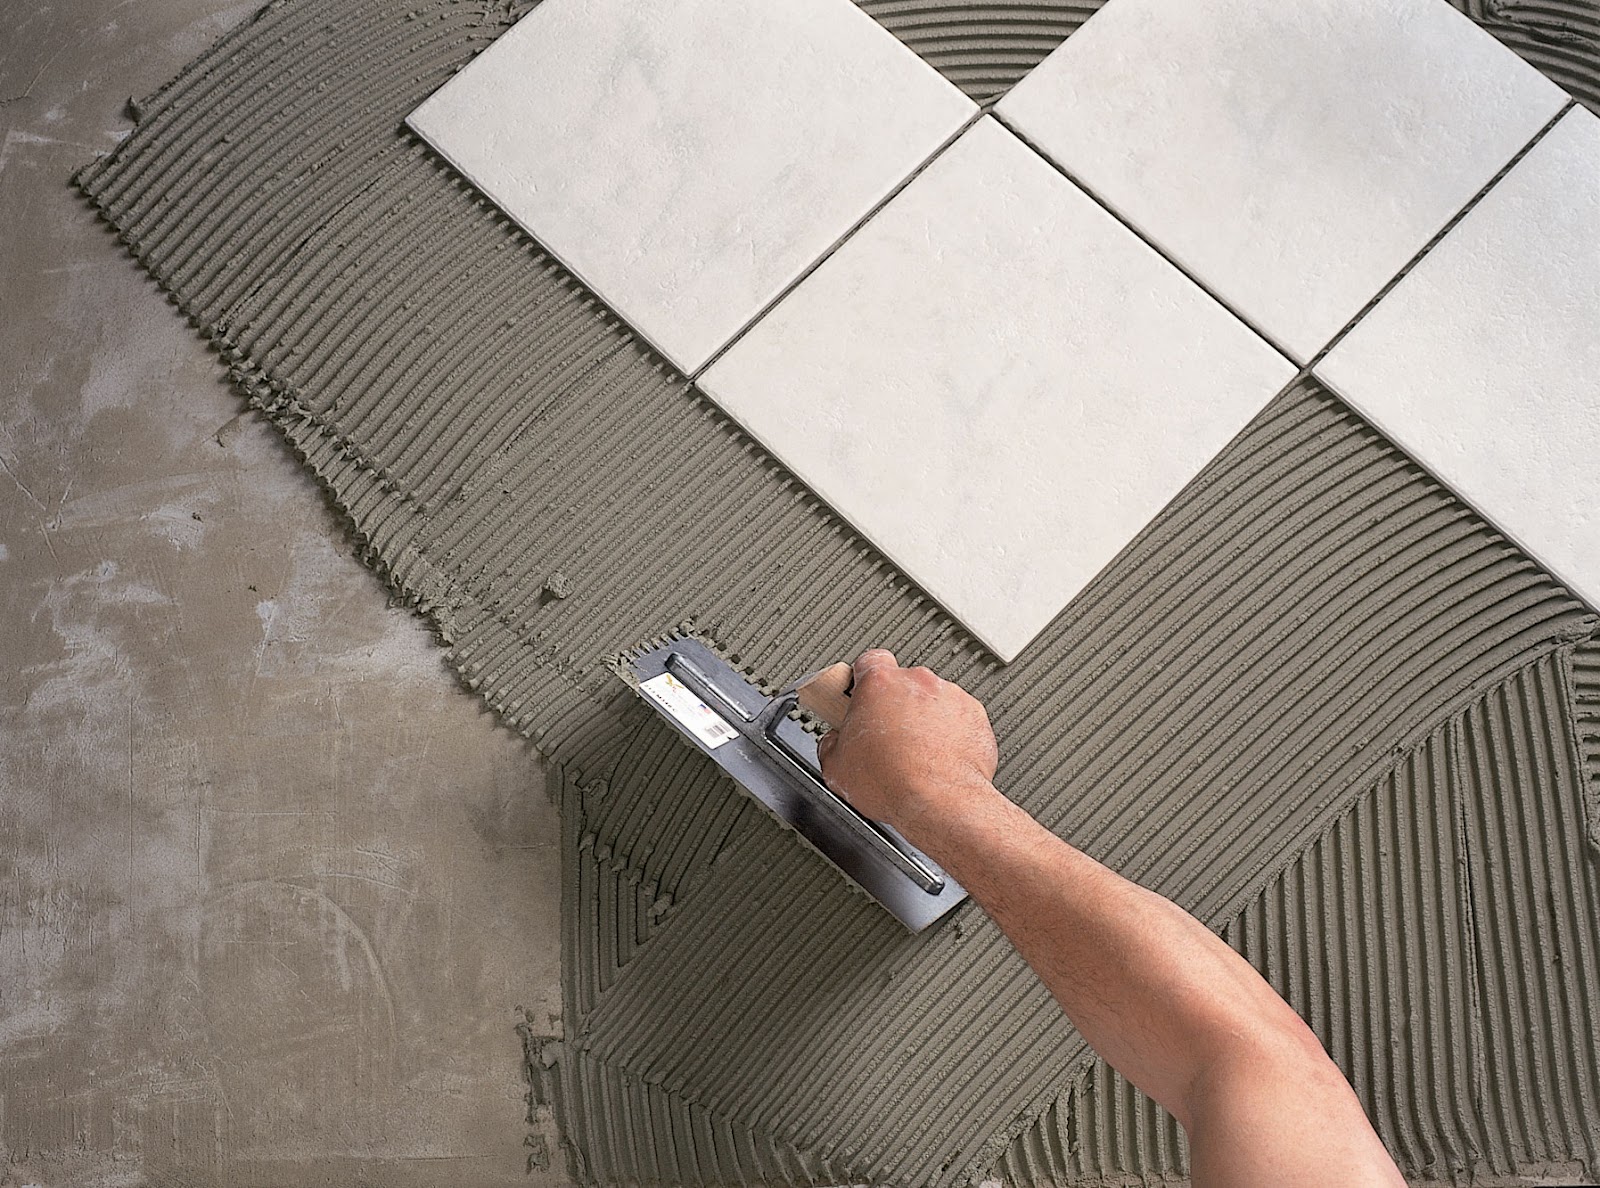
Floor tiles are laid on mounting adhesive. Here it is better to avoid the presence of seams. The glue is applied with a spatula to the wrong side of the tile and to the floor itself.
Important: laying floor tiles must be started from the entrance, so incomplete tiles will hide under the bathroom.
To avoid the appearance of voids under the tile, it must be tapped with a rubber mallet immediately after laying.
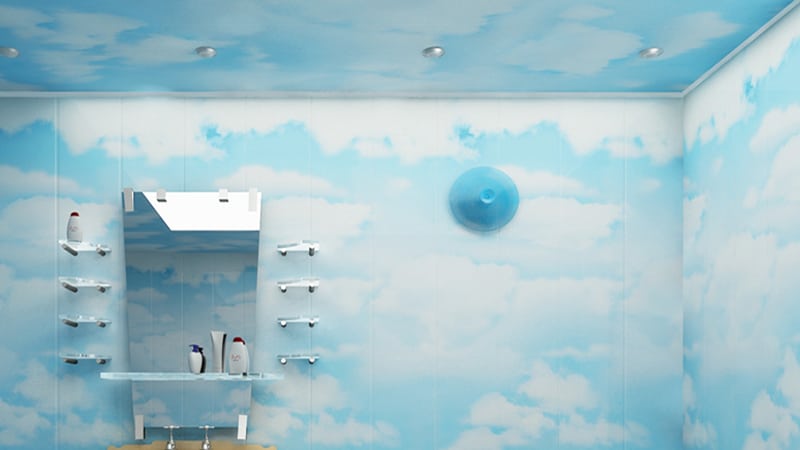
![]()
Perhaps you have decided to lay a wooden floor in the bathroom. It looks noble, and it is pleasant to walk on it, but this option is much more expensive and more difficult to install and operate. So think twice before choosing this option.

From wood, you can use larch impregnated with PVA and coated with moisture-resistant acrylic varnish. When laying, step back from the wall by 2-3 cm, and then fill this gap with foam and cover with a plinth.
Usually tiles are chosen for walls. It's over a budget option than porcelain stoneware, and its strength does not play a decisive role here. Wall cladding in the bathroom is done using plastic crosses, which are subsequently removed, and the seams are filled with grout, silicone or sealant.
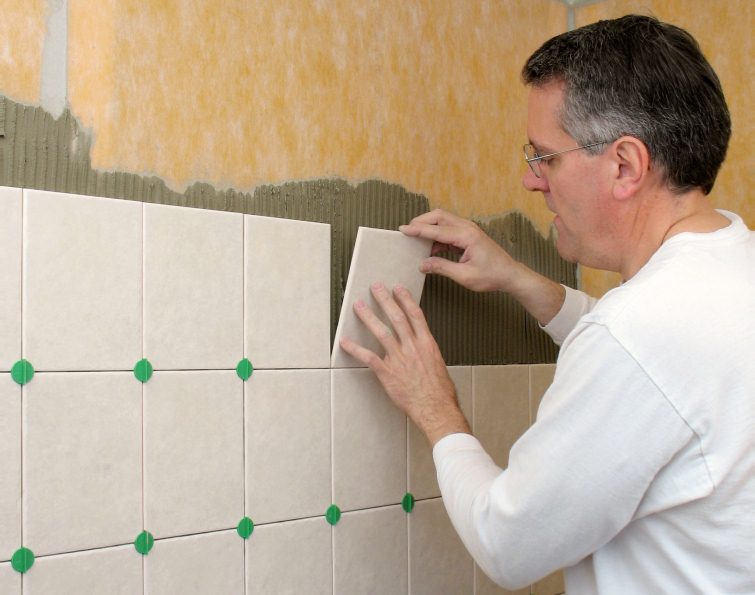
The tile is laid on the glue, after it dries, the corners are filled with silicone. Excess silicone is immediately removed with vinegar. Sometimes the corners are decorated with special overlays, which are also attached to silicone, but this is not necessary.
Installing plumbing fixtures is actually the easiest part of the job. It's much easier than many people think. The whole process is described in detail in the instructions for each item.
First, the bath or shower is installed, then the sink. After the mixers are mounted, water heaters and water meters are installed. The hood and waterproof lamp are installed last. In the photo you can see examples of successful do-it-yourself bathroom renovations.
In our difficult times, people often lack funds. But repairs still need to be done. And it is desirable that the bathroom has a decent appearance and at the same time served for five to seven years. In such situations, it will be useful to learn how to repair a bathroom cheaply, spending a minimum of money.
Today, the industry produces building materials of various price categories, designed for consumers of various income levels. These can be economy, standard and elite class goods. There are also very cheap materials on sale, but their advantage is only in a low price. The quality and appearance of such products do not stand up to criticism.
Doing the dismantling work yourself will significantly help to reduce costs.
Many works can be done independently, without involving specialists. For example, filing the ceiling with plastic clapboard does not require any special skills. Installing plumbing is also not difficult. Toilet, bathtub, washbasin - all this can be mounted independently. It is only important not to rush, carefully study the range, calculate all the stages of the work performed, then a successful result will be ensured.
As for building materials, it is more expedient to choose goods of an economy class and a standard price segment. Both of these types of materials practically do not differ in quality. The same manufacturer may produce similar products under different brand names. The first will be considered a standard class product, and the second - an economical option, and they will differ only in cost. World standards provide for certain quality criteria, for example, the density of building mixtures for solidification must not be below a certain threshold. For economical materials, this indicator will be closer to the lower value. This statement is true in relation to consumables.

You can do without buying new plumbing, and restore the old
As for finishing materials, plumbing fixtures and other things, low price quite different from poor quality. It is only necessary to take into account the mode of loads to which the product will be subjected. For example, floor tiles should be stronger than wall tiles. With proper selection and installation, bathroom tiles can last more than fifteen years.
If you have decided to carry out a budget renovation of the bathroom, photo samples of which can be seen in the gallery of this article, you should not purchase building materials of elite classes. Their quality is not higher than that of budget products, and they benefit only due to their aesthetics.
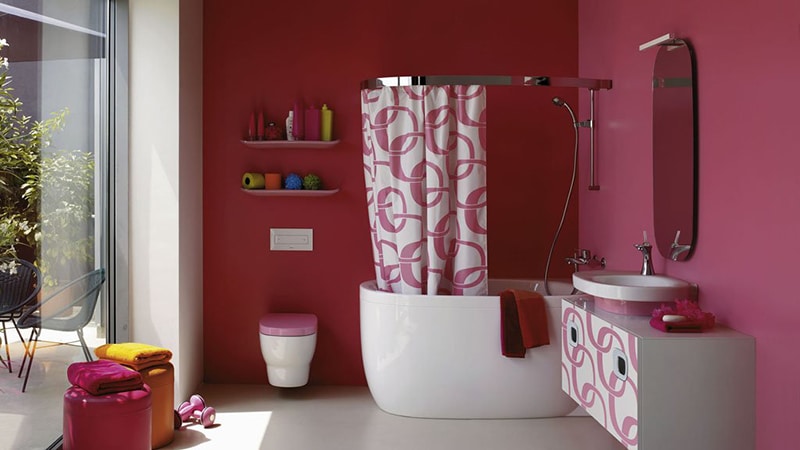
Painted walls and well-matched accessories will make the design impeccable.
In order for the result of the work performed to meet your needs, you need to carefully work out a preliminary project, think carefully possible options finishes and choose the most suitable for you.
The main part of the costs is the following items:
Thus, it is quite possible to reduce the cost of repairs, and you can save on both points. If you carefully study the information on how to make a budget bathroom renovation with your own hands, it can be concluded that most of the work is quite easy to do on your own, significantly reducing costs.
Many repairs can be done by hand
It is not unreasonable to decide to resort to the help of professionals only for difficult moments, such as laying electricity, installing water supply, and laying tiles. It is very important that electrical work is carried out only by specialists.
Please note that the cable must be solid and well insulated. Only solid wire segments can be used, and the distribution box must be placed exclusively outside the bathroom.
Question, how to make cheap repairs in the bathroom with your own hands worries many owners. To prioritize between savings and the quality of the design of the premises, you should adhere to the following recommendations:
If you need a cheap bathroom renovation and qualitatively, pay special attention to scrupulous planning of expenses. A detailed estimate will help you save a lot of money. Careful comparative analysis market pricing policy. In addition, on the Internet, as a rule, you can purchase many materials at a significant discount, especially when purchasing in bulk.
Even from inexpensive, but high-quality materials, you can create a cozy and stylish interior.
To revive a boring interior and diversify the static surface, experts recommend purchasing inexpensive accessories and trifles that will add coziness to the room and become an appropriate addition to the design. Additional convenience and decoration can be shelves, hooks, soap dishes, rubber mats, curtains and other decorative elements.
You should not buy building materials and equipment from well-known manufacturers, as you will have to pay extra for the name. Branded items are a priori more expensive. It will be much more profitable to purchase building materials produced by domestic companies, as well as the production of our closest neighbors - Poland, the Czech Republic, Finland. These will be quality, certified products. Of course, we are not talking about goods from China in the lower price segment. However, their products of average cost will be quite solid. Remember that quality and aesthetics cannot be sacrificed for the sake of economy.

Pasting the walls with glass wallpaper will help save money on repairing the bathroom
To design an original and unusual bathroom interior, and at the same time save money, you should first of all pay attention to cheap methods of finishing the ceiling in the room.

Smooth ceiling can be simply painted in any color
Tension structures look attractive and rich, but are very expensive. However, the appearance of plastic panels is no worse. An important advantage of suspension systems is that with their help any irregularities on the ceiling plane are easily leveled. In addition, this type of finish allows you to create multi-level structures. PVC lining refers to moisture-resistant materials, that is, you can not be afraid of flooding. It is easy to lay an electrical cable inside the rack ceiling and mount lighting. The price of such a system is quite affordable. Economical options for repairing a bathroom, photos of samples of which will demonstrate the feasibility of such actions, are presented below.
The rack ceiling made of plastic in its practicality is slightly inferior to the stretch
If the ceiling has only minor irregularities, it can simply be painted. To do this, it is necessary to remove the old top layer of the coating, apply putty, sand the bumps, and treat with a primer. After that, paint is applied in several layers. Such a finish will be very cheap, but it looks quite attractive.
The specificity of the bathroom is constantly high humidity with insufficient air exchange. That's why flooring must be resistant to moisture and wear. Ceramic tiles meet these requirements best of all. If you are considering a budget bathroom remodeling option, you should not buy expensive tiles of elite classes - it is quite possible to get by with domestic counterparts. In our country, the industry produces a lot of such materials, the cost of which will pleasantly surprise you. In addition, sales are often held in the markets and shops, where you can buy facing products at a significant discount.

Waterproof linoleum will become a reliable coating for the bathroom floor
There is an even cheaper flooring option, such as linoleum. Presented on the market wide range such coatings of various colors and textures. There are even waterproof varieties of PVC linoleum. The main advantage of this material will be that it can be laid literally within a few hours. Linoleum does not require gluing - pressed with a plinth, it will smooth out and level itself.
The optimal option in terms of price and quality for decorating the surface of the walls will be domestic tiles, which can be bought from leftovers on the market or warehouse. By purchasing a discounted product, you can save fifty percent of the cost or even more.
Tiles of domestic production will cost less than foreign analogues
A plain tile, decorated with friezes or decorative inserts, will look pretty decent. And the price will be quite attractive.
An inexpensive repair in the bathroom, a photo of the samples of which is presented in the gallery of the article, can be done by sheathing the walls with PVC panels. There is a huge selection of domestic and foreign designs that deserve attention. Plastic lining is available in all sorts of colors and textures. There are also panels with imitation tiles, marble or wood.
Plastic panels can decorate both the walls and the ceiling of the bathroom
Professionals recommend choosing materials designed for outdoor use, since the plastic from which they are made is much thicker and stronger, and therefore will last much longer. PVC panels are easy to install yourself. Such work does not require special skills and takes very little time.
With the right approach, sensible planning and a well-designed estimate, it is quite possible to carry out a budget bathroom renovation. The rational selection of building materials and the independent implementation of the maximum part of the work will help to significantly reduce financial costs. If you follow the recommendations of experts, a beautiful interior will delight your guests and delight you for decades.
Painted walls and well-chosen accessories to match them will make the design flawless Many repairs can be done by yourself Even from inexpensive, but high-quality materials, you can create a cozy and stylish interior Pasting the walls with glass wallpaper will help save money on repairing the bathroom The slatted ceiling made of plastic is slightly inferior in its practicality stretch Waterproof linoleum will become a reliable coating for the bathroom floor Domestic-made tiles will cost less than foreign analogues Plastic panels can be used to decorate both the walls and the ceiling of the bathroom An even ceiling can simply be painted in any color Performing dismantling work on your own will significantly help reduce costs You can do without buying new plumbing, and to restore the old PVC panels on the walls will protect them from water splashes and last for several years Seamless glossy lining will create a visual effect of a monolithic plane a successful result Bathroom walls can be painted with acrylic or enamel waterproof paint
Description: War Thunder is a next generation military MMO game dedicated to...

"Titan Siege" is a large-scale online game on the theme of Scandinavian and ancient Greek...

Being an avid lover of German tank looks, I spent a lot of time...