Description: War Thunder is a next generation military MMO game dedicated to...

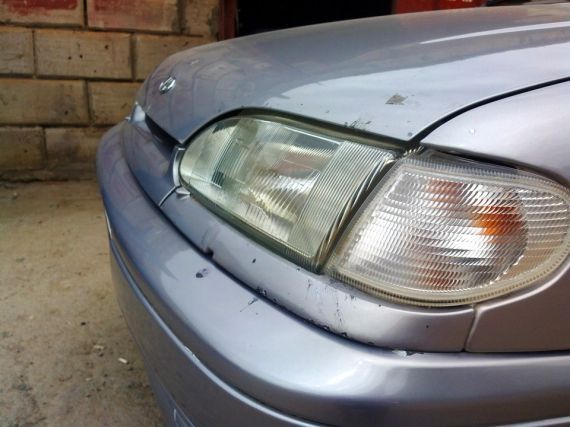
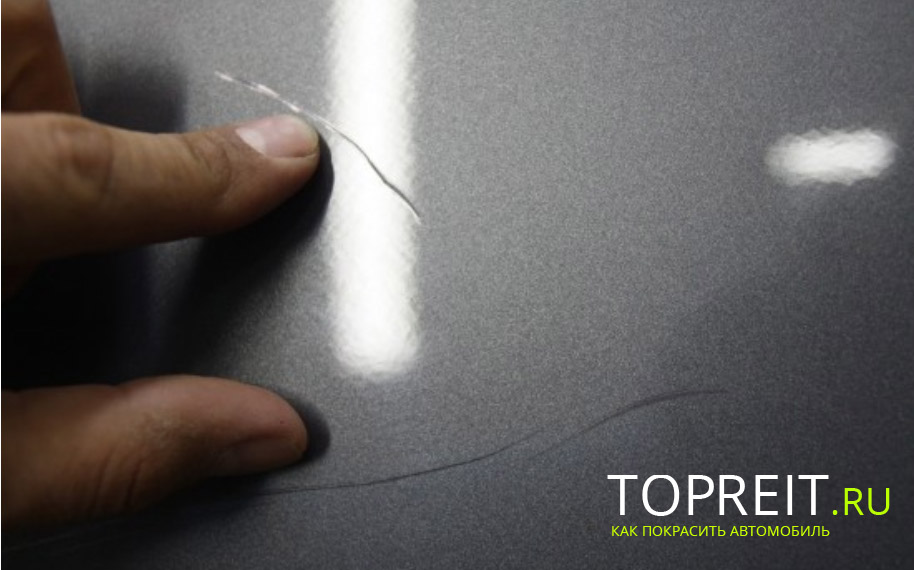
During the operation of the car, even the most careful driver is not immune from chips and scratches. These minor annoyances appear due to bouncing pebbles from the roadway, branches and tall dry grass. The situation is not pleasant, since gravel not only harms the paintwork, but also exposes the factory primer sometimes to the very metal, where then corrosion centers appear on its damaged structure, leading to worse consequences. To correct the situation, it is not at all necessary to go to the service and resort to repainting. Depending on the degree of damage, if you have patience, you can do local repair of chips on the car body with your own hands.
Scratches on the car
Damage is divided into three levels, their differences are in the depth and area of damage. Scratches to the top coat of paint, chips to the level of the primer and damage to the metal. Each level requires a different approach. Hull Repair Technologies vehicle make it possible to remove all damage without a trace. There are quite a lot of innovative products, all of them are resistant to moisture, sunlight and temperature extremes. You can find means to eliminate the consequences of exposure to an aggressive environment at any car shop.
If you are interested in the question of how to remove chips on the car body with your own hands, then before analyzing the repair process, you should familiarize yourself with some rules:
The sooner you get started, the less money the repair will cost. Remember that a small chip just a few millimeters in size can increase several times in a year, acquiring rust along the way.
LKP repair is divided into:
Materials needed for work:
Stages of work:
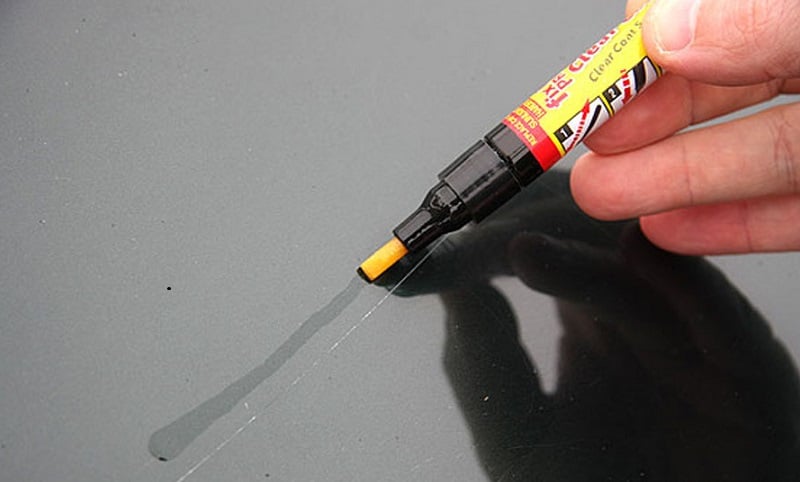
There are tools such as "wax pencils" or "correctors", they can easily and quickly eliminate chips where the ground is touched, however, they are not suitable for all cases. There are two types of these funds:
If you neglected the generally accepted and long-proven rules of painting technique in time to remove chips on the body, then at the end of the work you will definitely encounter such consequences as:
As you can see, some mistakes are difficult to fix, while others are not at all possible. I would like to note that even the most high-quality work done to eliminate scratches in an independent way is inferior after-sales service. You need to understand that independent local repairs are only a temporary measure. Of course, the best option would be to cover the bonnet area with a special anti-gravel film or other protective compound. As for the film, it comes in vinyl or polyurethane versions. Its layer of 100–200 microns creates a “shield” that protects against minor damage car for several years.
Other scratch protection options:
And pick up paint on it in a car enamel store. Also you can number your paint in technical description to your car. Be careful - the numbers of different manufacturers may vary. In the same store, purchase a primer; if the chip is strong (to metal), then buy the primer for metal. If not, then the paintwork. You should also purchase putty if you want the chip to be repaired with high quality. Buy another spatula, preferably a rubber one.
Wash the car well and dry it with a cloth. Do all the work in the garage. This will save the painted area from straight lines. sun rays. Clean the chip to the factory ground with a “zero” sandpaper. Rinse and degrease the cleaned surface with acetone. After degreasing, lay the primer in a thin layer and dry with a hair dryer. Clean up the resulting surface again with a zero. Lay another layer of soil. The procedure must be repeated several times (2-3). Remember that if you are the owner of a car that is not the first year, it is not necessary to clean the surface. The painted area may differ from the entire body in better side that will immediately catch your eye. Remember that the soil is easily washed off with acetone, and the dried soil is easily washed off with gasoline.
After applying the primer, inspect the chip (if the lighting is poor, then with a lamp). If it is deep, putty it. It is necessary to putty with a small gap in order to align with the main layer of paint. After that, clean off the unnecessary putty with sandpaper (zero).
Take a pre-purchased can of selected paint and start evenly applying paint to the putty surface. Before applying paint, read the instructions written on the can. Remember that the can must be kept exactly at the distance indicated in the instructions. If the distance is less than necessary, smudges will result, and if it is further, the surface will be matte (the paint will dry before it reaches the surface). Do not apply paint in thick layers. Better gently, a little bit, several times. Before the next layer, clean the previous one with a zero. Refrain from driving on the day of the event painting works. You can stain a freshly painted surface.
Small and large stones, flying out from under the wheels of your own car, passing and oncoming cars, hit the paintwork and lead to chips. Such damage must be repaired immediately to prevent corrosion. Try to restore the surface yourself.
You will need
The problem regarding how to remove chips on the hood relevant among the overwhelming number of motorists who care not only about the technical condition of their car, but also about its proper appearance.
Many believe that once a week or polishing the surface of the body is enough for this. But this is not enough to provide reliable protection body from corrosion.
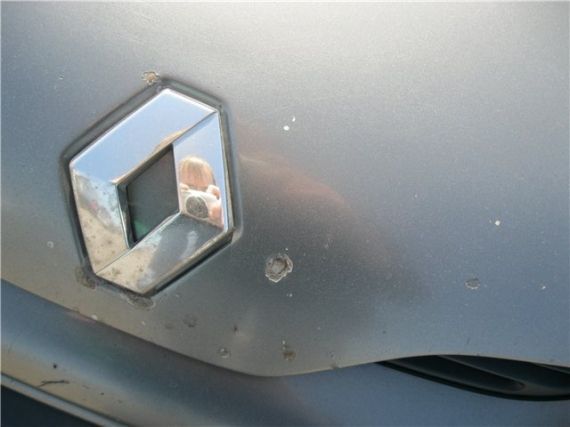
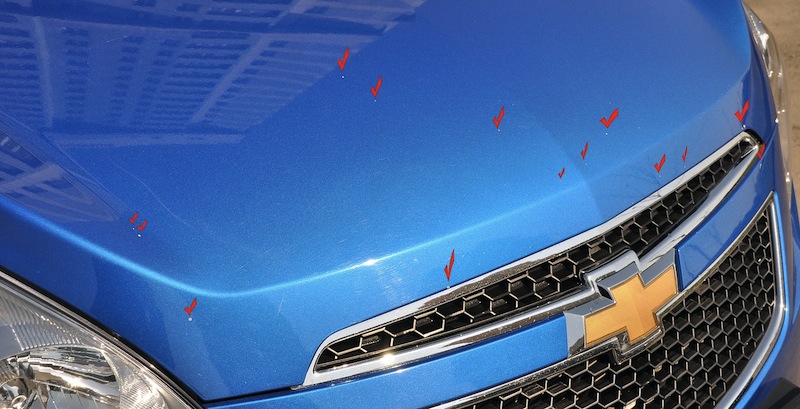
We must also remember about the chips that form mainly on the paintwork of the hood. They appear as a result of falling small pebbles from under the wheels of the car in front. Often the cause can be a strong hail.
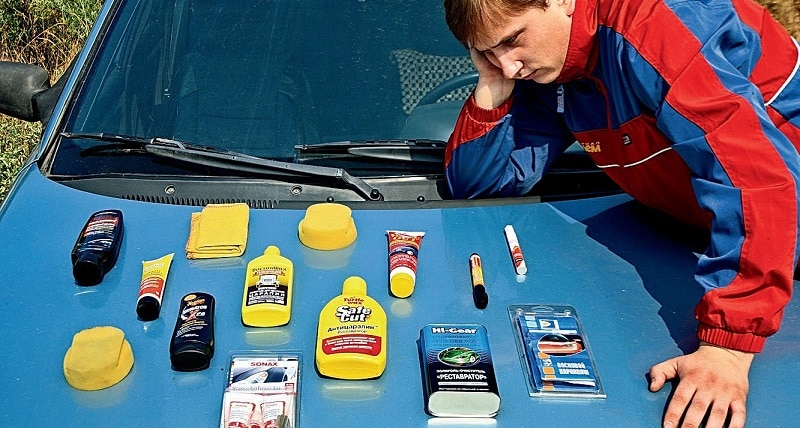
How to remove chips on the hood will be described in more detail below. But, before moving on to fixing paintwork defects hood, you need to familiarize yourself with the list of items that must be in the arsenal of a modern motorist.
Means for repair and care of the surface of the body:
Types of chips
Repair of shallow cracks and scratches
2. After washing, the surface of the hood must be completely dry.
3. Assess the severity of the situation.
5. If the primer breaks off with paint, apply a new coat of paint in the color of the car to the chip and let it dry. Next, an abrasive paste is applied and waited 15-20 minutes. The painted area is polished. At the end, another thin layer of polish is applied and a final polish is carried out.
With such proven methods, it is possible to independently eliminate a defect in the body paintwork without contacting the service station. The above information makes it clear how to remove chips on the hood yourself without the involvement of specialists and unnecessary expenses.
Repairing chips and scratches on a car body is something that, probably, any motorist faces. Any defect should be repaired, ranging from an imperceptible scratch to a large chipped paint or varnish. Minor defects, at first glance, do not interfere with the normal operation of the car, and many motorists simply ignore them. However, you can look at such a problem from the other side: a scratched car can no longer look as chic as it was at the time of its purchase.
In addition, chips are a sure way for rust. Chip repair improves not only appearance car, but also prevents corrosion of the body. In this article, you will learn how to remove chips and scratches from a car.
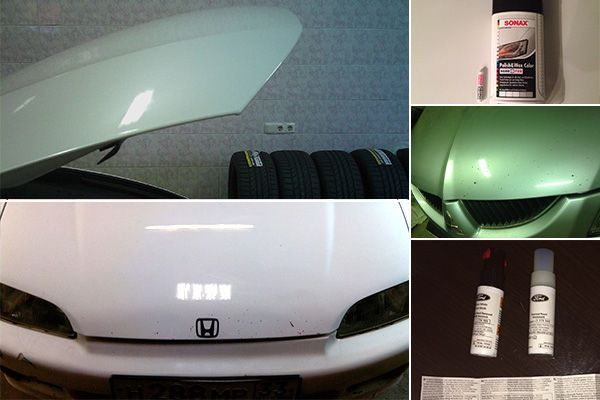
Repair technologies car bodies now allow you to repair all damage so that nothing else will remind you of them: your car will be indistinguishable from a new one. There are plenty of innovative products out there to fix any situation, such as scratch repair pencils.
Such pencils not only eliminate the consequences of careless driving, they are also resistant to aggressive environments. They cope with temperature extremes, high humidity, sunlight. But no one has canceled the traditional body repair.
In order for the repair of defects on the body to go as it should, you need to follow a number of simple rules:
Removing body chips is an important task, because such places are vulnerable to moisture and chemical attack, which can destroy the coating and body of the car. If insufficient attention is paid to the problem, it can develop into a serious defect that will have to be fixed for a lot of money.
So, a very small chip a couple of millimeters in size will eventually turn into a large concentration of rust. This means that if you start repairing earlier, then you will need much less consumables (varnish, paint, putty).
Before you start painting and restoration work, you need to decide on their volume. If you use modern equipment to repair scratches and chips, you will save a lot of time.
As an experienced painter, I can give you the right advice: check all the tools and read the instructions for use, because even after prolonged use, you can learn something new from the instructions, which will help to achieve a better painting quality.
Treat your equipment as carefully as possible. It happens that it fails quickly precisely because the owner did not pay enough attention proper storage tool.
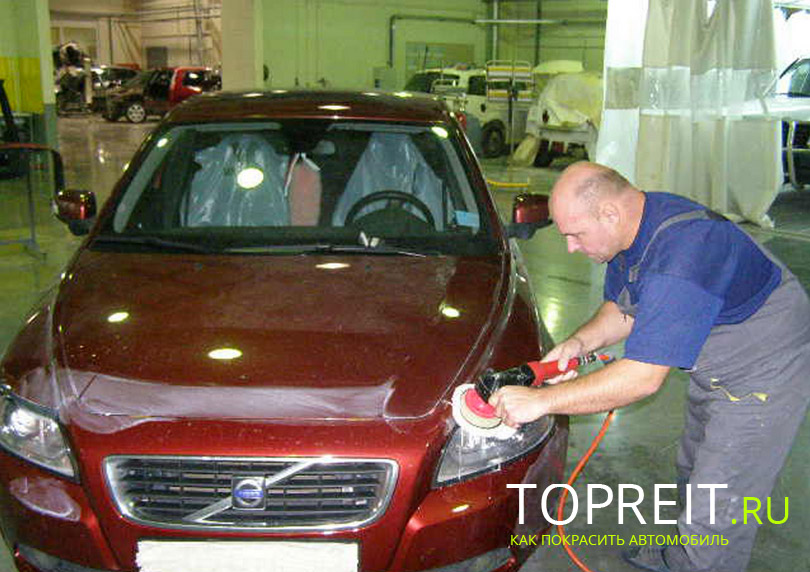
To paint chips on a car with your own hands correctly, use tools such as polishing machines, spotters for spot welding and other modern devices. After you find a place that violates the aesthetic appearance of the car body, carefully inspect the damage, determine how badly the body is damaged.
If the violations of integrity have affected only the top layer of varnish or paint, you can hope for a very simple repair. It is enough to buy a cosmetic pencil or polish of the same color as the car coating.
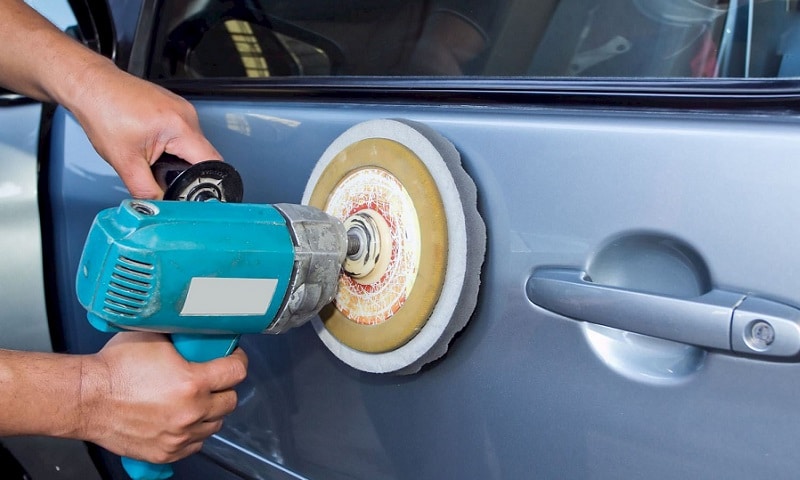
Also in this case, you can use the machine to fast polishing Or regular P2000 sandpaper. These tools will help you in repairing minor chips and scratches. After you polish the top layer, there will be no trace of a scratch left.
If the situation is not so cloudless, and you notice that the soil layer has also suffered, more serious intervention is needed. Do not delay the operation, because over time the consequences of a small scratch will worsen, and you will have to repair a much larger area on the body of your car.
If you have not yet allowed the formation of rust, proceed to the choice of paint. The code for the desired color is usually indicated on the plate with brief information about the car, which is fixed in the rear of the trunk. In addition, you can find the right tone using the VIN code of the car and a special computer program.
You can also turn to specialists who will analyze the color of the paint that is applied to the car body. If you do not want to put a defective body at risk on the road, you can get to a car service in another car, taking from yours, for example, a gas tank cap. By its color, specialists will also be able to determine the tone of the paint.
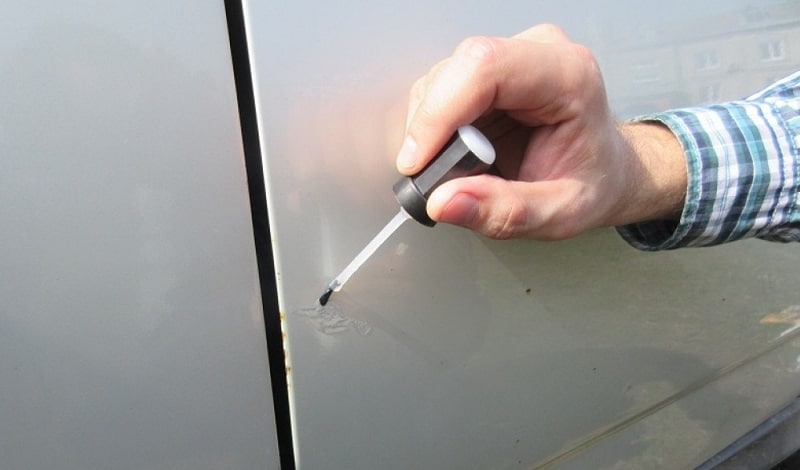
But this is not the only way to deal with defects that have appeared on the body. There are special kits paintwork materials that help you save money. Usually the kit includes chipping paint along with brushes.
Depending on the upcoming scope of work, choose a kit with one or two bottles of coloring liquid. You can make the chips less noticeable by shading them with a brush and coloring liquid.
It will also protect the body of the car from the prospect of rusting. To successfully paint with the Quick Repair Kit, follow these steps:
And, of course, do not lose sight of such an important thing as drying the surface after applying each layer. This will help make scratches as invisible as possible. But you still will not achieve the ideal effect.
So that no one can see the place of the repair, you will need to make a full-fledged local repair of chips and scratches on the car. We will consider the sequence of actions in the next paragraph.
Let us describe the process of local repair using the example of a hood restoration situation. First you need to wash the part thoroughly with water, it is better to use detergents white spirit type. Make sure your work area is well lit and you don't block the light. Examine the places that have been injured. The beak and the front of the hood are usually affected.
After the inspection, make a choice in terms of the type of coverage. There are several types of it: acrylic, which was often used to cover old foreign cars and VAZs, varnished acrylic (usually all foreign cars produced in the nineties), and metallic (it contains a base pigment and acrylic colorless varnish).
If you cannot decide exactly, then you can do a little experiment: take a white cloth, apply a drop of abrasive polishing paste on it and polish any area on the hood for a couple of minutes.
After polishing, take a look at the rag. If dirt remains on it, then there is a layer of varnish on top of the paint. If there is no dirt at the same time, then you washed the hood really well. Well, if a color trace remains on the rag, you can say with a high degree of certainty that the hood is covered with ordinary paint without varnish.
Is it acrylic or synthetic paint. Thus, you will need to make a choice in favor of one of the detected coverages.
The next stage is the removal of chips on the body with your own hands. If you see that rust has already begun to form at the cleavage site, go over it with any tool that will clean this rust. You can use a needle file, knife or special agent to remove rust.
After that, use sanding paper. Use P1500 or so. Wrap it around a small area around the treated area so that the paint or varnish adheres well to the surface. And then it will help to avoid sharp color transitions.
If you have done a hard scrubbing of rust, apply a primer to the chip. Painting chips and scratches on a car will end well if you use a two-component primer. Squeeze out just a couple of drops and no more.
Apply the mass with a thin brush or a sharpened match to the places where the metal is exposed. Wait a quarter of an hour, and then repeat the procedure. Then you have to wait a couple of hours, then use a hair dryer to speed up the drying of the surface. Once the primer is dry, fill the treated chips with paint.
Repair of chips on the car body will end very quickly if the car is painted with ordinary acrylic. You will need to take a brush or a toothpick and, just as in the situation with the ground, apply the paint in a thin layer on the chip. You probably stirred the paint before spreading, but if not, it's time to do it.
So repeat the application of paint every 15 minutes, allowing the coating to dry. The fact is that during the drying process, the paint shrinks a lot, and you will have to apply layers repeatedly until the result is satisfactory and the new coating rises above the surface with a small bump.
The next important stage is the grinding of the resulting tubercle at the site of the former chip. Your task is to level the tubercle with the rest of the coating. You must secure the area around the edges of the bump so that you don't rub the paint in that area. To do this, apply a thin layer of nitro putty on the edges of the treated tubercle.
After it dries, start sanding the problem area. To do this, pick up a small flat beam (half matchbox). It can be a small wooden lath. Then cut a small piece from a roll of P1500 sandpaper and wrap it around the bar.
Hold it tight with your fingers and grind. When sanding, be sure to use water to rinse the treatment site and the sandpaper itself. Do not press too hard and keep an eye on the surface outside the bump.
When it begins to noticeably decrease in size, know that the layer of applied putty is also being wiped off. If you see that there is nothing left of it, and it will take a long time to grind, to be sure, apply an additional layer of putty to avoid problems with another section of the hood.
When you feel that the bump has shrunk to a manageable size and is level with the surface, change to P2000 sanding and finish with the fine details.
After you have sanded the problem area, you can see that the paint has a mottled texture. To eliminate this defect, walk in a circular motion on the hood with P2000 emery. When doing this, use plenty of water. When you're done, you'll have a flat matte surface. For the result to be exactly what you expect, polish the surface to a shine.

Now you know well how to clean chips on a car. However, there is a high chance that something could go wrong, especially if you are doing this for the first time. Therefore, we consider the main defects of coatings after processing.
When you repair scratches on a car, follow the basic rules and instructions that are designed to ensure that the painting process goes without surprises.
But if you deviate from the well-known principles of painting, wanting, for example, to save materials, time or finances, then you will definitely run into problems. Sometimes such errors are difficult to correct, sometimes they are simply unrealistic. We list the main problems that negligent painters have:
It may happen that spots of soil will show through the paint or stains will appear in the form of stripes - this is the base coat.
If after painting your surface does not want to become glossy, it's all about high humidity air in which the car was painted. In addition, the reason may lie in the excess of the proportion of hardener in the varnish. This usually causes the surface to cool and moisture to condense on it.
This defect may appear due to the fact that the paint has an excessively liquid composition or the previous layer of paint was not completely dried.
As you can now see, repairing chips and scratches is no easy task. If you do not have minimal knowledge about this process, it is better not to undertake it. But if you know well how to prime, putty, apply the paint itself, then you are on the right track.
For a professional painter, chips and scratches on a car will not be a problem, but you still need to be well prepared for the upcoming painting. Prepare all the necessary equipment, as well as supplies, and focus.
Otherwise, you can always contact the workshop, where you will get a quality repair for a small amount. Then a positive result is definitely guaranteed.
No matter how carefully the driver drives, he is not immune to various little troubles, when pebbles fly out from under the wheels of cars and leave chips on the hood and wings. The situation is not very pleasant - on a smooth paintwork appear small scratches, dents, the paint is cracking, exposing the factory primer, and sometimes the chips reach the metal itself.
All this threatens with the fact that over time the body will be subject to corrosion, unless, of course, measures are taken in time.
How to clean chips from the hood and other parts of the car body?
First of all, you need to figure out what chips are, they can be:
If you go to a car service, then all these damages will be removed for you a short time that even a trace will not remain, but there is nothing to worry about if you try to remove them yourself.
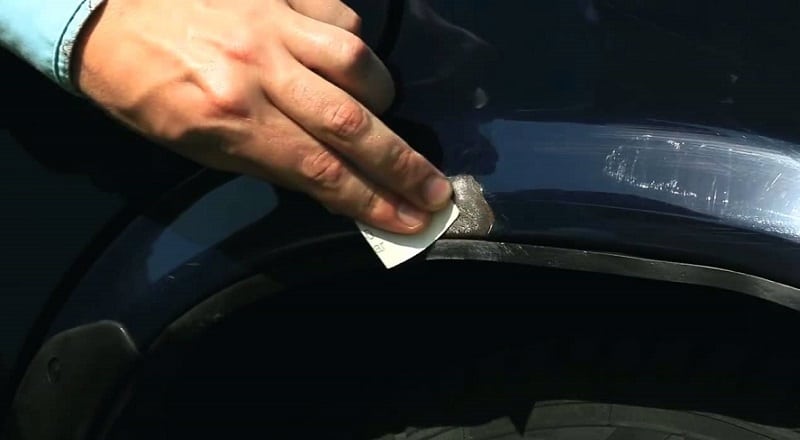
Shallow scratches and cracks can be removed with a colored pencil, which is selected according to the paint number. The paint number of the car is located under the hood on the plate, but if it is not there, then you can remove the gas tank hatch and show it in the cabin. The scratch is simply painted over with a colored pencil, and then the entire affected area is covered with a protective polish, which will subsequently protect against chipping.
If the chips are deep, reaching to the ground or to the metal, then you have to make a little effort:
It is worth noting that different experts offer their own methods of dealing with chips and cracks on the hood. So, if the chip touched the base paint, but did not reach the primer, then you can pick up the enamel of the corresponding color and literally “impose” it into the recess with a match or a wooden toothpick. When the enamel dries, sand the damaged area and cover it with varnish, and then polish it so that the painted chip does not stand out on the body.
It will be much more difficult to remove damage caused by hail or large gravel, when not only cracks, but also dents form on the surface.
You can even out the dent by lightly tapping the rubber mallet on wooden block applied on the opposite side of the damaged body element - the work is very filigree and in the absence of experience, you can damage the hood even more.
It is almost impossible to avoid the appearance of chips, we can only advise polishing the car with special protective agents that will protect the paintwork from minor damage and corrosion.
Description: War Thunder is a next generation military MMO game dedicated to...

"Titan Siege" is a large-scale online game on the theme of Scandinavian and ancient Greek...

Being an avid lover of German tank looks, I spent a lot of time...