
Description: War Thunder is a next generation military MMO game dedicated to...

Today, designers in interior design bring not only new and original trends, but also constantly return to the roots. The same thing happened with puffs. They got new life and “played bright colors”, thanks to modern fabrics and textures. In the Middle Ages, such window decoration was the privilege of only the nobility, as it was very expensive. In the modern world, you can afford it even with a small budget, if you know how to make puffs on curtains with your own hands, without resorting to the help of designers and at no special financial cost.
Puffs - tucks and folds on the fabric, which are made in the form of drapery made in non-standard ways. The result is a variety of extraordinary compositions that add high cost and gloss to the interior.
Important! Puffs have come to us since the time of Louis XIV. In those days, it was fashionable to decorate not only windows, but also clothes with voluminous folds.
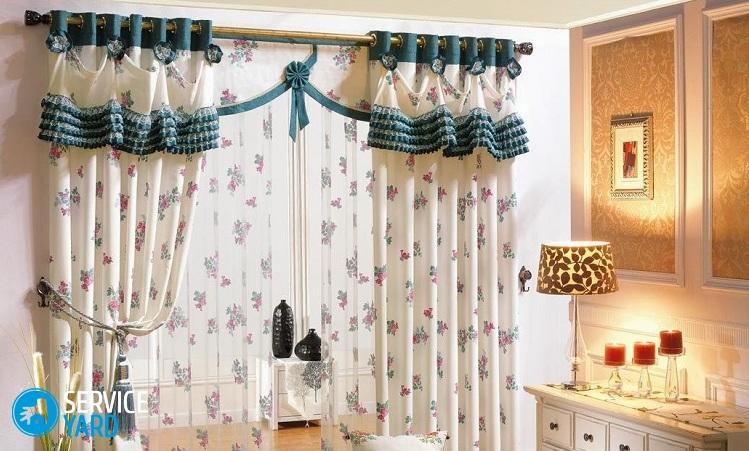
Decorating a window with puffs is best when designing bedrooms, offices, living rooms or halls.
Most often, such decorative folds are used in rooms where the interior is made in classical style with the presence of massive furniture, gilding and monograms.
They look very peculiar and extraordinary in the Art Nouveau style. AT this case, the difference will be only in the design of the fold itself. It can be made more magnificent and airy.
There are only two types of such decorative folds: factory-made and those that are made independently. The only difference between them is that handmade takes a lot of time and perseverance. As far as factory production is concerned, finished work you will receive as soon as possible.
To date, several configurations of puffs are most popular:
They got their names due to the shape of the fold, which is the result.
Important! In addition to decorating curtains, puffs are also sewn onto pillows and blankets.
If you decide to create puffs on the curtains with your own hands, the result largely depends on the quality and texture of the fabric you have chosen. Thanks to a huge assortment, you can easily choose the material that will not only be an ideal option for creating decorative folds, but also fully fit into the style of the interior. In order not to make a mistake in the choice, we bring to your attention a few recommendations.
Important! Try to pay attention to materials that have a metallic overflow. Thanks to this fabric decor, the future fold will “play out” in a new way.
You can sew curtains with puffs without using a sewing machine. But despite this advantage, you should stock up on a fairly large number of auxiliary tools:
Important! Chalk or a tailor's marker can be replaced with a bar of soap. It draws well, while being easily erased and does not leave marks.
The number of elements you need depends on the width of the future curtains. To do this, you need to multiply the length of your eaves by 2.5. The number that turned out is the length of the fabric that you will need with a margin for assembly.
Important! Always take into account the amount of fabric that will go to the processing of the side cuts. Therefore, you should add 10-20 centimeters to the total footage.
After you have calculated the amount of fabric you need, you can also find out the number of future folds. To do this, you need to divide the width of the curtain by the width of the future element.
The general algorithm for creating puff curtains with your own hands includes the following steps:
In order to make puffs on the curtains, you should draw a preliminary diagram. Thanks to her, you can transfer the sketch from paper to fabric as correctly as possible. The pattern should consist of dots and arrows (the direction of the thread from one point to another).
Important! The transfer of the pattern pattern to the fabric should be exclusively from the wrong side.
Always use a ruler while working. This is necessary so that the distance between the marks is equal.
There is another option. It's lighter since you're just copying the drawing. You need to divide the curtain into several conditional rectangles. With the help of a ruler and a lamp, transfer the pattern onto the fabric using the “tracing paper method”.
Important! Keep in mind that when transferring a picture, various errors may occur. You should pay attention to the equity and weft rows of threads on the fabric. So that the pattern is not skewed, the elements of the circuit must be applied parallel to the threads.
After the pattern is transferred to the fabric, you can begin the process of sewing puffs. If sewing is done by hand, the work is quite painstaking, so be patient:
Important! Such tucks do not have to be done throughout the curtain. You can only decorate the top or edges this way.
We bring to your attention some simple but interesting ideas on how to decorate a window with the help of puffs.
For this option, the first thing to do is measure the fabric. To make a calculation, the required height of the curtain should be multiplied by the fold factor. The width of the fabric cut is calculated using the same formula.
Important! The universal indicator for all types of fabric is 2.5. Depending on the taste and the volume of the future puff you need, the coefficient can be changed up or down.
Let's get to work:
For this method, you need a transparent fabric and a sewing machine. It is thanks to the use of such a texture that future puffs will turn out to be light and airy:
Important! The smaller the bandwidth, the smaller the wave will be.
In order to bring notes of Austria into the interior of the room, you need a piece of light curtain fabric and a sewing machine:
To create such a pattern, you need a dense and mother-of-pearl fabric. In this case, you will have to do without a sewing machine:
In order to decorate the window with extraordinary folds, you do not have to purchase new ones. You can perfectly make puffs on old curtains:
Important! For additional creation of waves, measure 8-10 centimeters from the braid while sewing.
Important! This option for making puffs can be done without braid.
In order to create puffs for a lambrequin, you need to have some sewing skills and the following inventory:
Let's get to work:
Exist various ways how to make puffs on curtains. You can decorate them both from the inside and from the front, or experiment with fabrics. But in order for you to succeed, you should follow a few rules:
In order to decorate a window with puffs, you do not have to be a noble aristocrat. Thanks to the above recommendations and rules, you can create a decor that Louis XIV himself would envy. The main thing is to have a little patience and perseverance. And then you will succeed.
Lambrequin on the curtain can be independently made in the form of lush air folds - puffs. Depending on the technology by which the tailoring will be made, its manufacture can be the simplest and take only a couple of hours or require a little work with a needle when assembling a more complex version.
Pelmet is an important part of the window decor. It will successfully hide an ugly cornice or a sagging edge of a curtain.
To make this finish you will need:
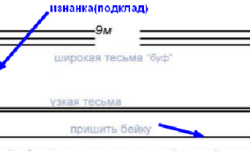
Scheme for the manufacture of lambrequin "BUF" on curtain tape.
Pull the cords of the ribbon together, forming nice folds.
A more complex version of the lush design for the curtains can be made from strips of fabric of the same or different colors. For its manufacture you will need:
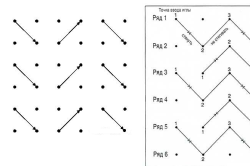
Figure 1. Schemes for creating puffs: "braid" (left), "wave" (right).
You will need:
The length of the material for sewing is calculated using an assembly factor of 2.5, the width must be selected with the expectation that in the finished product it will decrease by about 1/3. For accuracy of calculations, it is best to make a test sample by measuring the width of the fabric before making puffs and the finished sample.
The material chosen for sewing must be decatered, that is, washed and ironed so that shrinkage does not spoil the finished product.
Before sewing a lambrequin with puffs, it is necessary to mark the grid from the inside for collecting folds according to one of the schemes. Process the side and bottom sections into a hem.
Sewing a lambrequin puff was not very difficult. Creative inspiration, called to help in this matter, can suggest options for combining fabrics of different shades, which will give the product an even more original look.
Lambrequin puffs, curtains for the kitchen. Master Class|
|
Even short curtains for the kitchen involve the use of interesting design solutions. |
|
There are a lot of design options for short kitchen curtains - for different tastes and styles. |
And the most simple curtains can look elegant with the use of simple design techniques. |
|
If you are the lucky owner of a spacious kitchen, then the design of your kitchen window allows for more complex forms of curtains. |
Small touches, such as trimming the edges of the curtains with lace, will give your light white curtains an elegant and airy look. |
|
This option of curtains for the kitchen window will allow light to easily penetrate and provide free access to the windowsill. |
So that light curtains do not rise up from the wind blowing from open window, they are fixed with pickups in the center and on the side. |
|
For those who often open the kitchen window, this window design option may be suitable - extraordinary and practical at the same time. |
For lovers of experiments in the most ordinary and simple things - this avant-garde design kitchen curtain from global interior designers. |
|
White curtains can be complemented with colored elements that are in harmony with the overall color scheme of your kitchen. To do this, it is better to choose easily draped fabrics. |
Even the smallest kitchen deserves attention to the design of its window. Light white curtains will not overload the kitchen bright colors, and decorate it with their exquisite shapes and cute details. |
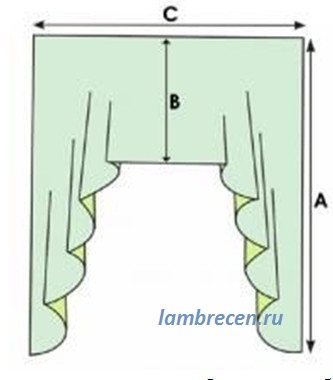
Curtain "Cat's House" (the legacy of the magazine "Peasant Woman") - this original came to us from the Soviet magazine "Peasant Woman". It was developed by employees of the All-Union Research Institute of Technical Aesthetics. Judging by the responses and letters from readers, then this version of the curtain for the window made a splash. Its echoes have reached our days. She represents curtain with an arch flared like a sun-flared skirt. Therefore, it does not have an assembly along the cornice, the volume and tails at the bottom are formed due to the “flared” cut.
How to cut out:
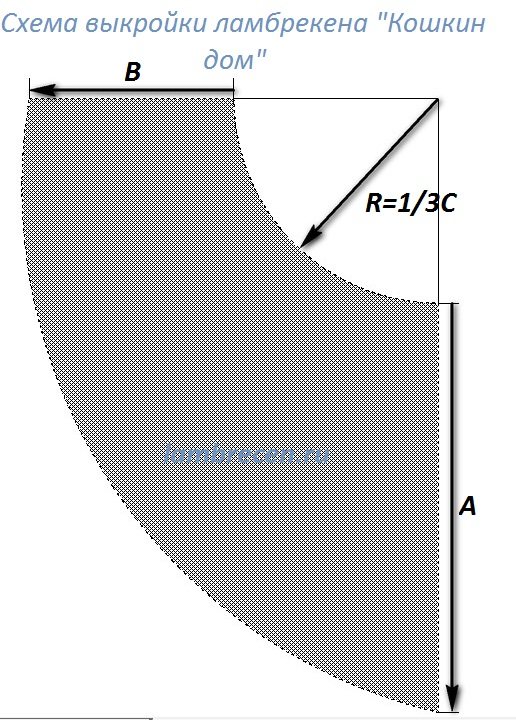
Processing and tailoring:
Cut out the curtain, process the bottomMoscow seam, or oblique trim, or fringe. Finish the side cuts. Sew a straight belt with a curtain tape with eyelets, or a drawstring to the top of the curtain - as if you are sewing a half-sun skirt on the belt. This method of processing the top of the curtain is quite simple, and even novice dressmakers can do it.
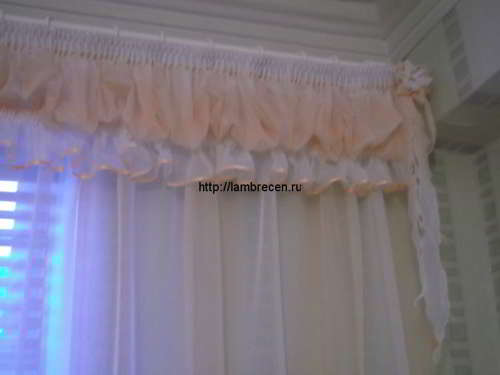
In this master class, I will teach you how to sew a puff lambrequin on a curtain tape. For this lambrequin, it is not necessary to make swags, perekida and other details. It is sewn from a single panel, assembled on a curtain tape. You get puffs. Very cute too.
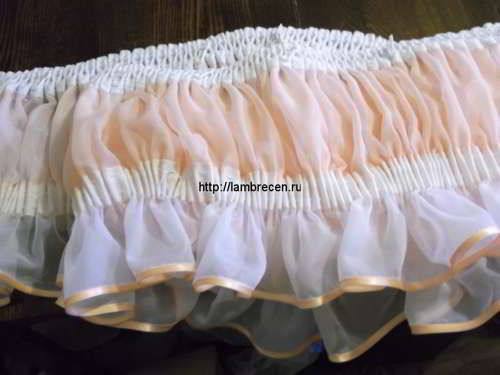
Here is what the finished product looks like:
 lambrequin puffs lambrequin puffs
We will sew according to the following scheme.
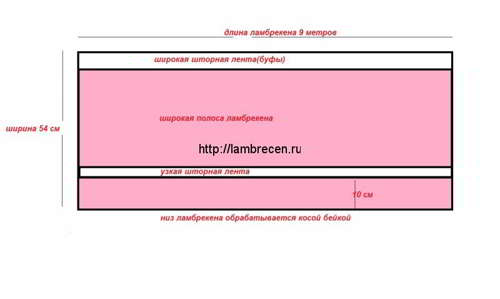

If the length of the cornice is 3m, then we cut the panel with a length of 9m, if 2m, then 6m, respectively. So the build factor is 3.
(It is hard to see in the diagram that the width of the narrow strip of the lambrequin is 18 cm)
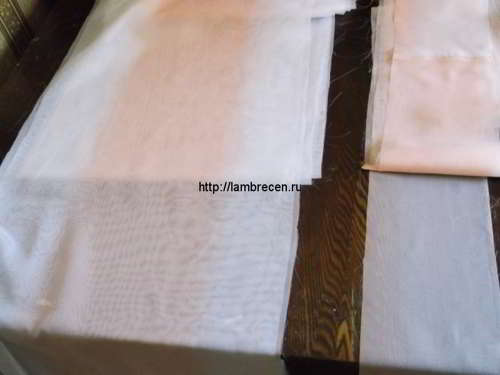
This lambrequin consists of two panels, cut out according to the scheme.
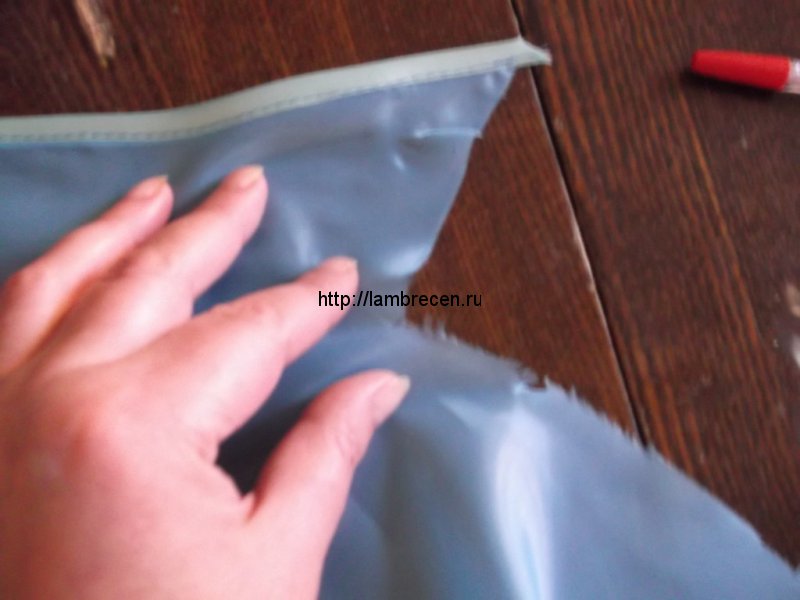
1. First, we process the sides of each canvas.
Then
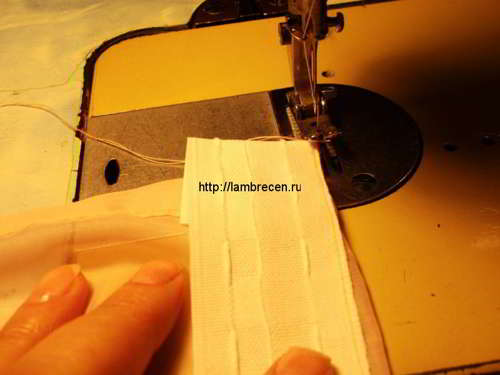
2. To a wide canvas on one side we sew (as shown in the diagram) a curtain tape, but we lay only the top line
leave the bottom of the braid unattached
3. We process the other long side of the wide canvas.
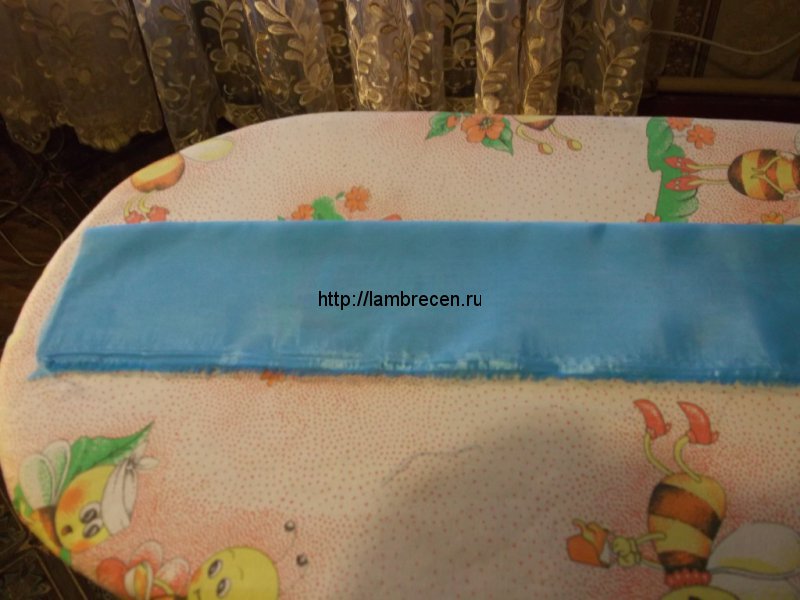
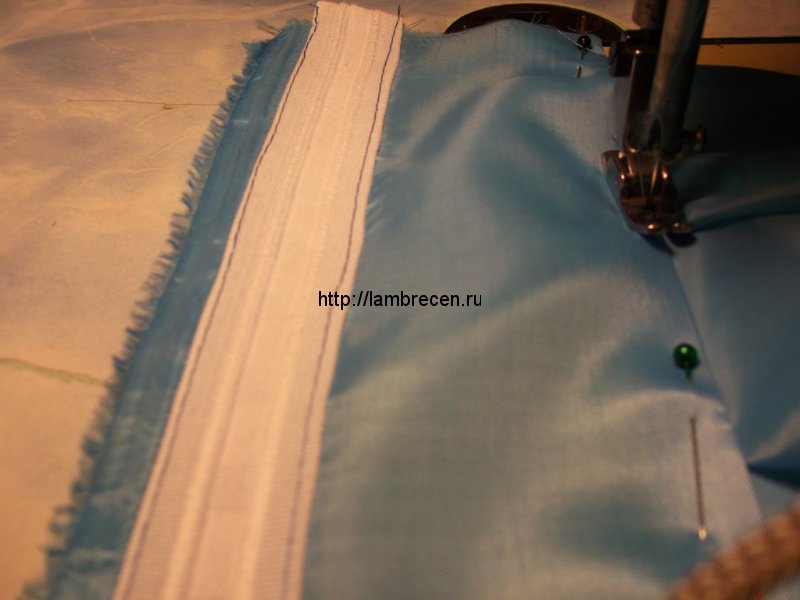
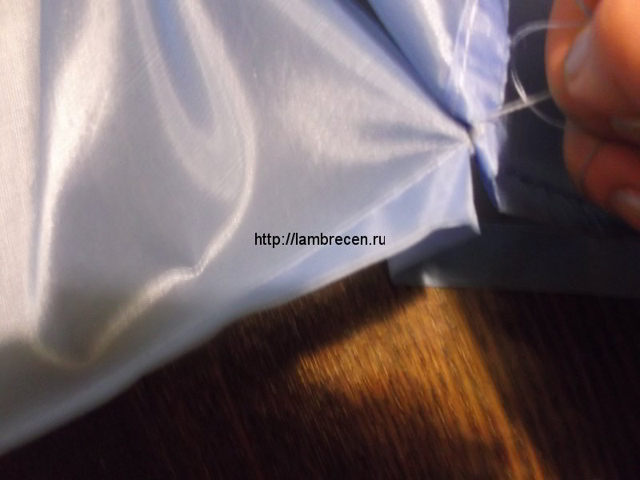
4. At a distance of 10 cm from the edge of the fabric treated with inlay, we sew another curtain tape (narrow) and also lay only one bottom line.
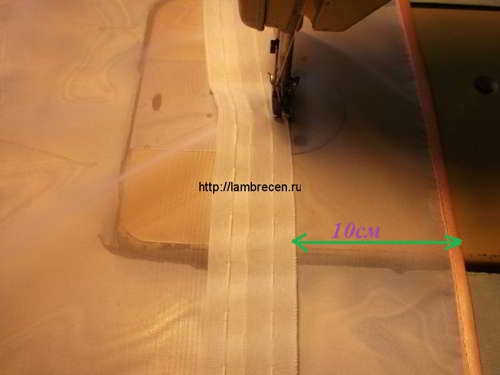
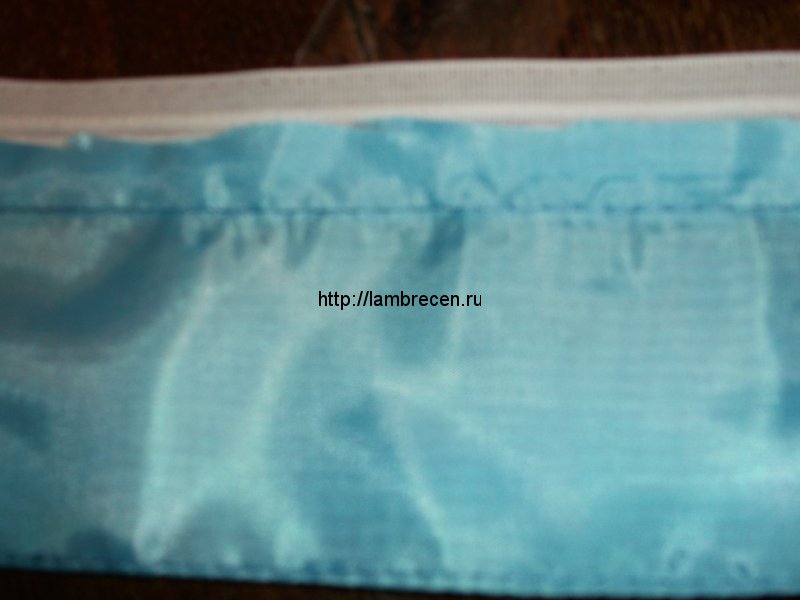
It turned out that the wide part of the canvas was also processed with an oblique trim and a curtain tape was sewn to it on both sides at the top of a wide puff, and at the bottom it was narrow.
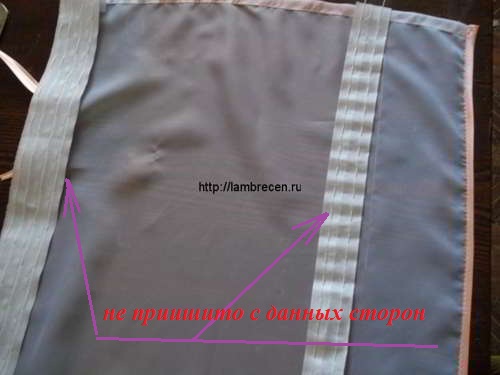
However, the curtain tapes are each sewn on one end. In the middle of the canvas, they are not fixed with a line.
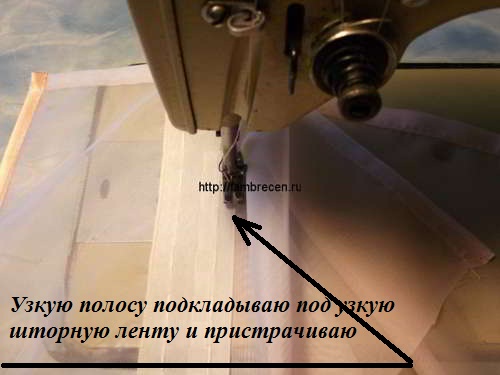
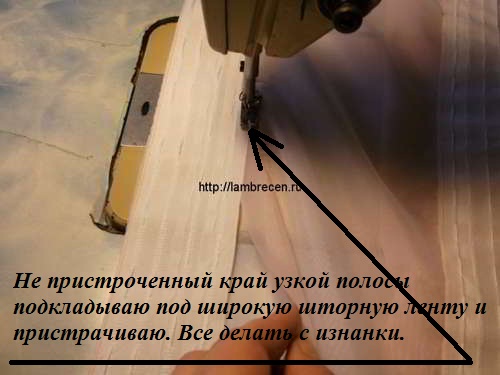
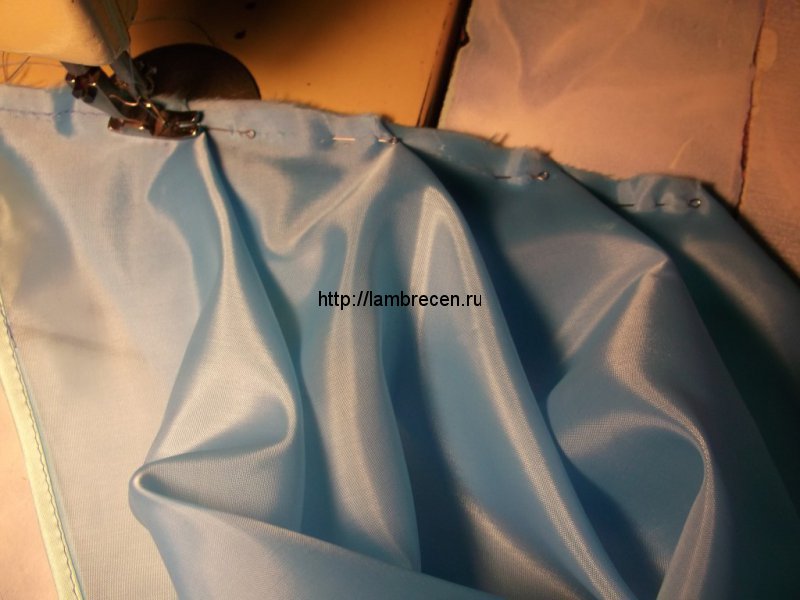
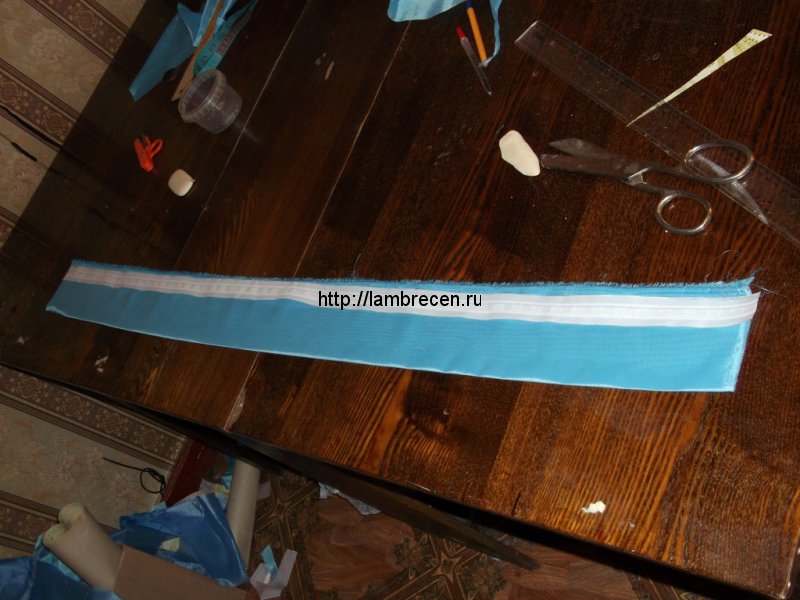
5. Now we insert a narrow canvas between the non-sewn ends of the curtain tape and lay lines along the non-attached ends of the curtain tapes. It turns out a sandwich: at the bottom there is a wide canvas, then a narrow one, and all this is fastened on both sides with curtain tapes.
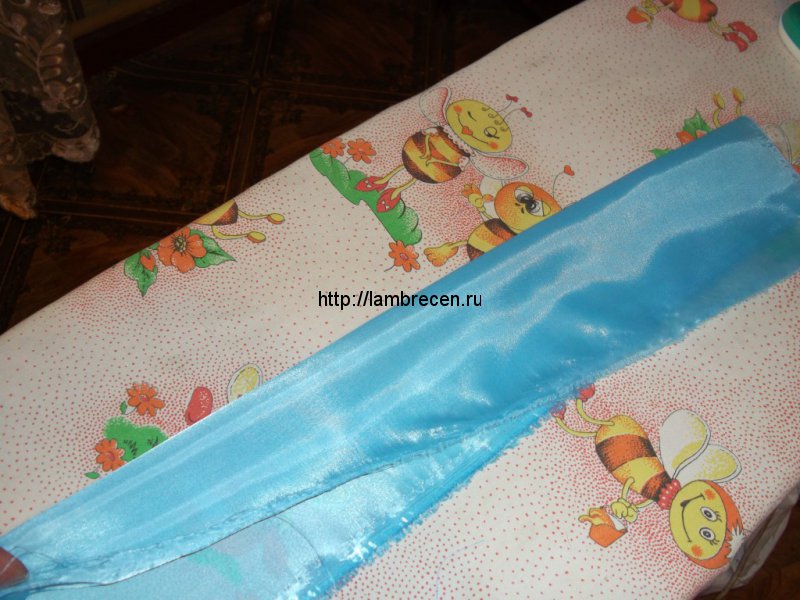
Now you can iron everything.
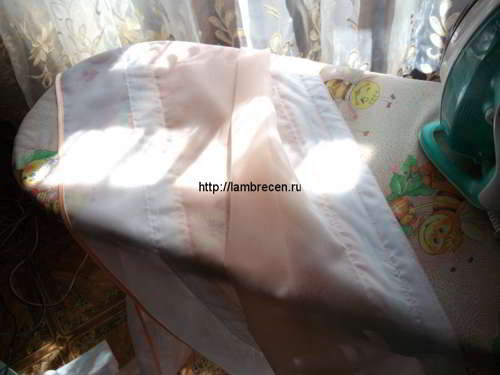
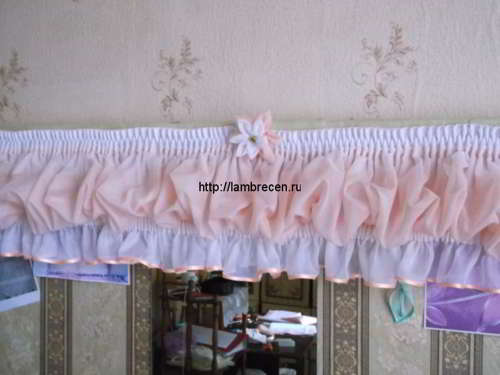
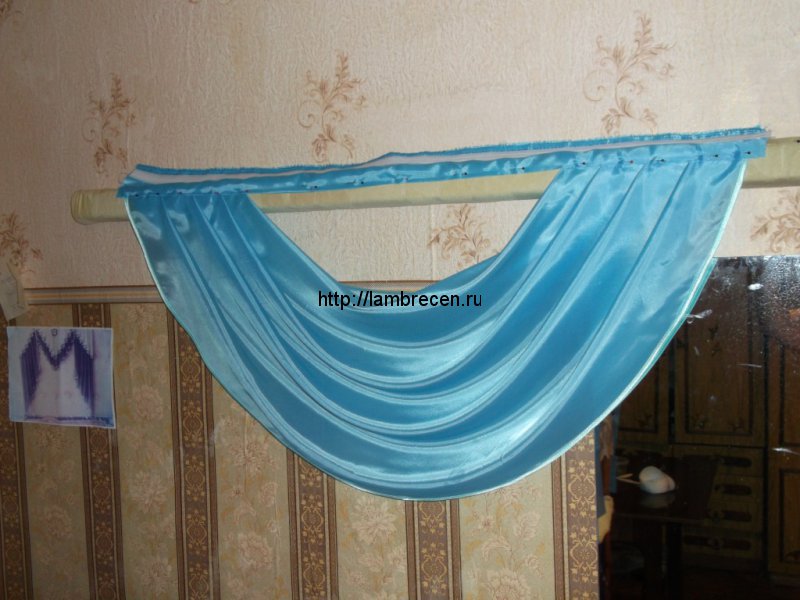
Here is our finished product.
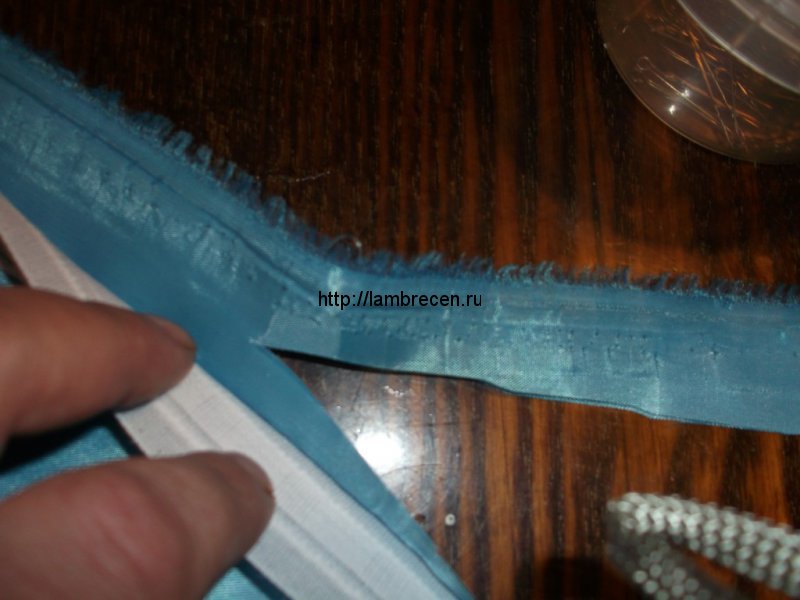
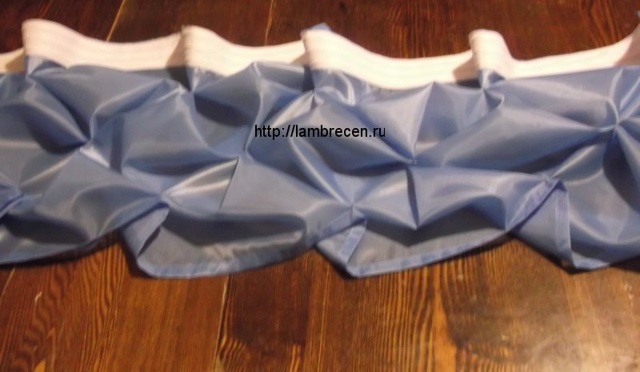
Now we tighten both the upper and lower curtain tapes to the size we need and get puffs that can be adjusted manually, if desired, where you need.
In theory, such a lambrequin should be called mechanical, since the puffs themselves in it are obtained thanks to drapery with a curtain tape (by analogy with a mechanical swag on a curtain tape).
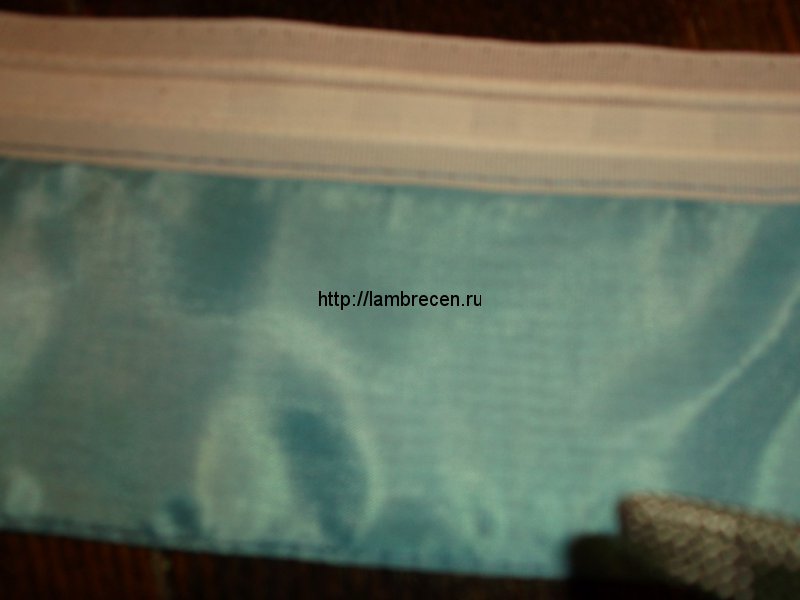
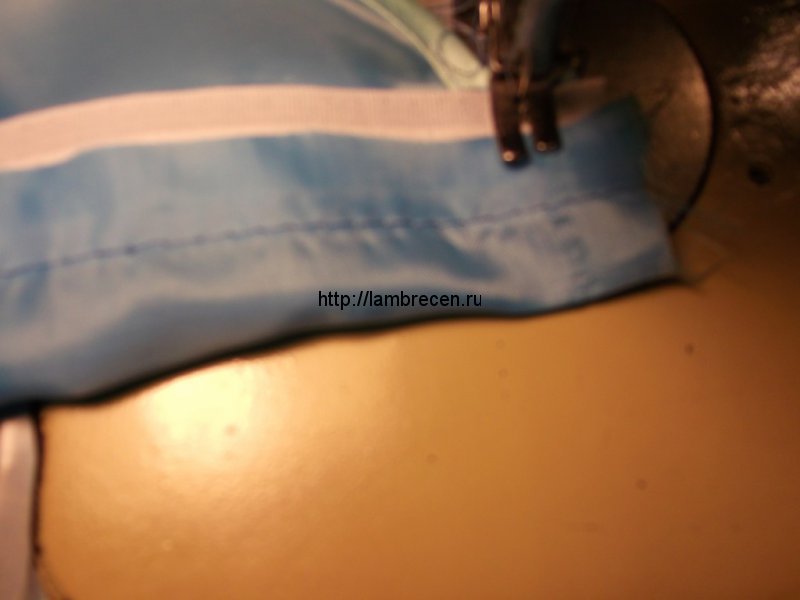
Here's what came out of the inside:
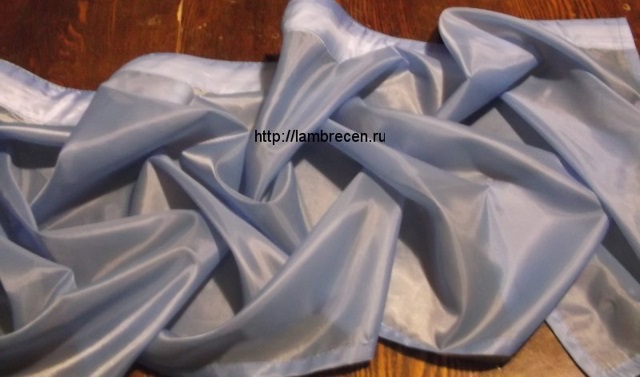
And from the face:
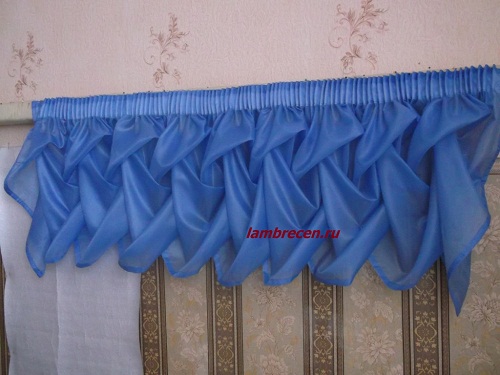
And this is the result of sewing curtains fromand our lambrequin:
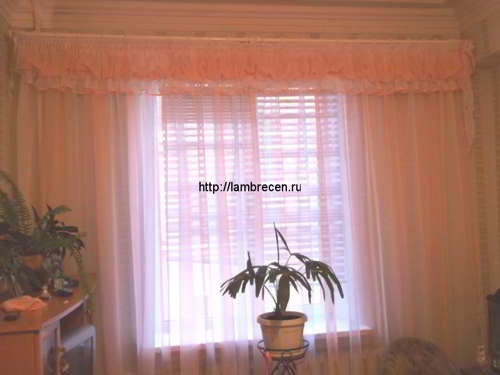
lambrequin puffs lambrequin puffs
However, on the site, in the master classes there is a lesson abouts (according to the braided pattern):

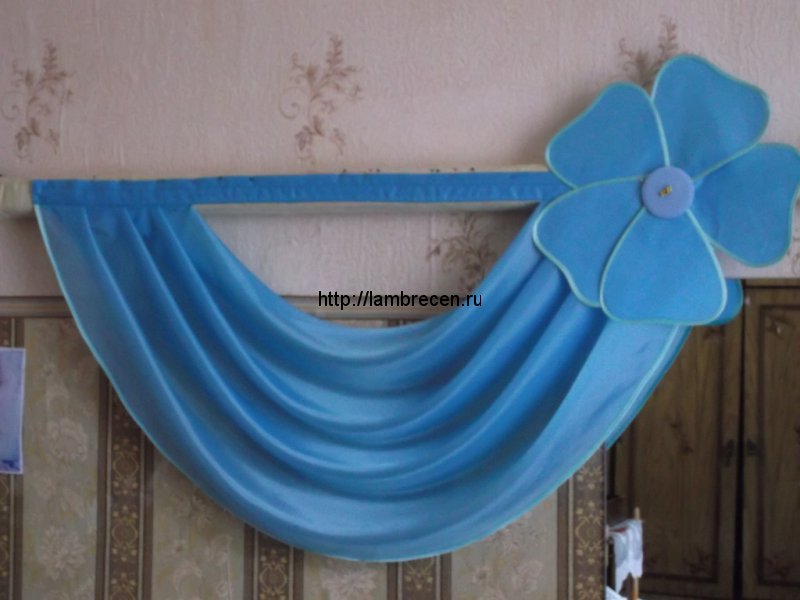
From this master class, you will learn how to sew a lambrequin from a symmetrical flip, resulting in a flip lambrequin decorated with a fabric flower:
1. We process the upper and lower sagsoblique trim.
after that, be sure to iron and let the parts cool.

2. On the cutting table, lay the folds at the crossover and pin them with pins or baste them.
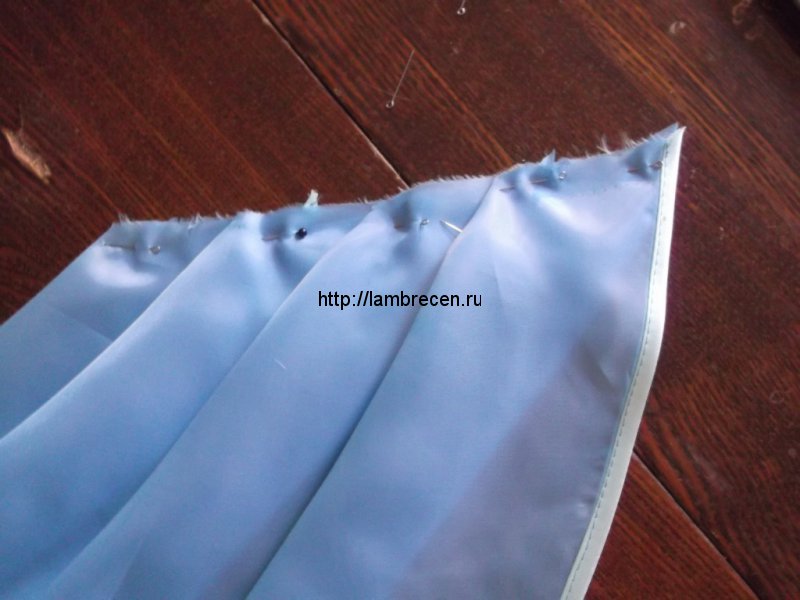
3. We fix the folds with a machine stitch.
4. We hang it on a special bar for assembling lambrequins, covered with insulation, and on top with a cloth. (You can adjust the back of the chair) in accordance with its length (the length of this flip over the bar is 115 cm). This bar does not have to be firmly fixed to the wall. You can nail fasteners to it (as on wall cabinets) and hang it only when you are sewing a lambrequin , so, as during assembly, they should just hang like on a cornice. And you can easily assemble any details of the lambrequin on this bar by adjusting the length of the lambrequin itself and the position of any of its details up to sewing a bar to it, which will fix exactly the model that you laid out on the bar.
And so, this is what happened:

Now let's start sewing the bar in the first way. To do this, we cut off (you can tear off) a strip of fabric 120 cm long (the length of our throw is 115 cm.) And 17 cm wide.
5. Iron the bar in half along the entire length and let the fabric cool.
6. We sew a narrow curtain tape at a distance of 7 cm from the ironed edge of the bar.
I advise you to iron it with steam before sewing on the curtain tape. The tape may shrink.
7. Cut off the excess fabric under the braid on the untreated side of the bar.
Here's what happened from the face of the bar:
And this is the view from the inside:
It is possible not to cut the fabric, but simply, when processing the plank, later tuck this protruding piece under the curtain tape.
Who likes it better.
8. We pin the prepared bar directly to the crossover hanging on the bar in this way:
9. Filming lambrequin from the bar and lay a line. We sew the bar to the crossover.
Here's what happened:

10. Fold the plank in half with the right sides inward and process the edges of the plank.
Pulling out the plank:
11. We lay a line in a line along the bar, trying to grab the bottom of the bar along with the braid.
12. Flip lambrequin on the wrong side and we lay one more line in a line along the braid. lambrequin
Good luck!
http://lambrecen.ru/master-class-2/shem-lambreken-mehanicheskiy-bufsobr
Information for webmasters: when copying materials from the site, please read
In this master class, we will learn how to sew such a puff lambrequin:
how to sew a pelmet puff how to sew a pelmet puffThe idea for sewing this lambrequin is taken from here:
It is sewn according to the braided puff pattern. Figure 1 shows the diagram for these puffs. According to this scheme, you can also assemble a beautiful decorative pillow to decorate your home. Only the sides of the square must be chosen 1-5 cm, at your discretion.

For lambrequin puffs of the side of the square, we take 15-20cm. You can build not a square, but a rectangle, where one side will be 15cm and the other 18-20cm.
Who likes it. You can try to sew in different ways.
To begin with, I build a diagram for this puff labrequin (Fig. 2):
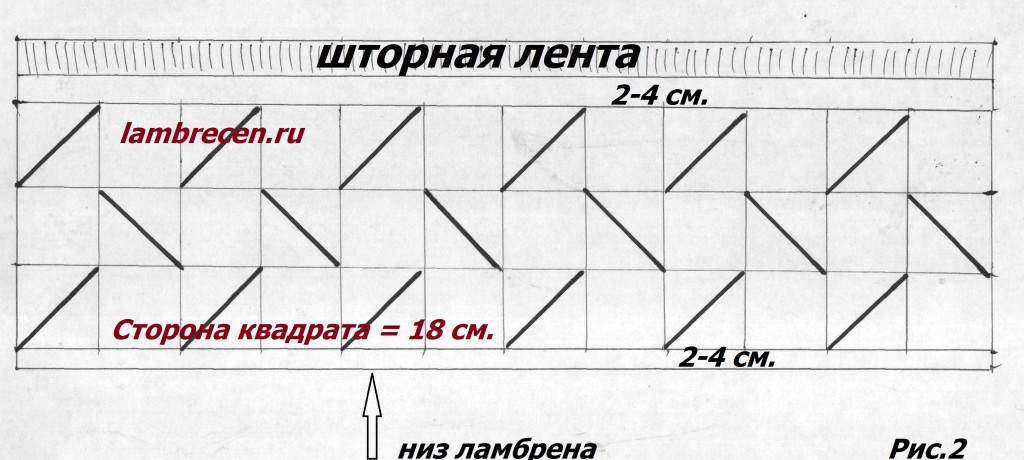
For sewing my own, I took the side of the square, equal to 18 cm.
I needed a lambrequin with a finished length of 1.30 m along the eaves. To do this, you need 1.30, multiply by with an assembly factor of 2.5.
It turns out that along the length of the fabric I had to take 1.30x2.5 = 3.25m + 5cm for processing the sides. Equals 3.30 m.
Now we need to adjust the amount of fabric along the length so that our squares, into which the pattern is divided, fit along the length of the product completely, and do not break off somewhere in the middle. That is, we divide 330 cm by the size of the side of the square, which I have taken with a length of 18 cm, we get: 18.33. That is, I have 18.33 squares in a length of 340 cm, so I just take an integer number of squares, that is, 19 pieces. So, we multiply 19 squares by 18 cm, we get 342 cm or 3.42 m plus 4 cm (or 6 cm) for processing the sides. Total 246cm. or 2.46m. I took this length of fabric for a lambrequin with a length of 1.3m along the eaves. If you took the side of the square at 15 or 20 cm, then divide not by 18, but by 15 or 20.
We decided on the length of the fabric. Now we determine the width of the cut fabric.
See Fig. 2. It follows from the figure that I need to take the width of the fabric equal to 18x3 + 8 cm (width of the curtain tape plus 2 cm allowance for freedom) + 2 cm (allowance at the bottom of the lambrequin) + 3 cm for processing the bottom edge. Total 67 cm. In finished form, the product will be 1.30 cm long, 47 cm wide (height). If you want a different length, then do the appropriate calculations. If you want a smaller width, then take the sides of the square 15 cm, but a larger one, then you can take not 3 rows of squares in the diagram, but 4.
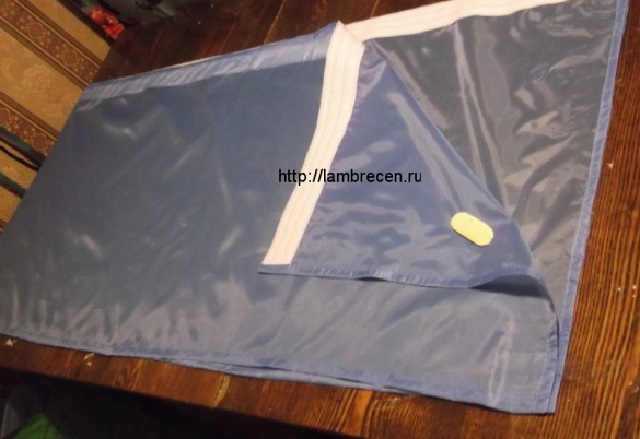
Now that I have decided on the dimensions of the fabric for the cut, I cut out a strip of fabric 3.42 m long and 67 cm wide. I process the bottom and sides, sew on the curtain tape. How to sew a curtain tape can be seen
Here's what happened:
The next step is to draw a diagram on paper.
I take pattern paper and draw on it a pattern in three rows with a square side of 18cm (you can take your size):
Now I cut out the drawn diagonals of the squares so that the markup is conveniently applied to the fabric:
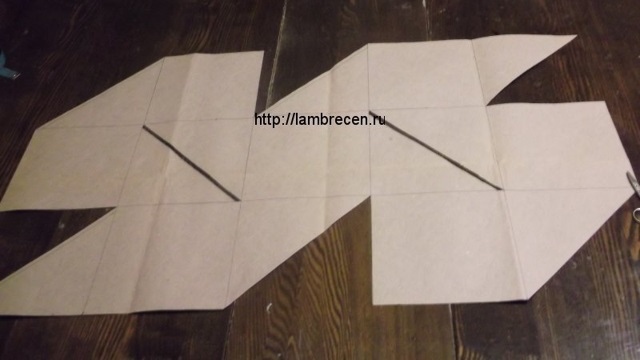
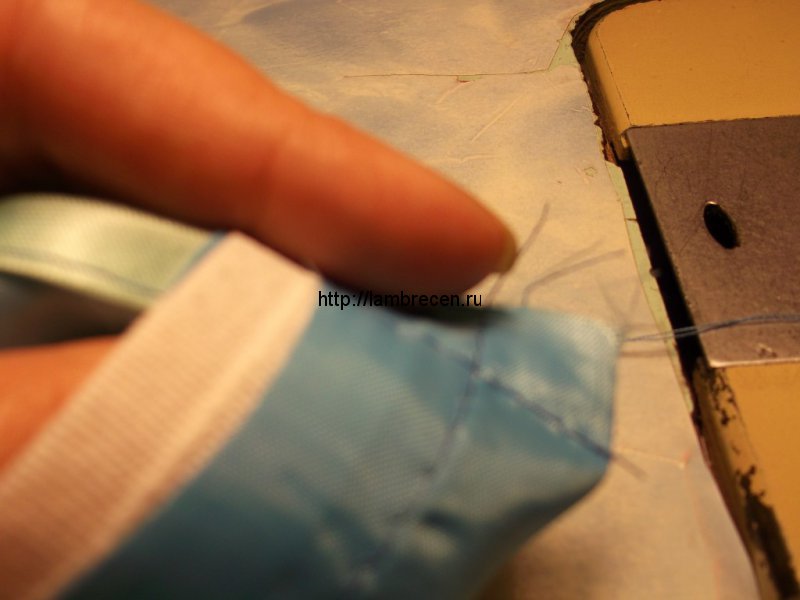
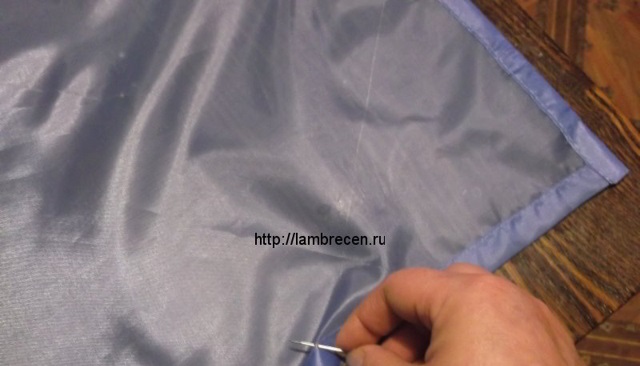
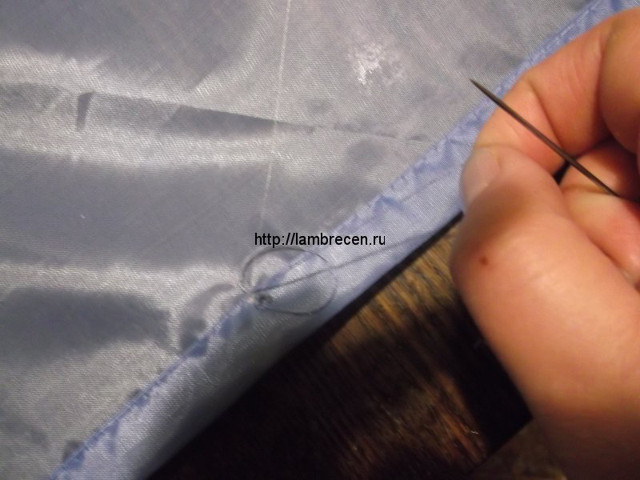
Got the pattern. I put the pattern on the fabric and make the markup from the inside. To do this, you can use a disappearing felt-tip pen, if the fabric is transparent, if not transparent, then you can use a pencil. But not with chalk and soap, as the markings will be erased before you collect the puffs. I used a silver gel pen.
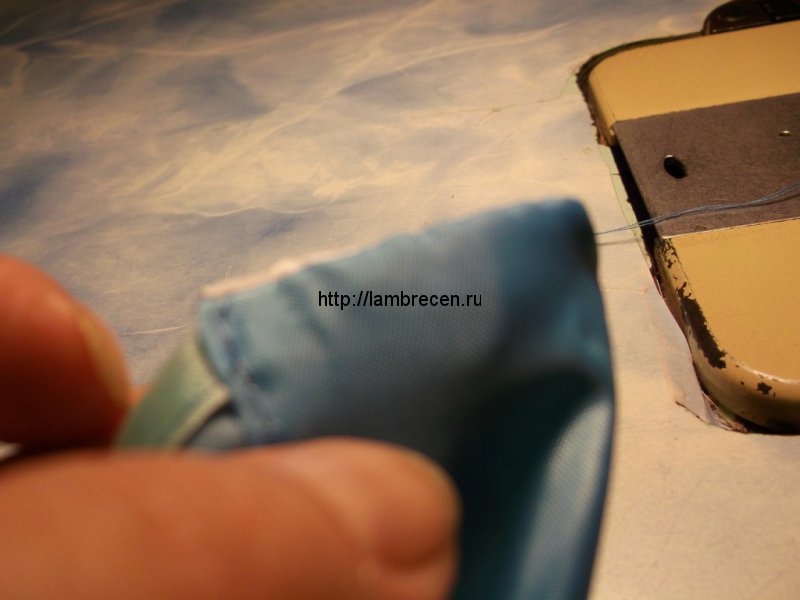
The markings are done, you can start assembling the puffs:
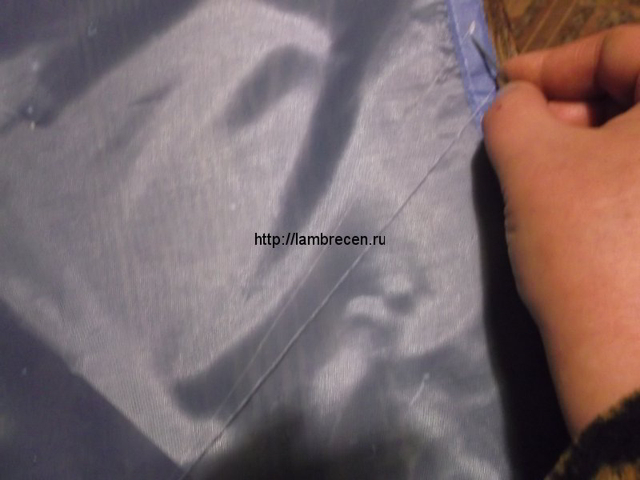
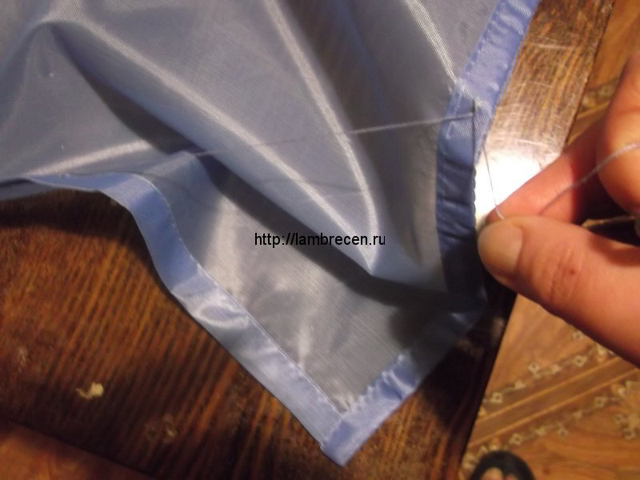
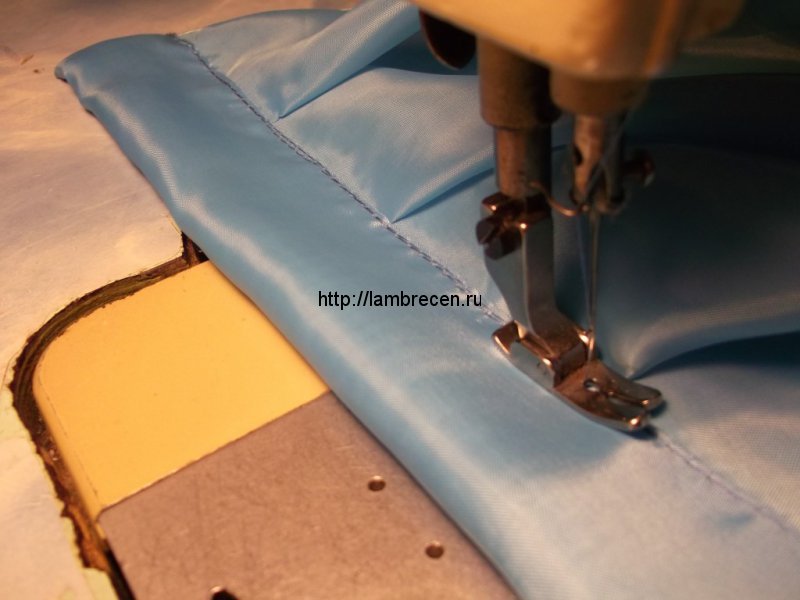
When all the puffs are assembled, this is what happened from the inside of the lambrequin:
And this is the front view:
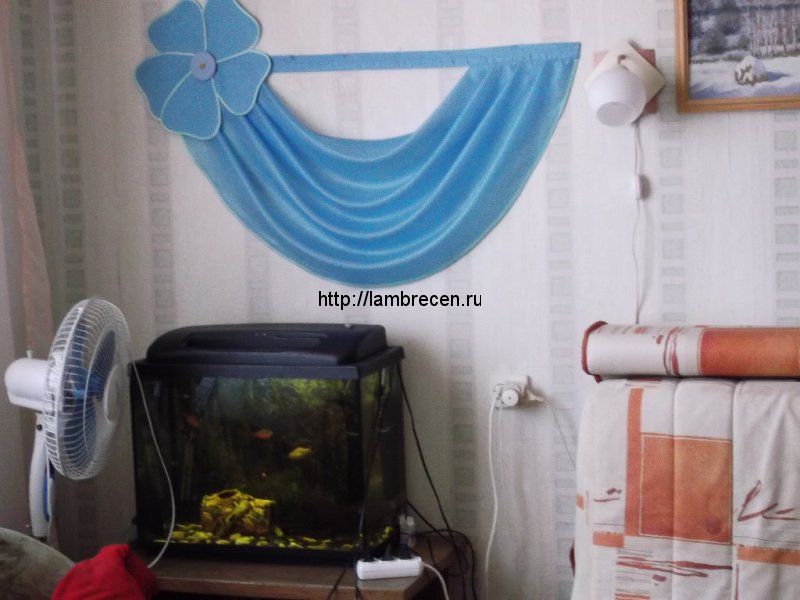
The lambrequin is ready, now you need to pull the curtain tape to the desired size and hang the lambrequin on the cornice, having previously straightened all the folds-puffs by hand.
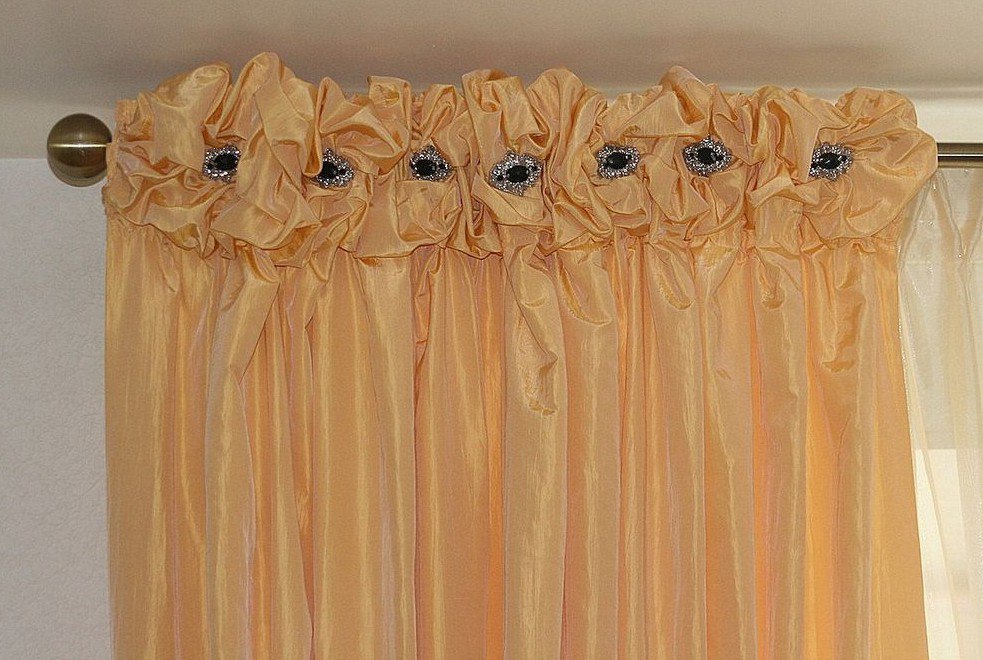
And here is a selection of lambrequins puffs, taken on the vast expanses of the Internet:
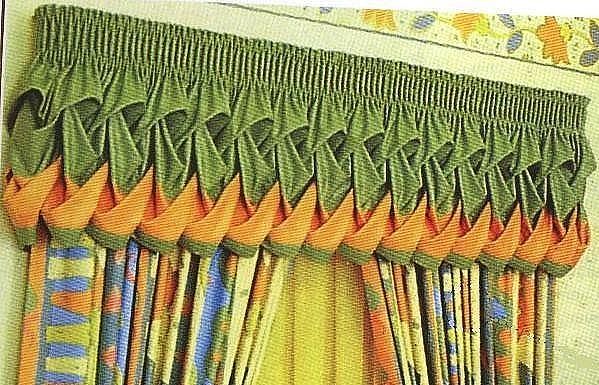
In this lambrequin, two colors of fabric are ground, yellow and green. The width of the yellow strip should be equal to the length of the side of the square you have chosen for puffs.

It's similar here.
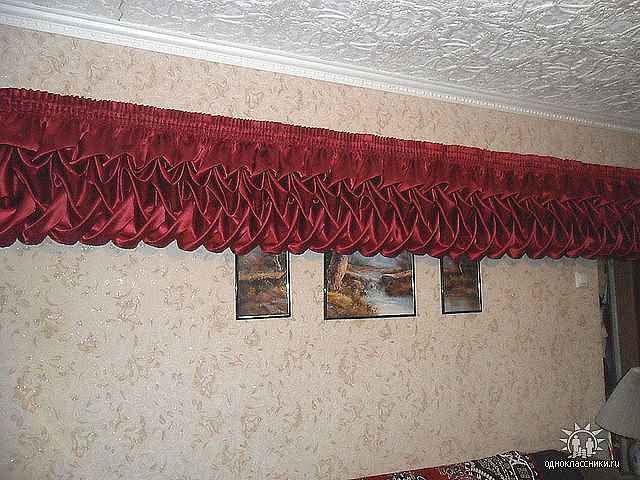
Here, the lambrequin is sewn from a denser non-transparent fabric and, of course, it looks more beautiful than in the master class, but the manufacturing technology is the same.
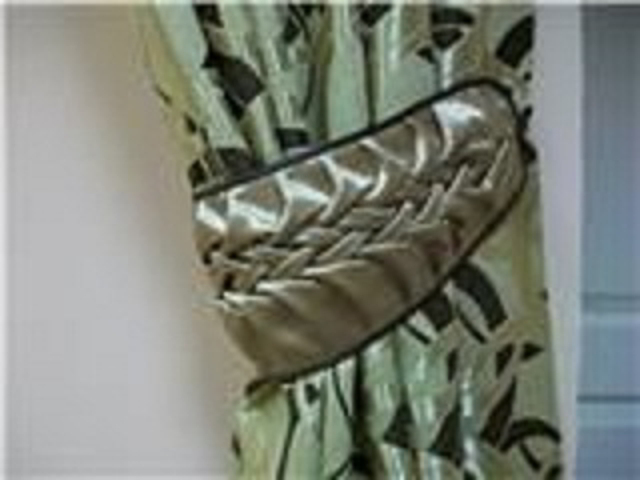
But what a spectacular pickup you can do with your own hands, using the same puff technique and according to the same scheme. There are only two rows in this pickup. You can choose the size of the squares at your discretion:
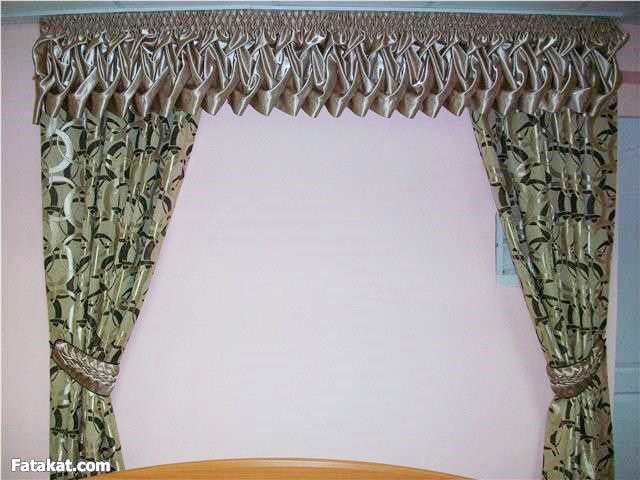
Imagine, you can sew such a lambrequin puff and add ties made using the same technique to the curtains. There will be a great ensemble.
I would just like to add that this lambrequin looks better when it is sewn from denser, non-transparent fabrics.
Then the puffs themselves are laid out more clear, voluminous. The length for this type of lambrequin is also advised to choose at least 2 meters.
Photo of lambrequin puffs:
I bring to your attention a video on how to process, sew a curtain and sew on a curtain tape. This lambrequin is processed in the same way.
And from this video you will learn everything about the curtain tape:
It is becoming more and more popular and practical to sew not only clothes, but also things for everyday life with your own hands. Every keeper hearth strives to make her home special. Therefore, we often focus on exquisite details, such as, for example, curtains on the windows. The highlight in the interior will always be fashionable lambrequin-puffs.
One of the advantages of these curtains is the technique of tailoring itself. Dense fabric is then collected on a special curtain tape, and thus original puffs are obtained. Such curtains will always look rich and elegant.
It's no secret that cute puffs can be present not only on curtains, but also on pillows, sofa covers, bed linen, chair covers, etc. But it is on the windows that they look most original. There are special patterns for sewing, the simplest among them: puffed puff and braided. The braided pattern is more accessible. Most needlewomen use it, and with its help, puffs decorate interiors almost everywhere.
Try to make them curly and lush. The tighter you tighten, the narrower each lambrequin puff will turn out. With your hands you create perfection.
Anyone who visits your room, decorated with lambrequin puffs, will not remain indifferent to the elegance and richness that they give to the interior.
If you seriously approach the choice of fabric for curtains, then transparent and lightweight materials will perfectly let air and light in. And your room will be illuminated by soft sunlight or moonlight to the delight of the household.
Taking into account individual preferences, as well as the features of your interior, experienced and courageous housewives can combine several shades of the same type of fabric and create a cloudy look on their window. color scheme, having received incredibly beautiful curtains.
If the puffs do not harmonize with your furniture or other decorative elements, then such decoration will look, to put it mildly, ridiculous, or simply tasteless. The hostess should know that beautiful folds are not ironed out and are not intended for too intensive washing. They only need to be rinsed a little to remove dust and maintain their external gloss and splendor.
It is easy to sew such beauty, but if at least one fold looks untidy, there will be no point in hanging the finished product for everyone to see.
Ready-made curtains with lambrequin puffs can be bought at the store or sewn to order. But it's always nicer to do something yourself.
And if you manage a difficult task once, you will probably want to consolidate success again and redo your apartment completely under this sophisticated style.
Description: War Thunder is a next generation military MMO game dedicated to...

"Titan Siege" is a large-scale online game on the theme of Scandinavian and ancient Greek...

Being an avid lover of German tank looks, I spent a lot of time...