Description: War Thunder is a next generation military MMO game dedicated to...

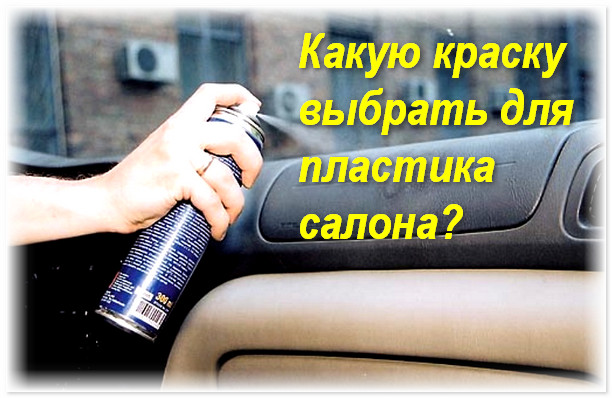
For self-restoration of the car, you need to do the interior. It is this part that suffers the most from exploitation and needs high-quality painting. Here the driver spends a lot of time, his communication with the car is to use the details of the interior. Therefore, they should always be kept in perfect order. So that the paint for the plastic of the car does not peel off and does not shed ahead of time, you need to use the recommendations and purchase high-quality materials. Your car will again become more attractive and will be able to please you with wonderful emotions during operation.
The hardest thing to paint plastic parts. Here, the structural surface creates certain difficulties during restoration, it does not allow you to properly clean the layer of old paint and apply new materials. In order for the plastic in the cabin to be like new, it must be looked after, treated with polishes and protective agents. If the appearance has already deteriorated, you will have to take up repair work. In working with the interior of a car, the most important stages are - right choice products for painting, as well as competent processing of the part before applying materials.
The selection of suitable materials is one of the most difficult stages of the work. If you have never encountered questions, plastic restoration will be a rather difficult process for you. Auto needs a professional approach at every stage, including when choosing products. You will not need a primer for salon elements, but specialized materials for painting will come in handy. You need to pay attention to such points:
It is also worth getting rags, a solvent and thinking over devices for hanging or laying plastic parts when applying paint and varnish products. Take care of everything in advance so as not to run around in search of improvised materials around the car when work has already begun. It is best to paint the interior elements of your car with products with a quality guarantee. In the store, when buying, you can ask for documents for the goods.
Plastic in the interior of the car needs a very high-quality processing. The specificity of paint materials is such that improper application will be fraught with streaks, color transitions and unpainted parts. All this causes certain difficulties. Paint for interior plastic can lie down normally only when preliminary preparation details. To do this, a fairly simple procedure is followed with the following procedure:
In order for the car to become beautiful again, you must apply the purchased materials with high quality and without errors in the process of doing the work. Otherwise, the paint will drain, not dry, or will be very different in color. Also remember that when painting local details plastic will have to use the transition staining method. This is not possible with a can, professional equipment is required. Paint for interior plastic is sold not only in aerosol form, but this is how its use is most convenient.
Structural surfaces are unpredictable when applying paint products. In one car, a 400 ml bottle is enough to paint the entire interior, and in another, the same amount of material will go to one big detail. It is difficult to predict consumption. Each car is different, but there are certain general criteria. When purchasing materials, consider the following features:
Given the democratic cost of cylinders, you can take products for cars with a small margin. You can always find something else to paint in the car in order to get the normal operation of the interior of the vehicle. But to paint one small car part, you don’t need to buy too many paint products. Otherwise, the cost of your car restoration venture will be too high.
Every car owner wants to make their vehicle more attractive. There are many ways to accomplish this noble undertaking. But often the methods involving professionals turn out to be too expensive. Therefore, potential customers of spray booths and service stations prefer to buy the necessary paint on their own and do the work with their own hands. It is much cheaper, but it does not always work out to get the desired results. It is important to choose the right methods and tools.
When working with plastic, it is worth protecting the interior as much as possible from enamel ingress, preparing the part for applying car paint. Also, do not forget that there are quite a few brands on the market offering paint products in a variety of price segments. Much easier to buy good stuff and then do not overpay for the restoration of poorly painted parts. It will be cheaper and more profitable in all aspects, and the owner of the vehicle will be able to prove himself in caring for his car.
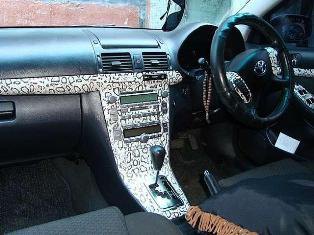
They wear out and lose their original appearance. But wear concerns not only external, but also internal elements, including door cards, consoles and torpedoes. Of course, you can buy a new item. However, often its cost is inadequate. You can also take the part from disassembly in a more or less "alive" state. But, as practice shows, the best and most economical way to refresh parts of the cabin is to paint the plastic of the car with your own hands. How is it done and what to pay attention to when working? All this and more - further in our article.
The first stage is the dismantling of all elements that will be subject to painting. This is the most difficult operation. Each make and model of car has its own options for installing dashboards, overlays, maps and pens. Even if this is the same machine, but with different configurations, there will be several dismantling options. On some vehicles, the instrument panel can only be removed using a puller pin on the side windshield.
For convenience, it is better to buy a set of tools for working with the car interior in advance. Such kits are universal and suitable for most modern cars. With such pullers, you will significantly save the effort and time spent on dismantling.
When disassembling plastic parts, never use steel screwdrivers. For this, there are special polyurethane blades. At the slightest contact, the hard metal will bend the edges of the soft plastic. And it will be very difficult to return to its former form.
Also, in order to avoid confusion, put all the bolts and nuts in separate boxes, or better, sign them. So you will not “get lost” when assembling the elements, when one bolt will not be screwed in due to a different thread pitch, although they are externally the same in size. Sometimes car owners take periodic photographs, fixing where which element was fixed earlier.
After successful dismantling, the interior elements are placed on a soft, non-abrasive surface. It can be a sheet of chipboard, OSB or any other made of wood, or large pieces of cardboard. 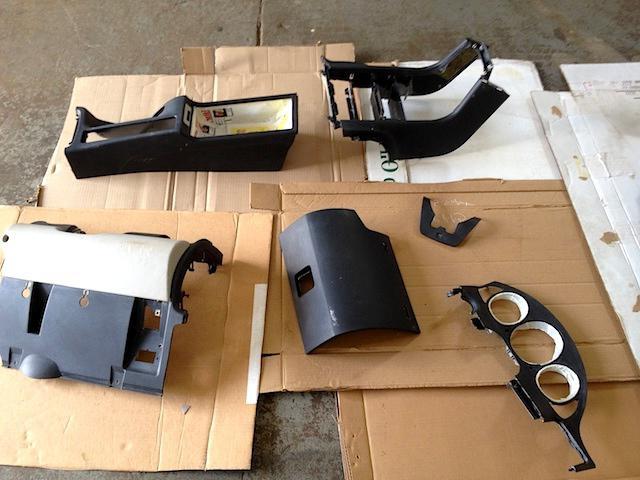
If you lay an element on asphalt, even when caring attitude, the plastic will be scratched. To prevent the adhesion of dust and other small particles, when plastic is spray-painted, the surface is pre-treated with an antistatic agent. Even a small lint can well spoil the final result of the work.
Further, painting the interior plastic is accompanied by surface treatment with sandpaper. All existing defects - cracks and scratches are carefully polished and, if necessary, puttied. 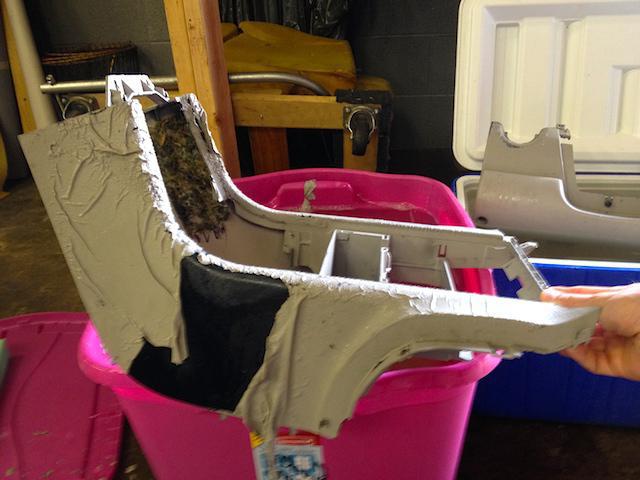
If this is a crack in a critical node (for example, a door handle that is constantly subject to stress), for greater reliability, it is treated with a thick sealant from the inside. To avoid scratching the surface, periodically soak the sandpaper in water.
After that, the coating is thoroughly degreased. For this, white spirit, gasoline, or anti-silicone is used. The latter is excellent at eating away greasy stains and provides a good base for the plastic to engage with the new paint.
Then a primer is applied for plastic for painting. It must be applied in 3 thin salts from a distance of at least 20 centimeters. Otherwise, streaks will form. And it is extremely difficult to remove traces of such an aerosol, since it reacts with plastic and promotes better adhesion of nitro enamels.
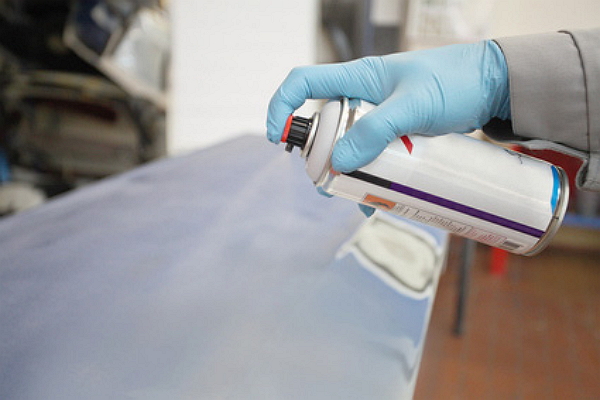
Next, the final painting of the plastic of the car is carried out - using an airbrush or spray can, a new layer is applied to the surface. If it is a metallic, it requires a special application technology. After drying (approximately 20 minutes), the surface is treated with a layer of varnish. The distance from the spray can to the plastic remains the same - from 20 centimeters.
The slightest smudge will indicate that a “tint” was made, and of poor quality. It is better to process one area in several layers than to pour a bunch of paint at a time over the entire perimeter. Next, the coating is carefully polished with a wax paste.
Using this tool instead of spray cans is an extremely risky business. After all, with the slightest inaccuracy, there is a risk of streaks. In addition, the layer from the brush is quite thick and its drying time is about a day. In this regard, aerosols are several times superior to this method of coloring. If you have no previous experience with painting and want to spend less time drying the element, by all means, choose a spray can.
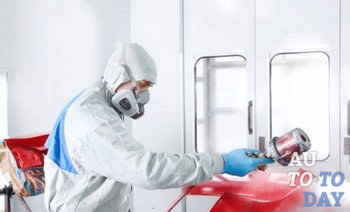
To perform the work, you will need the cleanest and most well-ventilated room. You should not do this on the street - the slightest dust will spoil all efforts. Also remember to take precautions. In our case, if this is painting the plastic of the car interior, you need to protect the respiratory tract with a respirator, and your eyes with goggles.
The car itself should be far from the place of painting - the slightest speck of paint scatters through the air at a distance of up to 5 meters. When it dries on the body paint, it will be very difficult to remove it. If these are small details, an old newspaper will do instead of cardboard and planks. 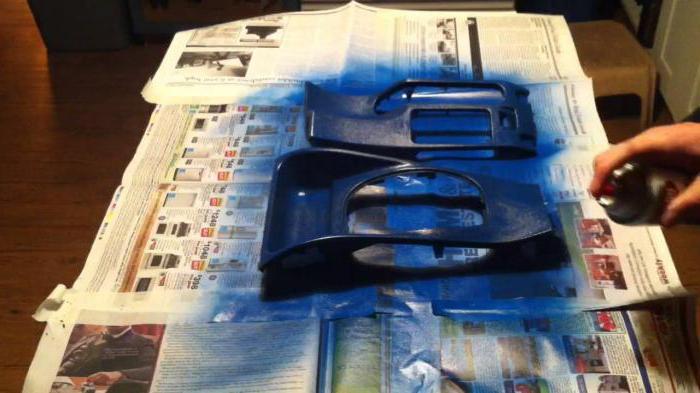
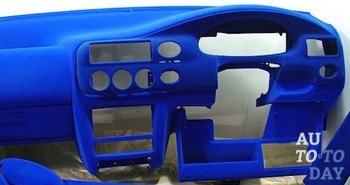
As for the choice of color, painting the plastic of the car interior is carried out with one goal - to refresh the interior. No need to buy bright colors, with the idea of preparing a car “for sports”. So you will only spoil the interior, and when selling such a car, it will be valued less than the factory one.
Therefore, we choose the most “stock” shade. When disassembling the interior, try to remember or fix with photographs the places where the part was located. Place various small things in the form of door buttons, handle edgings and air duct regulators in a separate niche. 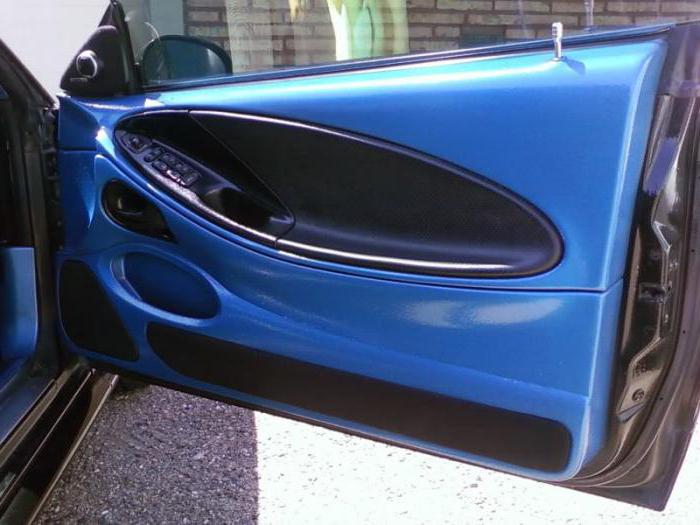
When working with a spray can, do not forget that the paint inside is very reactive. With a large amount of it, it easily “undermines” the previous layers on the plastic, forming pimples. Painting plastic with such components is carried out from a long distance. It is advisable to use a “torch” cap for this - for a more uniform application of the composition to the surface.
By the way, small scratches can be easily removed with an abrasive polish. Plastic painting is not required. It is important for this to prepare a nozzle for a drill and a special paste containing an abrasive - diamond grit. 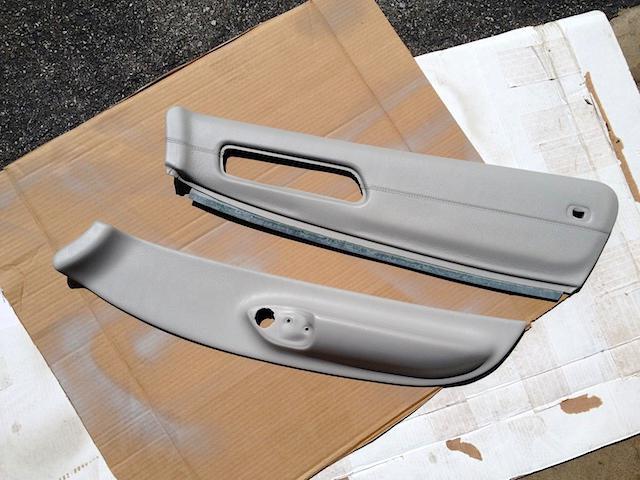
But when performing such operations, you need to monitor the temperature of the plastic. From high speeds and polish, it easily overheats - it is important to catch the right moment when the plastic begins to “press in”, erasing the edges of the scratch. For larger deformations, such as cracks, this repair method is useless.
Automakers use several types of interior plastics. One of them requires a primer, the second does not. It is better to consult with specialists in advance or conduct several tests.
The first way is to test for flammability. If this piece of plastic emits soot when burned, it needs a primer. But since we need to restore, and not permanently burn it, we use an alternative method to check. Place the plastic piece in a container of water. If it is sunk in water, no primer is required. If it floats, painting the plastic is necessarily accompanied by priming. 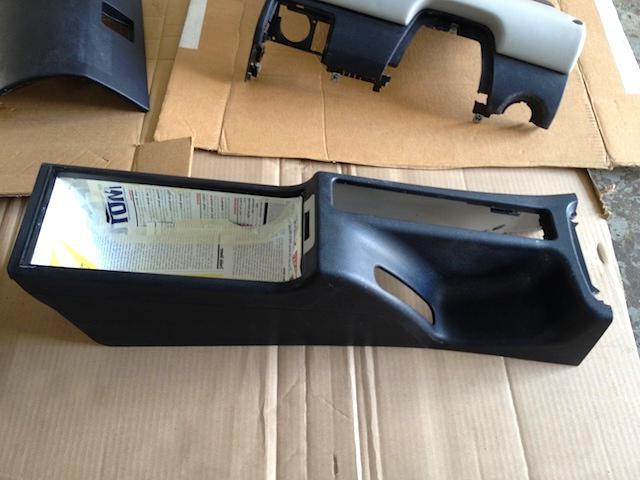 When processing with "sandpaper", observe the transition of grain size - from coarser at the beginning to fine "zero" at the end. So you will not have scuff marks and the paint will completely fill the existing pores on the surface. To give more shine, use several layers of varnish.
So, we found out how the plastic of the car interior is painted. As you can see, the work can be done with your own hands. The main thing is to follow the technology and do not forget about security measures. After all, paint vapors strongly affect the human respiratory tract, liver and other organs.
Painting plastic machine on your own done in several stages. First of all, you should remove all, without exception, external parts or interior components from the car. The second step is to prepare the surfaces for applying coatings. Then the painting and installation of plastic parts is carried out in reverse order to the starting position.
The most difficult process is to carefully disassemble the plastic components of the interior and from the outer surface of the body. Types of mounting systems for handles, dashboards, grilles and trims for any car model are personal. First of all, before proceeding to disassembly, you need to prepare everything necessary tools and sometimes make special devices.
 So, for example, in certain cars, it is possible to remove the dashboard only from the side of the motor, using a pin of a specific configuration. Auto repair shops have various factory tools for the purpose of disassembling panels. At home, you have to use more suitable resources from what is available. You can purchase a universal tool kit that will work with any car. With such a kit, painting the plastic of the car on your own will not take so much time.
To remove plastic elements, thin polyurethane spatulas are used, stainless steel forks began to remove caps, keys to remove climate control systems and car radios (with vertical and horizontal mounts), thin flat screwdrivers and other tools. The material from which the tools are made is designed for careful disassembly, during which the surfaces will not be damaged in any way.
However, when disassembling, you must be as careful as possible. In particular, it is important not to allow breakage of plastic and metal latches, loss of small parts. In order not to forget the place where multiple small elements are attached (connectors, sockets for built-in electronics, small fasteners), you can take pictures from time to time.
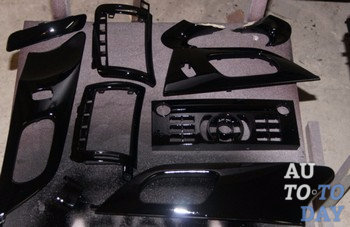
A step-by-step example of how partial coloring of the plastic of the interior of a Lada Grant car (dashboard) is carried out:
1. Remove the front console.
2. Dismantling of buttons, overlays, handles (which will not be painted).
3. Removal of dampers of air ducts and rings.
4. Disconnecting the wire from the battery ("minus").
5. Dismantling the audio system master unit, turning off the speaker and antenna tip.
 6.
Removing the handles of temperature distribution regulators and air supply from the axles (a mounting blade is used).
6.
Removing the handles of temperature distribution regulators and air supply from the axles (a mounting blade is used).
7. Removing the handle of the recirculation system damper control lever (a plastic spatula is used). In this process, it is necessary to overcome the resistance of the fixators.
8. Removing the overlay from the panel.
9. Disconnecting the wires of the switches in the overlay, pads of the harnesses.
10. Removing the main dashboard trim.
11. Surface degreasing.
12. Needs to be primed twice.
13. Dry.
14. Apply paint.
15. Apply acrylic varnish.
16. Dry.
17. Set the elements back to their original position.
 In the described example of painting the Lada Grant, the console fasteners are taken into account with iron latches. The front panel fixture in any car has a personal system, for this reason you need to carefully study the documentation and diagrams of your own car before disassembling.
If you are thinking about painting the plastic of a car, first determine the type of material. There are two main types of plastic used in the automotive industry. For the 1st of them, careful preliminary work is not necessary before painting. Other - will require priming several times before applying paint.
It is possible to check the type of plastic using 2 methods based on the properties of combustibility and buoyancy. If a small piece has broken off from one or another part, use it for control.
Set fire to this piece. Clean fire when burning - priming is needed, if it emits soot - a primer is not needed. Another method: dip a piece in water. If it floats and does not sink to the bottom - get a primer, if it goes to the bottom - a sanding skin is enough.
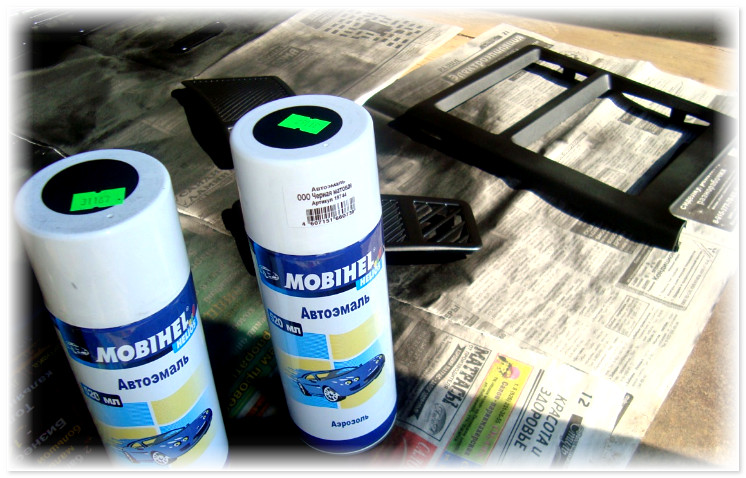
The list of the main materials that you need to purchase:
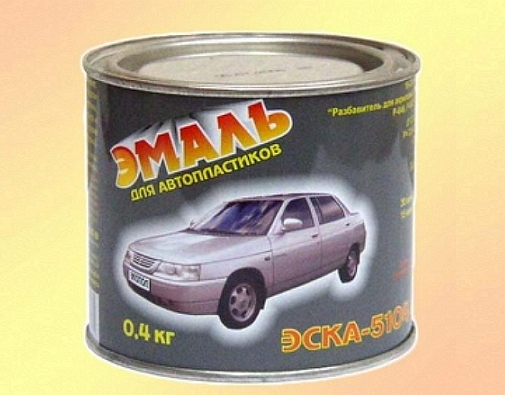
- paint for plastic parts;
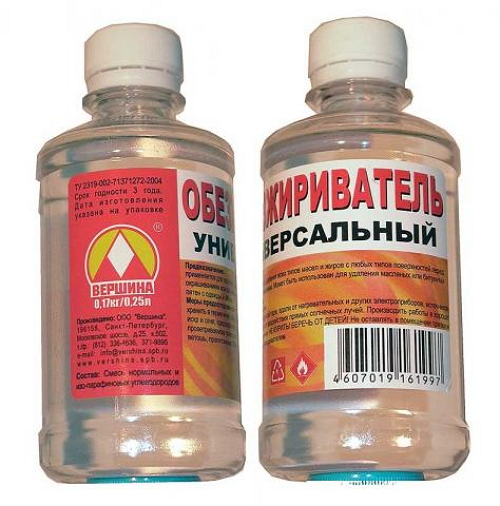
White spirit or acetone;
Acrylic colorless varnish;
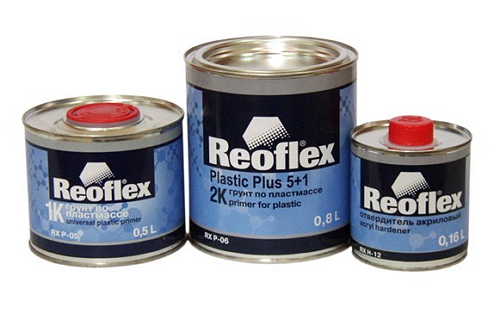
Primer for plastic parts (not always used).
 Paint can be purchased in aerosol cans or cans. It is comfortable to use spray cans, however, many elements will need to be painted using a brush.
The sequence for staining plastic is approximately as follows:
1. Degreasing plastic surfaces with acetone or white spirit
2. Treatment of plastic with antistatic agent
3. Elimination of existing imperfections or wear marks with putty for plastic
4. Grinding of surfaces with abrasive moisture-resistant sandpaper P320-400 using water
5. Drying and re-degreasing the part
6. We cover the surface of the plastic with a primer twice and dry it.
7. Matting the surface with sandpaper R400-500
8. Application of plasticizer or plasticized acrylic composition 2-3 times. Allow to dry after each coat.
9. Lacquer application if metallic was used
10. Surface treatment with wax-based polishing paste
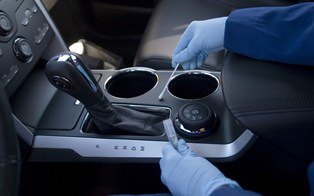
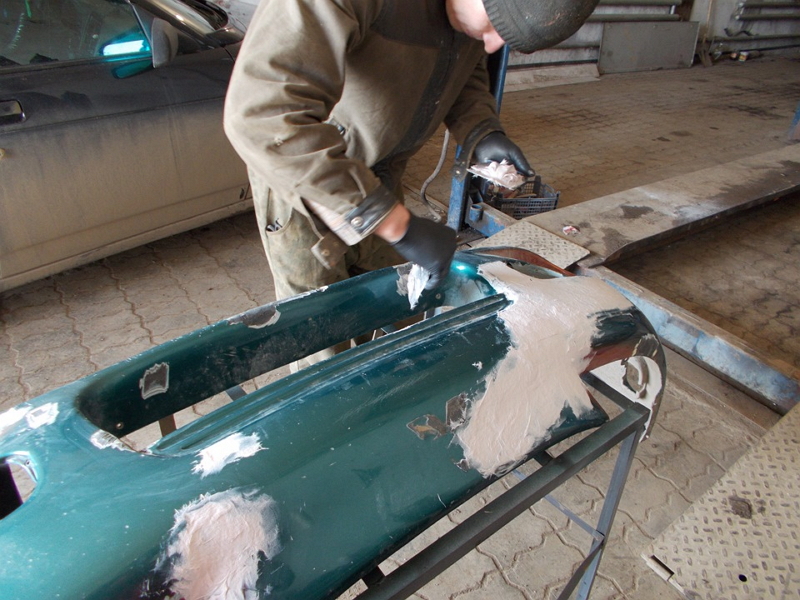
The first stage is the organization
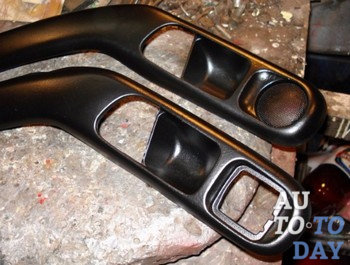
![]() At this stage, we remove from the machine all the elements that are subject to staining. Now, touching on the problem of surface preparation, let's say that everything here, without exception, is individual for any part, however, we will try to voice some points that you may have to meet when painting plastic. For example, you get a door molding at a car dismantling, which definitely needs to be painted.
At this stage, we remove from the machine all the elements that are subject to staining. Now, touching on the problem of surface preparation, let's say that everything here, without exception, is individual for any part, however, we will try to voice some points that you may have to meet when painting plastic. For example, you get a door molding at a car dismantling, which definitely needs to be painted.
Option number 1
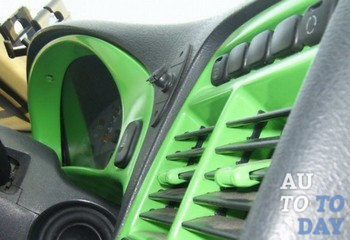
This molding is from an inexpensive car configuration, in which the following parts, such as mirrors, door handles, plugs, moldings and almost everything else, “come” unpainted. With the coloring of such an element, it will be necessary to tinker a little more and use a little more material. The procedure will be described a little later.
Option number 2
This molding from the car in the "standard" configuration. It was previously painted in silver tone. If there are no scuffs and scratches on the surface of the parts, then it will be enough to mat the surface with scissor paper, grit P 800-1000, it is also permissible to use a grayish scotch bright. After that, you can cover the part with paint or varnish.
 As you can see, it is much easier with the detail in the 2nd case, because we skip the priming procedure. There are still episodes, the paint may begin to peel off, or there are large scratches, dents and other defects. Hard sandpaper and putty can not do here.
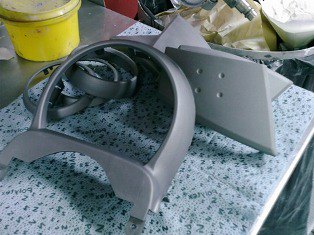
Second stage - priming
The types of primers used are directly dependent on the quality of the surface preparation. A little earlier, we sorted out the options for parts. In the 1st case, we need a Velcro primer, which is applied directly to the plastic. In advance, before this, you need to matte the surface with a scissor P 600 - P 800 or grayish Scotch Bright. A primer is applied using an airbrush, and it is also possible to use an aerosol can. It dries within fifteen minutes, after which enamel can be applied.
This information is general and does not apply to each manufacturer. For this reason, we recommend that you take an interest in the instructions before applying the paint. By the way, one more thing. The primer for plastic is created mostly colorless, for this reason there are difficulties with spraying, or a lot in some area, which leads to smudges, or in certain areas it is completely absent.
elementary solution, primer in a well-lit room, or another option, you can try to find a primer with a silver filler, which is especially comfortable when priming large elements, such as a bumper. But in no case do not try to add one or another filler to the primer.
 Now the problem is brewing, but is it necessary to cover the Velcro primer with an acrylic primer ?! The decision is necessary or not, also depends on the surface of the element. If the plastic part does not contain mechanical defects (seizures, scratches, abrasions, cracks), then one primer will suffice. And if the element has been sanded with hard sandpaper, then in order to hide the risks, it is necessary to apply an acrylic primer.
The color of the primer depends on the color of the element. If, for example, the element is black, it is best to apply a black primer and vice versa. Acrylic primer should be properly applied in 2-3 layers, and it is also necessary to always do an exposure between coats, approximately 3-7 minutes. If this is not done, the primer may leak.
After that, just as you cover the element with an acrylic primer, it must be left for a certain period of time to dry completely. The drying period is marked on any can of material. However, we recommend not to rush, and if a period of 3 hours is noted, then it is best to start rubbing the soil no earlier than after 6 hours. As a rule, it is better to prime the parts and leave them overnight. The next day you will be sure that the primer has dried and is ready for processing.
3rd stage - mashing the soil
Primer for plastic ("Velcro"), does not need grouting!!! You can already paint immediately after drying. But after coating the part with an acrylic primer, some processing (washing) is also required. To “wash” the primer, you will need a container with hot soapy water, it is not necessary to add soap there, but everyone advises doing this so that the sandpaper is less clogged.
Sandpaper must be applied by all means "wet". There are many manufacturers of scissor paper, but of absolutely all of them, we would recommend that you use Sia scissors, because they performed very well. In no case do we impose on you to buy paper from this particular manufacturer, but simply give advice, and it's up to you.
How do you know if the surface is worn?
 It is necessary to rub until the surface of the part is completely smooth, do not forget to constantly scissor paper and the part, regularly moisten it with water, because sandpaper “on wet” does not like it if it is brushed dry (this way you won’t rub anything, and you can even add a lot of scratches that will become noticeable when painting). After that, as you have made sure that the surface is ready, the element must be thoroughly washed with water in order to remove dust from the primer from it.
4th stage - coloring the plastic of the machine
The most tender period has come, after such a long and uninteresting work, this is the coloring of plastic. Painting proceeds in 2 stages:
1. Paint application
2. Lacquer application
Although this does not happen all the time, for example, varnishing is not necessary for acrylic paints. It is necessary to apply varnish after half an hour, after applying the final layer of paint. The lacquer is the most watery, for this reason, do not pour heavily, because you can mess up smudges that are very difficult to remove from the radiator grille. In a straight plane, this is much easier to do.
 The first row of varnish must be made the driest, as it adheres better to the surface and does not form smudges. We apply the second row to the “spill”, trying to put it without shagreen (just don’t overdo it in any way, otherwise you can, make smudges). If you do not have the skill in painting with a balloon or spray gun, then initially practice with any detail you do not need.
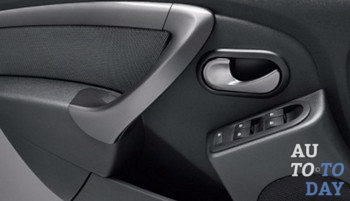
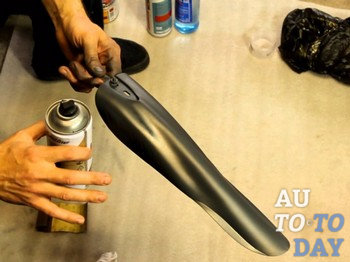
Moldings are painted and can be installed. When painting similar elements, be sure to show interest in the ends, which will become very noticeable when the element is mounted on the machine. Now there are no "inexpensive" plastics in the cars and visually, the equipment of the car has become higher.
In certain cases, painting the plastic elements of the machine with a brush is more comfortable and cheaper than with an aerosol can. This kind of method guarantees high quality coverage of small parts and improved bonding (adhesion) of materials. There are a few things to keep in mind when using a brush. And directly:
1. Paint applied with a brush dries longer. For this reason, it is essential to dry the parts in a clean and dust-free area.
2. When painting with a brush, the smallest layer thickness is needed. To achieve this, it is necessary to press the brush against the surface with your hand during work, lower the brush into the paint by no more than one third, preventing the paint from drying in the working area.
3. Squeeze excess paint regularly on the edge of the can.
4. The staining angle must be the same in absolutely all areas.
 5. Paints have different drying times. Paint that dries for a long time, apply extensive stripes with further shading. Rubbing the paint into the pores will give you a uniformly painted surface as a result.
If painting the plastic of the car interior is a solved problem, prepare for this work in advance:
1. Find a large and well-ventilated area to work.
2. Buy yourself work clothes, a respirator, goggles and gloves.
3. Obtain materials and tools for dismantling the cabin in a certified outlet.
4. Prepare a series of stacks of old newspapers or other material on which individual elements will crumble and dry.
5. Read the directions on the material jars and bottles carefully.
6. Read the technical documents for built-in electronic components in detail.
7. At first, do not go to extreme tuning.
8. Do not try to color the material, appearance similar to plastic, but not being such.
9. Exclusive cars of the latest modifications are equipped with numerous decorating elements from innovative materials with a unique structure.
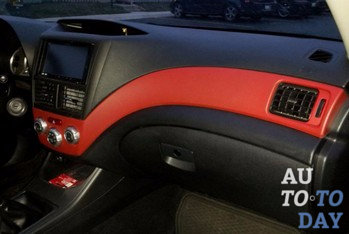
10. Choose pleasant colors to update the design. A gloomy car interior does not have a positive effect on absolutely all drivers.
11. When dismantling the interior, work slowly, trying to clearly understand which part was in which place. Unmounted small regulators, put the handles together, at the same time with the large parts of this block.
12. If material resources allow, purchase a special test control to reveal the shortcomings of puttying, applying a primer or varnish.
Subscribe to our feeds
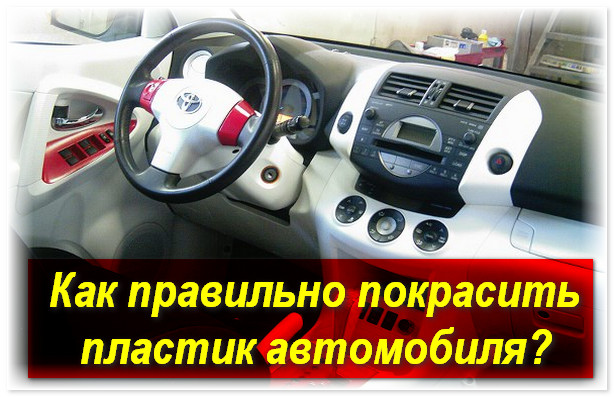
In a previous article, we talked about how to update the paintwork ( paintwork) torpedo. But the interior design of the car does not end with this detail. In continuation of this topic, it is worth learning in more detail about how do-it-yourself painting of plastic car interiors is carried out. After all, it is from polyurethane that most panels for medium and economy class transport are made.
The same requirements apply here as with any painting works regarding the maintenance of cleanliness, temperature regime, ventilation and other factors. You can learn more about everything while reading the article.
Not every motorist will be able to paint the plastic of the car with their own hands in the garage. After all, ideal conditions can only be achieved at the factory, and as close as possible to them - in a professional workshop.
But every day, more and more motorists decide on a new experience as a house painter. Without special education, you can master the technology only in the process of detailed study of the theory. Only then should you start practicing.
An amateur painter will have to sequentially perform the following stages of work:
It will be easier to do all this if, at each stage, according to the sequence of work, you capture the nuances on a photo / video camera.
Just a list of all the points confuses the beginner. In fact, not everything is so scary. Some items require special attention and careful approach.
This stage can be divided into several stages:
embarrassment. There are a lot of plastic elements in the work, and they need to be laid out simultaneously for each of the stages of work. When it is warm outside (more than 18 degrees Celsius), you can sit outdoors, but away from roads and dust movement.
To decide how to paint the plastic, it is worth performing a material test. This will require a small fragment of the product.
Method 1 (with water): a piece of plastic is placed in water.
Method 2 (by flame): the same element is set on fire.
The result might be:
The product may have a clean flame during combustion and not sink or smoke heavily and go under water. In the first option, you will have to carry out a primer, and in the second, it will not be required.

For individual painting of plastic car parts you will need:
Before painting the plastic parts of the car, dismantled from the passenger compartment, it is necessary to prepare them.
It is desirable to do it like this:
If problem areas requiring restoration and repair are not found, then the next step will be painting plastic parts using the appropriate technology. Who had chips, cracks, scratches on the plastic, it is worth filling up the defects acquired during the operation vehicle. The features of puttying plastic are no different from working on metal, therefore you can learn about this stage of preparatory work in detail in other materials.
It is better to grind plastic using a “wet” technology, using an abrasive P320 - 400. After drying the product, a primer can be applied (according to the results of the test performed at the very beginning).
A modern car is not only metal parts assembled in the right order, but also a mountain of plastic: bumpers, spoilers, moldings, exterior mirrors, and so on.
And so that their untidy appearance does not oppress the driver and does not scare away his passengers, you will have to learn how to paint plastic body parts with your own hands. Perhaps someone has already mentally painted a picture of how he easily takes a spray can and puts the car in order in about twenty minutes. But it was not there! The subtleties of this simple work fit just in one article, which is better to read to the end.
Like all other plastics, plastic has some properties that are unique to it, and therefore a car enthusiast should at least understand a little about the materials that went to the car. Almost all parts are made from different types plastics. Generally, all plastics used for internal and external parts of machines must be, above all, strong and safe. They are divided into 2 types: those that require a primer and do not need it at all.
Usually you have to choose one of the following plastic repair methods:
1. Check for buoyancy
Putting the plastic in water, see if it sinks or not. If the part is immersed in water, then unnecessary trouble can be avoided. If it floats, then first you need to apply a primer for plastic, and only then - an acrylic primer.
2. Incineration
Break off a small piece of plastic from the part you are about to repair. Make sure it is free of dirt, paint, or mold grease. Set fire to the plastic. If it burns and smokes, then the material does not need to be primed. If the flame rises clean (like a candle), then a plastic primer should be applied before the main primer coat.
If you have purchased a new plastic body kit or bumper, then you probably want it to fit almost tone-on-tone to the color of your car. Here's what you'll have to do:
If your plastic part does not require additional primer, then first degrease it by wiping it with anti-silicone. After that, apply an adhesive line under the two-component acrylic primer with grit 240 and above and prime thoroughly.
Grind the dried primer with an abrasive 320 (under a simple enamel), and then “under the metallic” with an abrasive 450 or 500. After adding the primer and plasticizer, or “Elasticator”, as it is called, to the paint, paint the part (look at the percentage of components on the bottle). "Elasticator" will help the paint not crack even with small pushes of the car.
In the event that a part needs to be primed with a plastic primer, be sure to very, very thoroughly clean the surface of factory mold lubricants.
Next, follow the same steps as described in the two paragraphs above, only before using an acrylic two-component primer, apply a primer over the plastic. It is usually one-component and almost transparent. It dries very quickly, but does not like “busting”: with abundant application, it will definitely give smudges. It is better to apply 2 thin layers, waiting for each of them to dry. Grinding such a soil is not worth it. But as a consumable material, you can use soil.
Almost all the work on preparing and painting plastic is the same and does not differ much from: you need to degrease the surface, putty before leveling and sand it. Special putty for plastics is expensive, but you can easily get by with a regular two-component polyester putty.
Description: War Thunder is a next generation military MMO game dedicated to...

"Titan Siege" is a large-scale online game on the theme of Scandinavian and ancient Greek...

Being an avid lover of German tank looks, I spent a lot of time...